


-
Transfection-grade plasmid DNA purification using MACHEREY-NAGEL’s NucleoSpin® 96 Plasmid Transfection-grade kit and NucleoVac 96 Vacuum Manifold
Semi-automated miniprep protocol for very low endotoxin level (<50 EU/µg DNA) plasmid purification on the ASSIST PLUS pipetting robot
The use of silica membrane-based DNA purification kits is a convenient way to prepare high quality, transfection-grade plasmid DNA samples for cloning, sequencing and restriction analysis or for more sensitive applications, such as transfection of standard cell lines. In the latter case, transfection efficiency is negatively impacted by endotoxins, and so it is important that levels are low. MACHEREY-NAGEL has developed a novel technology to reduce endotoxin content. Its NucleoSpin® 96 Plasmid Transfection-grade kit is designed for high throughput purification of high-copy plasmid DNA from E. coli in a 96 well plate format. The miniprep protocol is based on alkaline lysis, and is optimized for the purification of plasmid DNA from 1-5 ml of bacterial culture. However, it is a time-consuming step in genetic analyses.
The ASSIST PLUS pipetting robot, together with a VIAFLO 12 channel 1250 µl electronic pipette, allows automation of the MACHEREY-NAGEL plasmid DNA isolation protocol. The system performs all the pipetting steps, guaranteeing perfect and reproducible liquid handling while protecting the user from repetitive strain injuries. The pipette guides the user through each manual intervention in the purification process, ensuring an error-free workflow. Together, MACHEREY-NAGEL’s NucleoSpin 96 Plasmid Transfection-grade kit and INTEGRA’s ASSIST PLUS pipetting robot provide researchers with an easy and efficient way to extract and purify plasmid DNA of up to 96 samples with minimal hands-on time.
-
Table of contents
The use of silica membrane-based DNA purification kits is a convenient way to prepare high quality, transfection-grade plasmid DNA samples for cloning, sequencing and restriction analysis or for more sensitive applications, such as transfection of standard cell lines. In the latter case, transfection efficiency is negatively impacted by endotoxins, and so it is important that levels are low. MACHEREY-NAGEL has developed a novel technology to reduce endotoxin content. Its NucleoSpin® 96 Plasmid Transfection-grade kit is designed for high throughput purification of high-copy plasmid DNA from E. coli in a 96 well plate format. The miniprep protocol is based on alkaline lysis, and is optimized for the purification of plasmid DNA from 1-5 ml of bacterial culture. However, it is a time-consuming step in genetic analyses.
The ASSIST PLUS pipetting robot, together with a VIAFLO 12 channel 1250 µl electronic pipette, allows automation of the MACHEREY-NAGEL plasmid DNA isolation protocol. The system performs all the pipetting steps, guaranteeing perfect and reproducible liquid handling while protecting the user from repetitive strain injuries. The pipette guides the user through each manual intervention in the purification process, ensuring an error-free workflow. Together, MACHEREY-NAGEL’s NucleoSpin 96 Plasmid Transfection-grade kit and INTEGRA’s ASSIST PLUS pipetting robot provide researchers with an easy and efficient way to extract and purify plasmid DNA of up to 96 samples with minimal hands-on time.
Key benefits
Overview: How to automate MACHEREY-NAGEL's NucleoSpin Plasmid Transfection-grade kit
The ASSIST PLUS pipetting robot is used to automate the pipetting steps of the MACHEREY-NAGEL NucleoSpin 96 Plasmid Transfection-grade kit purification protocol. The liquid handling platform guides the user whenever manual interventions are required during the process. The following procedure is based on the kit manufacturer’s protocol for purification of 96 samples.
Bacteria are first cultivated at 37 °C following MACHEREY-NAGEL’s recommendations, either in a square-well block or tubes. For the present protocol, the bacterial cultures are grown in tubes and transferred into a square-well block. The cultures are centrifuged for 10 min at 1000 x g to pellet the bacteria. The supernatant is discarded, and the residual medium removed by tapping the plate upside down on a clean paper sheet or soft tissue.
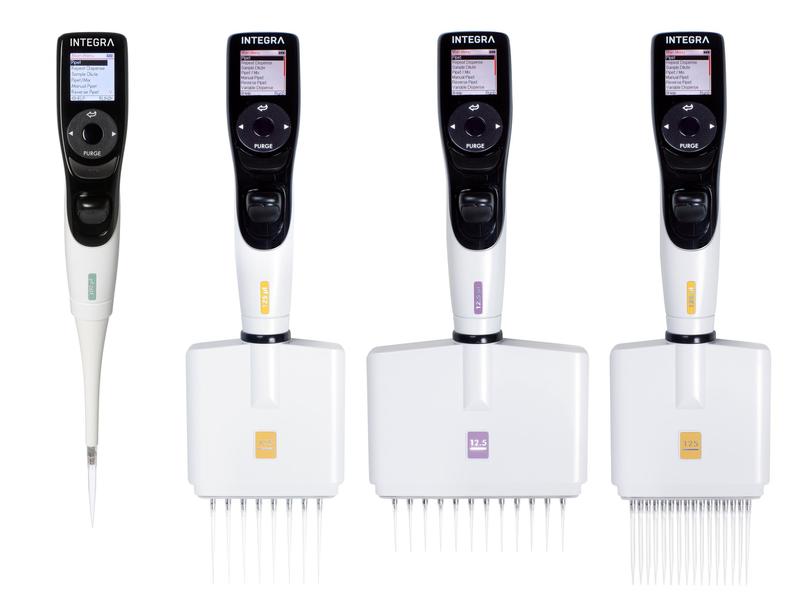
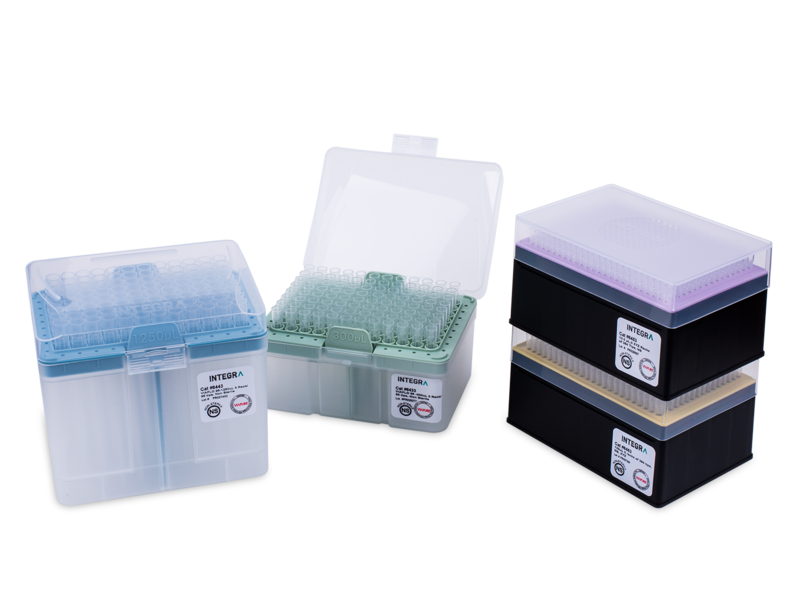
The ASSIST PLUS pipetting robot operates a VIAFLO 12 channel 1250 µl electronic pipette with 1250 µl Sterile, Filter GRIPTIPS®.
Downloads: App note and protocols for the Transfection-grade plasmid DNA purification
Here you can download the complete protocols and reports used in this application and use them on your ASSIST PLUS. The protocol can be customized with the VIALAB software.
Experimental set-up
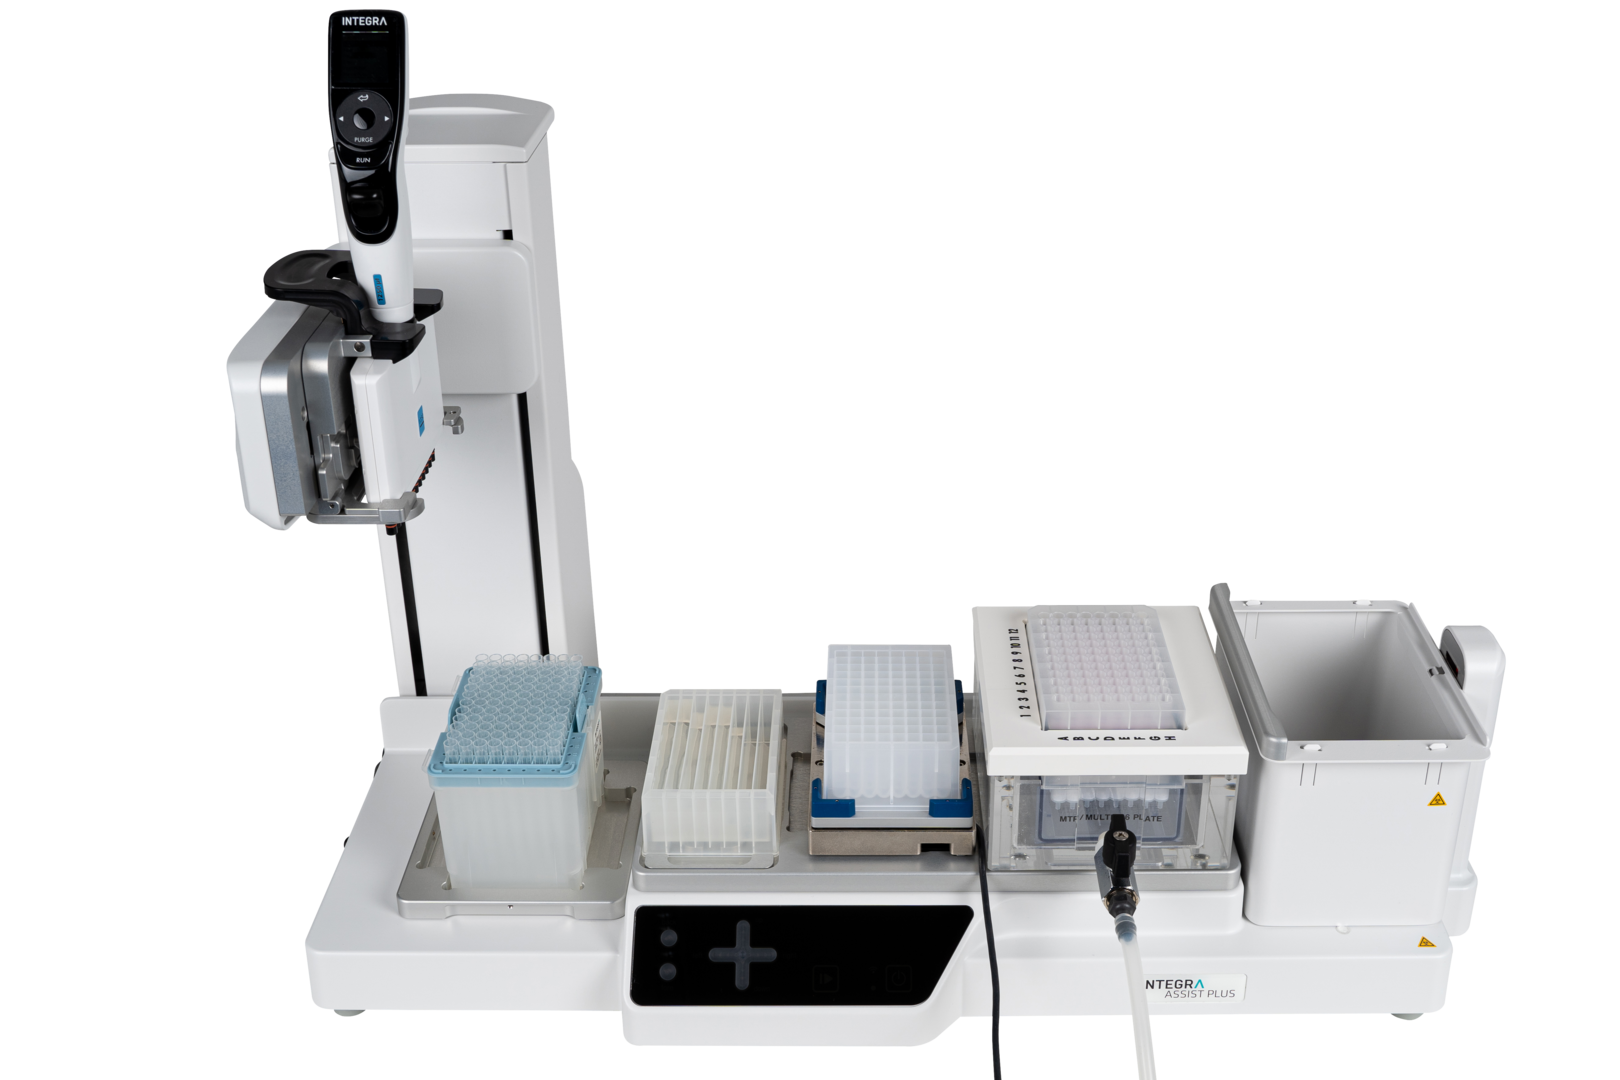
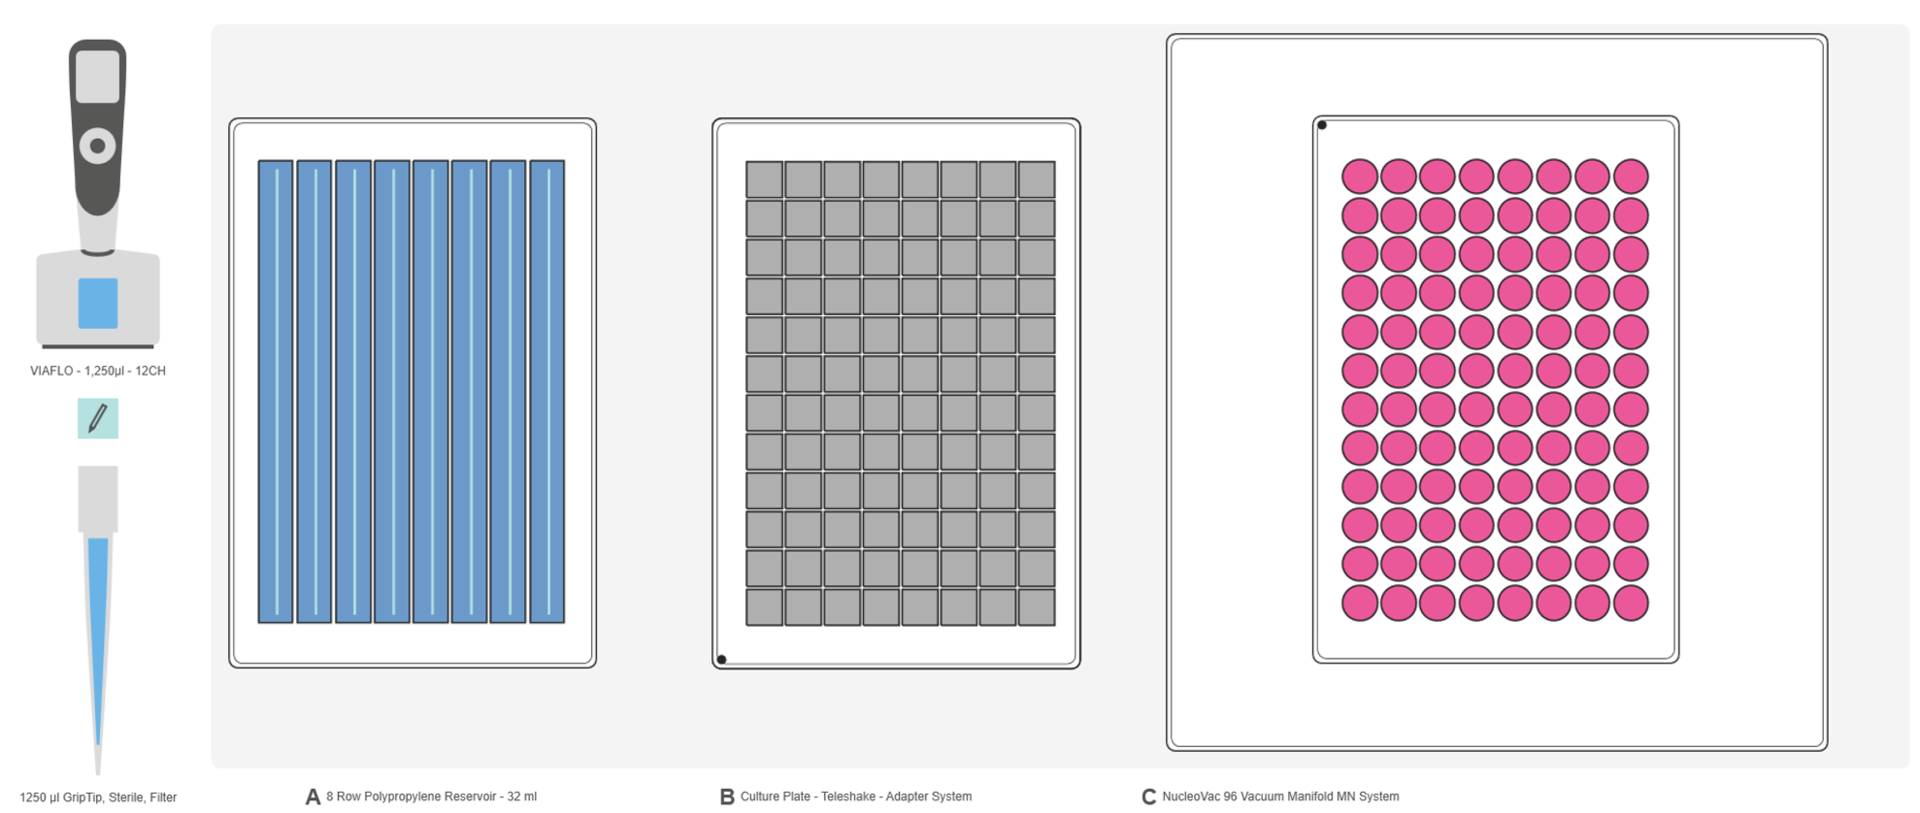
Prepare the deck of the pipetting robot as follows (Figure 1):
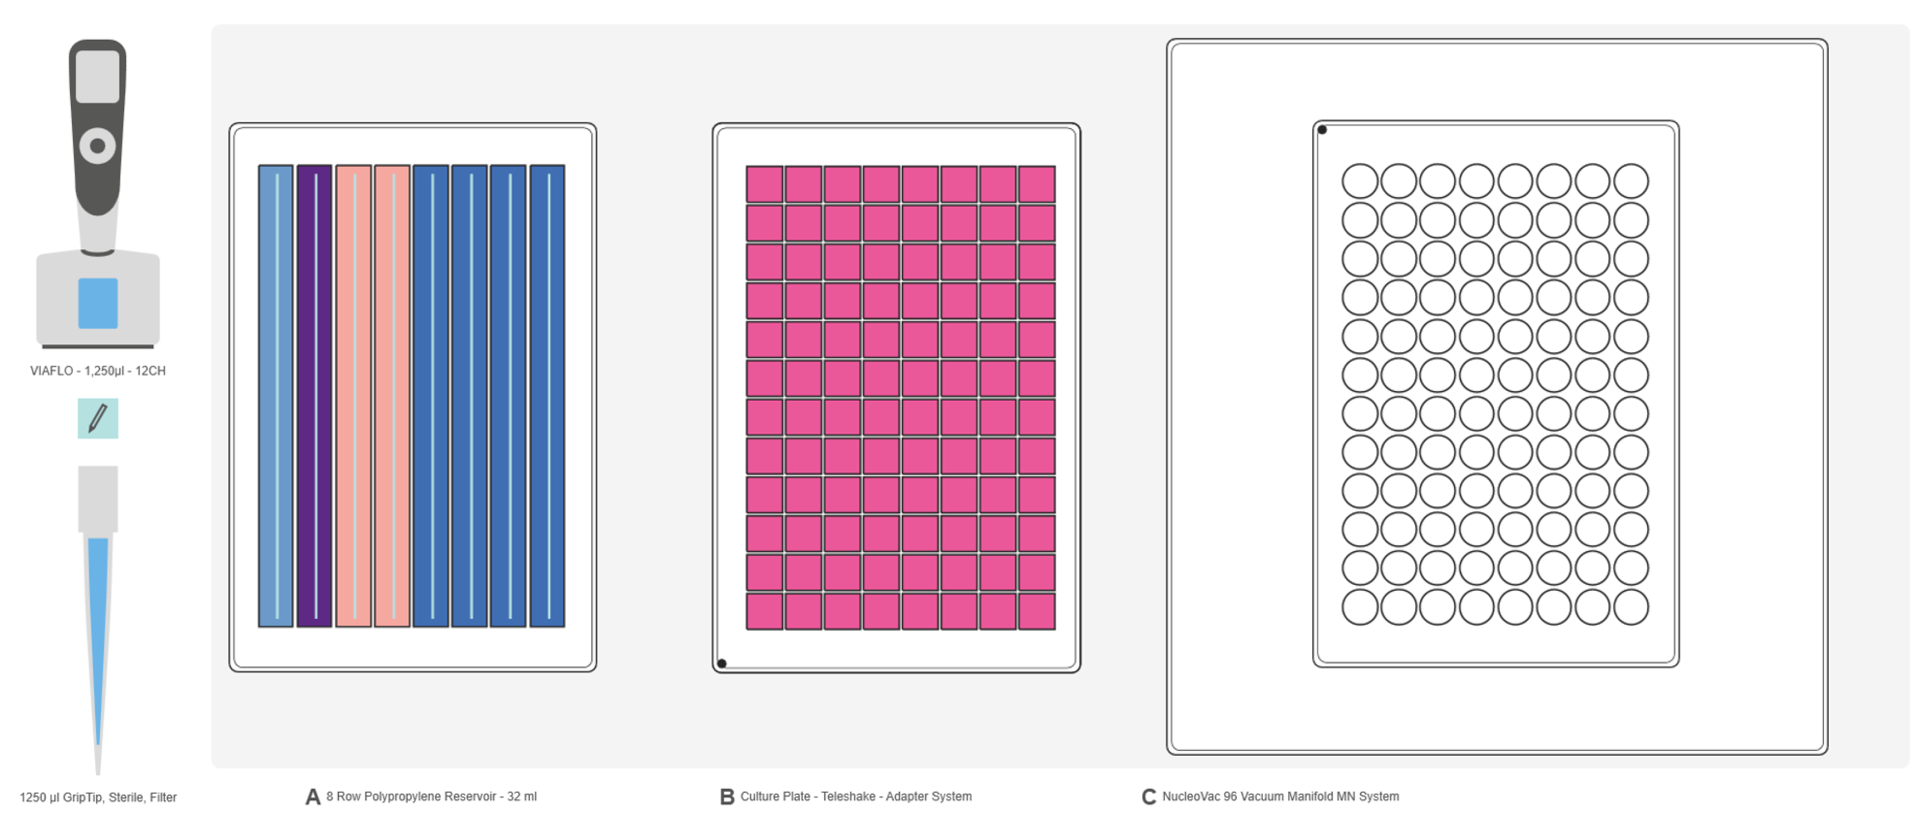
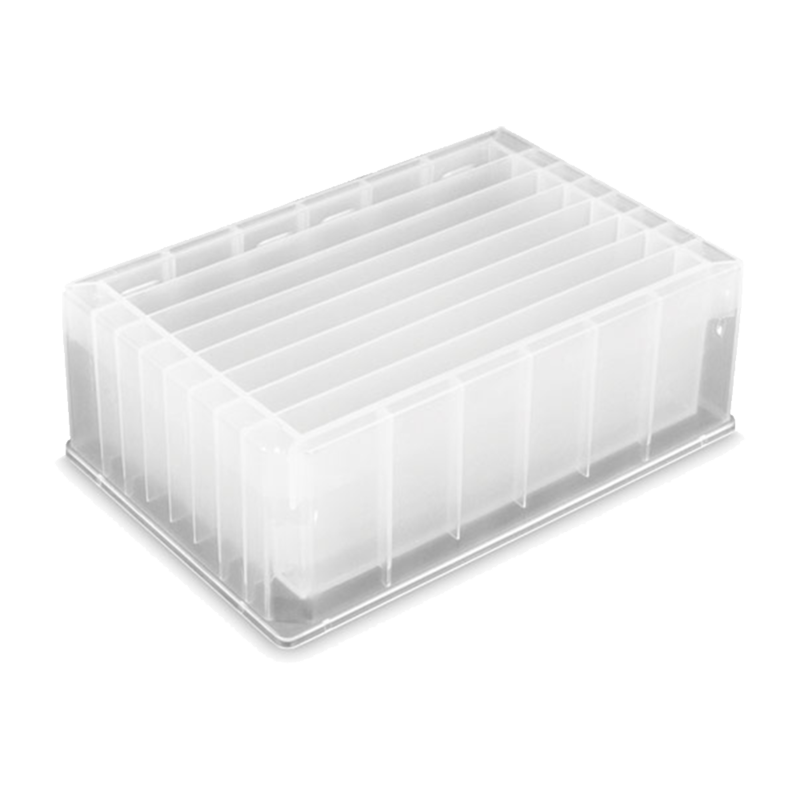
Deck position A: 8 row reagent reservoir containing the different buffers for the protocol (Figure 3).
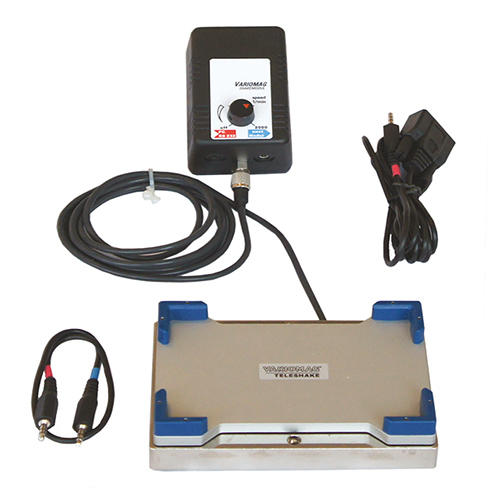
Deck position B: 96 well culture plate (square-well block) containing the centrifuged bacterial cells placed on the Teleshake microplate shaker in portrait orientation.
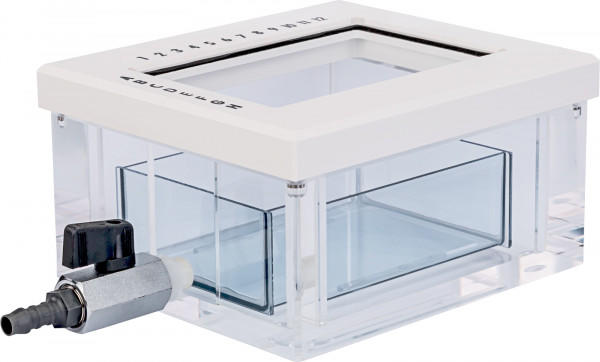
Deck position C: NucleoVac 96 Vacuum Manifold containing and/or supporting the different 96 well plates. The vacuum manifold needs to be placed on the instrument in portrait orientation.
IMPORTANT: Make sure that the vacuum manifold outlet is positioned towards the user, so that the tower of the pipetting robot can move freely along the x-axis. Also check that the Teleshake cable does not interfere with the tower movement.
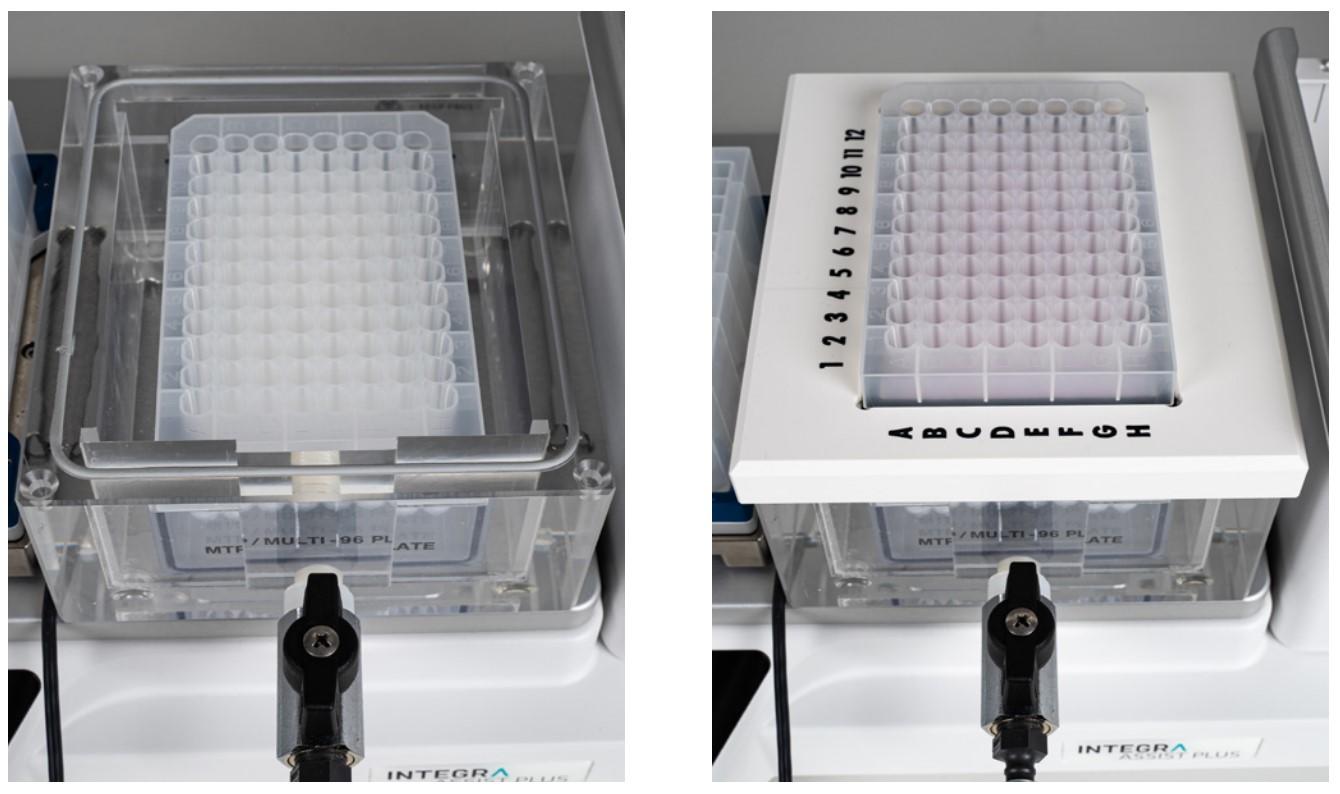
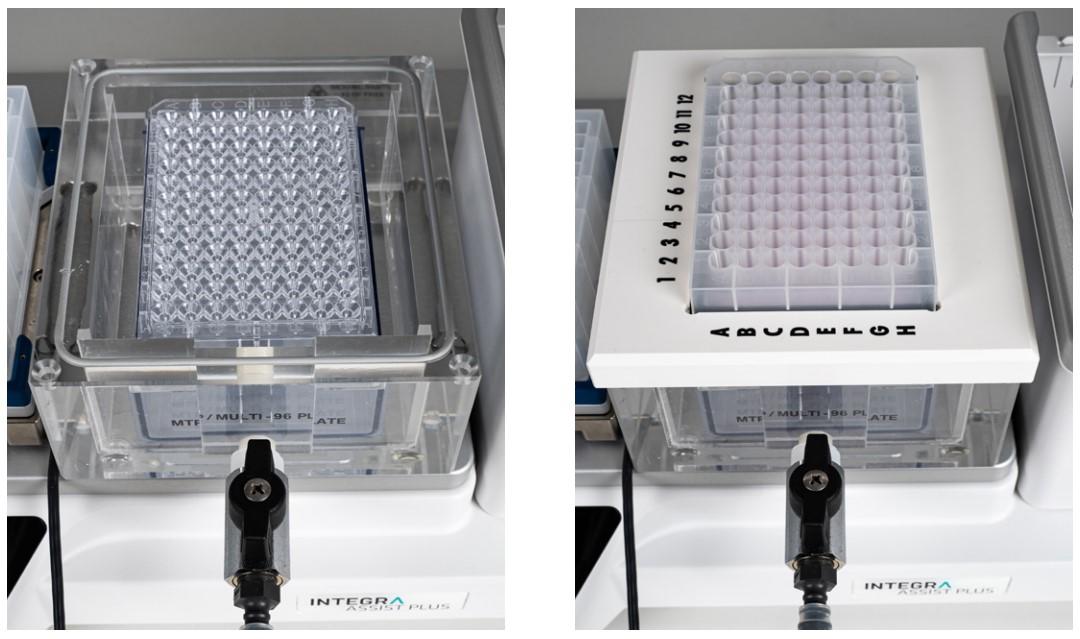
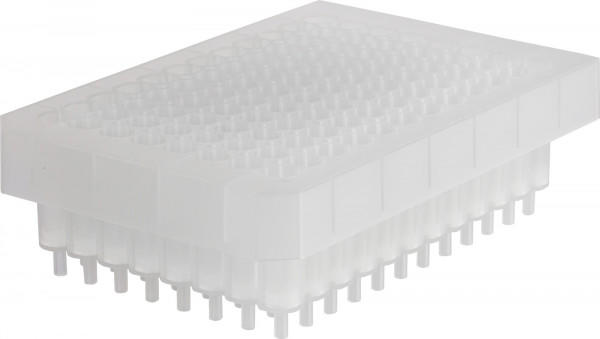
For the initial set-up, assemble the manifold as described in Figure 2, with the NucleoSpin Plasmid Filter Plate (violet rings) on top of the manifold and the NucleoSpin Binding Plate (white rings) in it.
1. Resuspension of the bacterial cells
Resuspend the harvested bacterial cells.
Fill the 8 row reagent reservoir with the different buffers as shown in Figure 3. Select and run the VIALAB program ‘MN Plasmid TG’. The ASSIST PLUS transfers 250 µl of Buffer A1 from row A of the reservoir into the culture plate using the Repeat Dispense mode. Turn on the shaker as indicated by the pipette and resuspend the cells by shaking at 600 rpm. The VIALAB program includes a 4 minute delay, after which the pipette informs the user to stop shaking the plate.
2. Lysis of the bacterial cells
Lyse the suspended bacterial cells.
The ASSIST PLUS transfers 250 µl of Buffer A2 from row B of the reservoir into the cell culture plate using the Repeat Dispense function. Turn on the shaker as indicated by the pipette, and incubate at room temperature with moderate shaking (300 rpm). A 2 minute delay is set in the VIALAB program, after which the pipette informs the user to stop shaking the plate. The program then continues directly with the next step.
Tip:
- Introducing a tip touch on the upper right side of the wells allows the pipette tips to be reused while avoiding contamination of the source.
3. Neutralization
Neutralize the lysis buffer.
The ASSIST PLUS pipetting robot adds 350 µl of Neutralization Buffer A3 to the suspension using the Repeat Dispense mode.
Tip:
- For lysis in the plate, mix by pipetting up and down either after adding the buffer or before loading onto the NucleoSpin Plasmid Filter Plate. The VIALAB program can be easily adapted to introduce a mix cycle at the end of each dispense of the Neutralization Buffer A3.
4. Lysate clearing
Clear the crude lysates by vacuum filtration using the NucleoSpin Plasmid Filter Plate.
The suspension is mixed twice by pipetting the whole volume up and down. The entire volume is then transferred to the NucleoSpin Plasmid Filter Plate. A 1 minute delay is set to allow room temperature incubation for optimal precipitation. The pipette prompts the user to turn on the vacuum pump. Apply a vacuum of -0.2 to -0.4 bar and adjust it to establish a flow rate of 1-2 drops per second (this takes 4 minutes, including a delay set up in the VIALAB program). When the crude lysate has passed through the NucleoSpin Plasmid Filter Plate, release the vacuum as indicated by the pipette.
Tip:
- The use of Wide Bore GRIPTIPS may prevent shearing of DNA when transferring the crude lysate to the NucleoSpin Plasmid Filter Plate.
5. DNA binding
Bind DNA to the silica membrane.
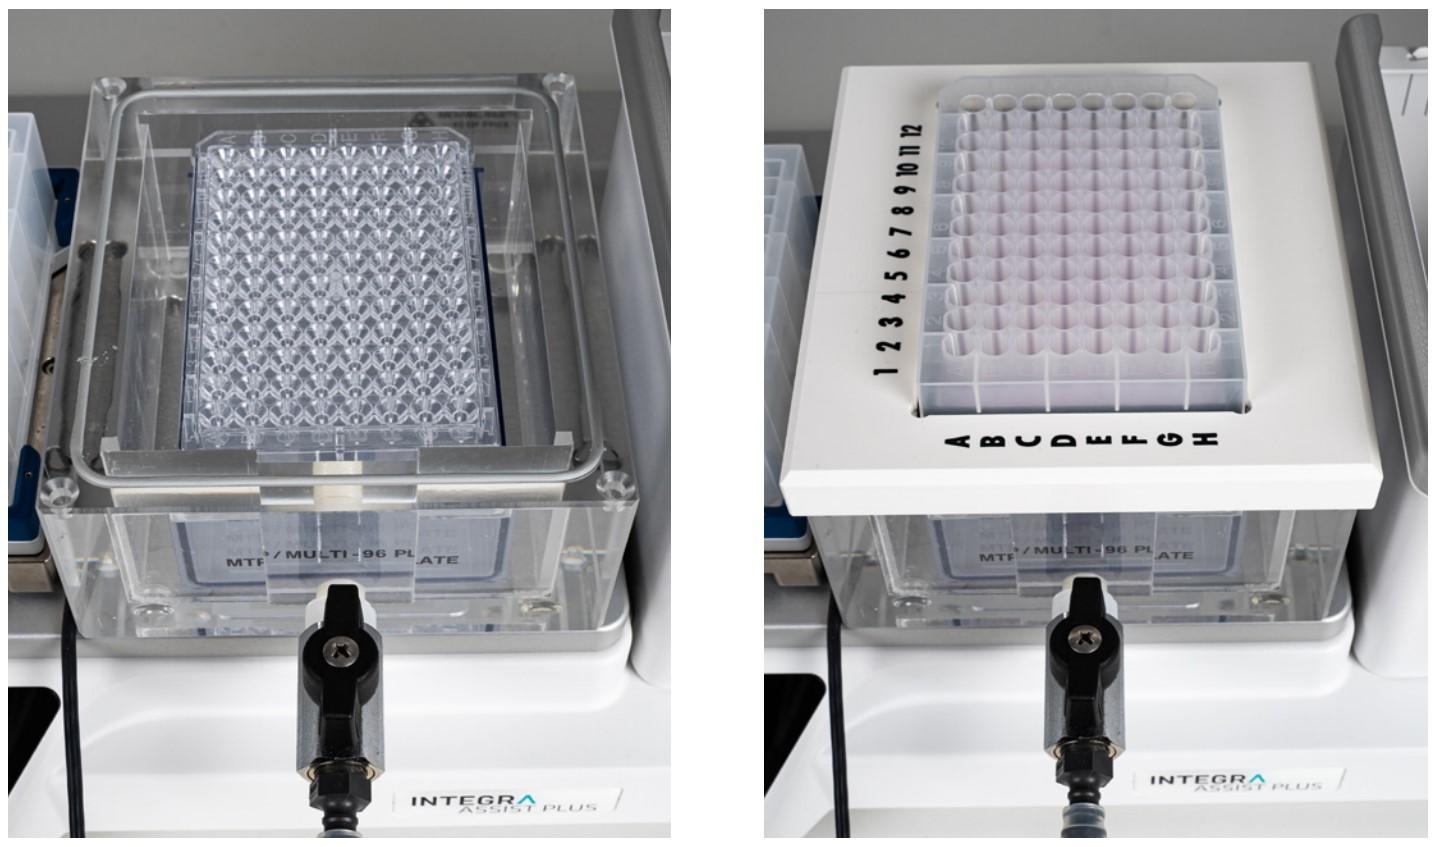
Remove and discard the NucleoSpin Plasmid Filter Plate. Open the manifold lid and remove the NucleoSpin Plasmid Binding Plate containing the cleared lysates. Insert the Wash Plate onto the spacers inside the manifold base, replace the lid on the base and put the NucleoSpin Plasmid Binding Plate on top of the manifold. The vacuum manifold is now ready for the next step (Figure 4). Apply the vacuum (-0.2 to -0.4 bar, 1 min, flow rate of 1-2 drops per second) until the cleared lysate has completely drained, then release the vacuum.
6. Washing and drying
Wash and dry the silica membrane.
The ASSIST PLUS adds 900 µl Buffer ERB (detoxification buffer) to each well. After a 30 second incubation, it informs the user to apply a vacuum (-0.2 to -0.4 bar, 1 min, flow rate of 1-2 drops per second). In the meantime, prepare an 8 row reagent reservoir filled with Buffer AQ (Figure 5). Release the vacuum. The ASSIST PLUS transfers 900 µl of Buffer AQ containing ethanol to each well for a second wash step. Using the same conditions as before, apply the vacuum after incubation, release it and allow the pipette to transfer 900 µl of Buffer AQ to each well for the third wash step. Apply the vacuum after incubation (same settings as before). Remove any residual wash buffer from the NucleoSpin Plasmid Binding Plate and tap the outlets of the plate onto the clean paper sheet supplied. Remove the MN Wash Plate and the waste container from the manifold base and place the NucleoSpin Binding Plate on top of the manifold. Apply a vacuum (-0.4 to -0.6 bar) for 12 min to dry the membrane completely, and to remove any trace of ethanol that may inhibit subsequent enzymatic reactions. Maintaining a continuous air flow is the most important aspect for this step.
Tips:
- Pre-wetting the tips prior to pipetting, and having an air gap at the end of the aspiration, prevents droplets and dripping when pipetting volatile liquids such as ethanol. Additionally, Low Retention GRIPTIPS can be used for these pipetting steps.
- The pipetting speeds have been set up specifically according to the nature of the buffers.
7. Elution
Elute the bacterial DNA.
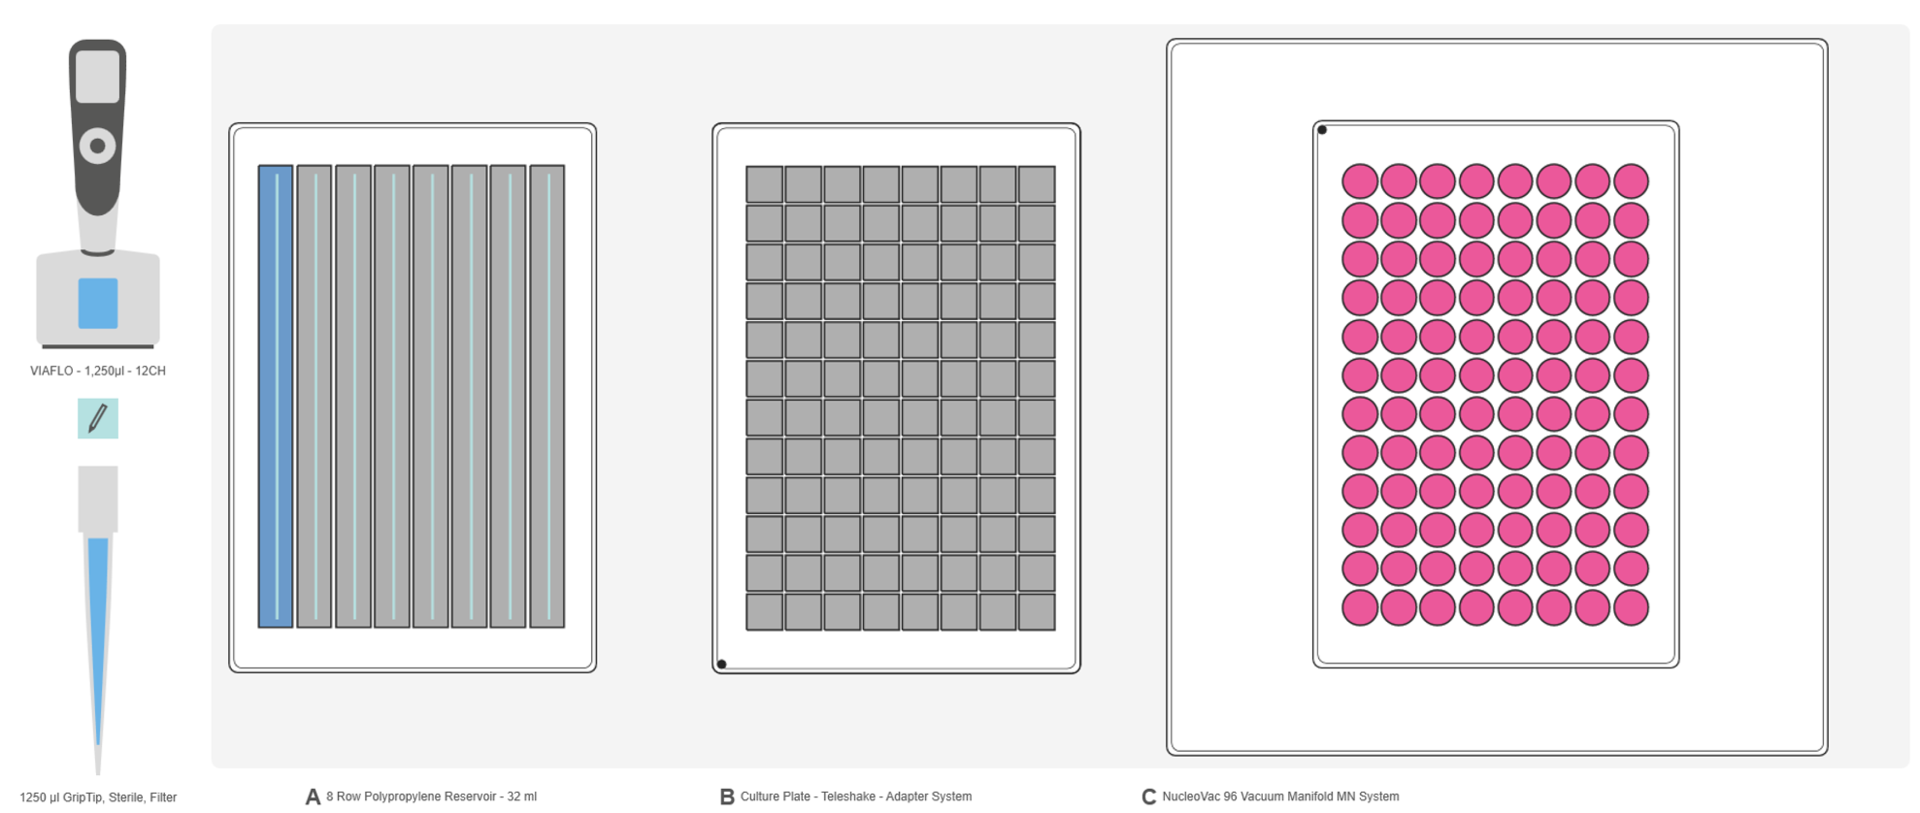
Place the U-bottom elution plate in the manifold base and the NucleoSpin Plasmid Binding Plate on top of the manifold (Figure 6). Place an 8 row reservoir containing Elution Buffer AE in row A on Position A (Figure 7). The ASSIST PLUS pipetting robot dispenses 150 µl Elution Buffer AE into the Binding Plate. After a 2 minute incubation period, apply a vacuum (-0.4 to -0.6 bar) for 1 minute, release it, then remove the elution plate containing the DNA and seal it for storage.
Tip:
- When another DNA concentration is required, simply adapt the elution volume according to MACHEREY-NAGEL's recommendations using the VIALAB Software.
Results
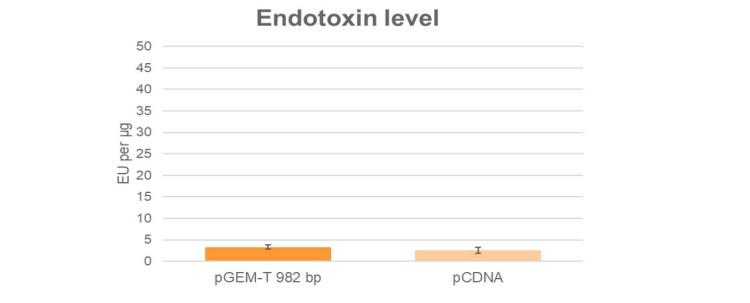
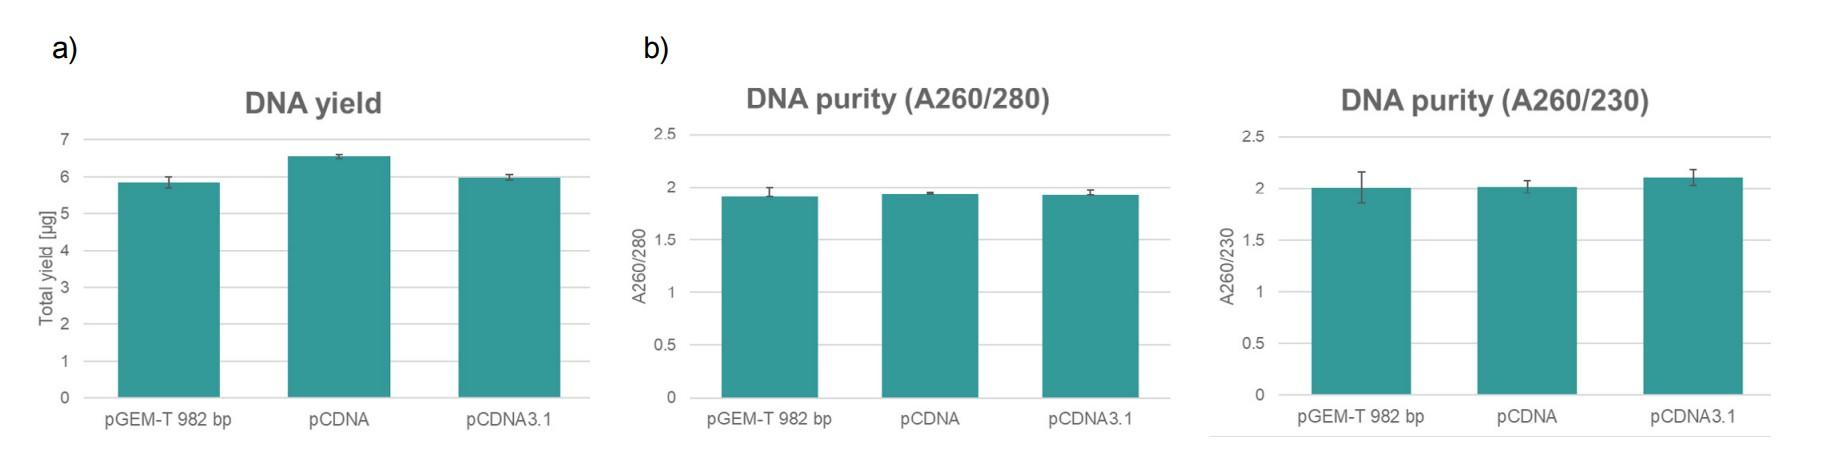
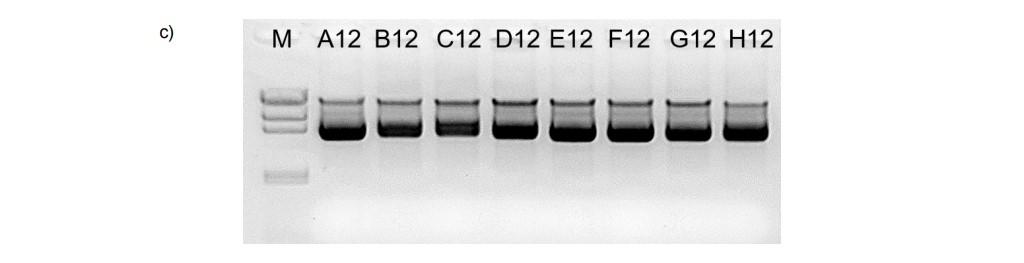
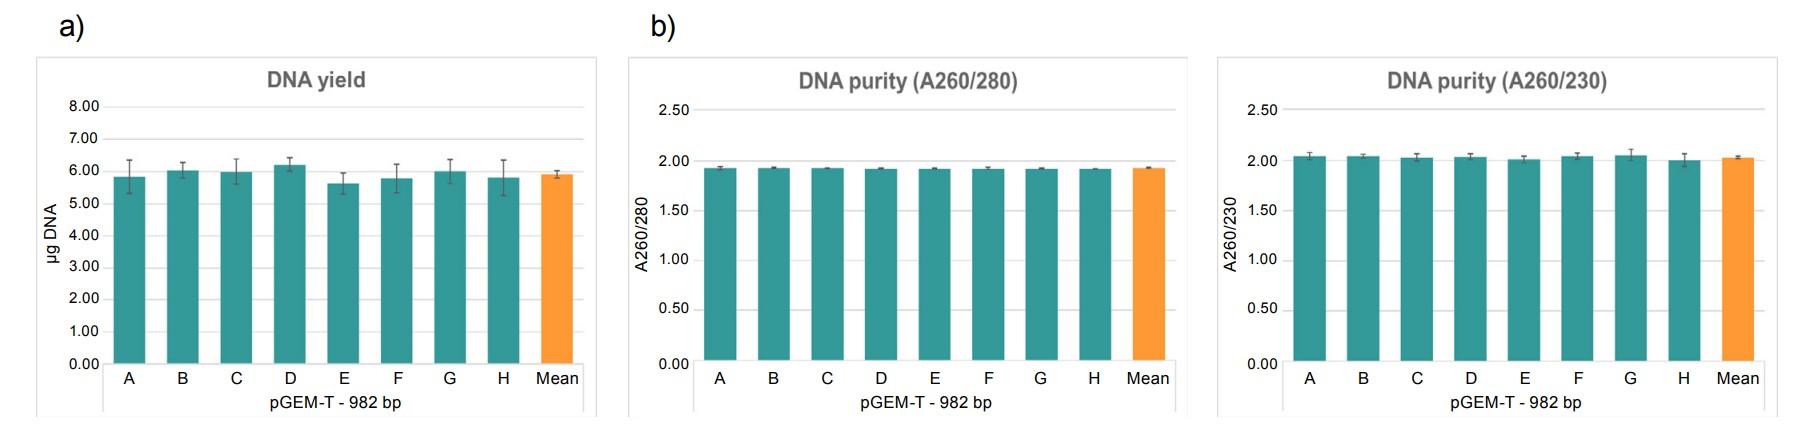
The validation data show high quality plasmid DNA from three different constructs with different plasmid sizes on one plate using the ASSIST PLUS pipetting robot.
Remarks
VIALAB software:
The VIALAB programs can be easily adapted to your specific labware and protocols, for instance, if lysis of the bacterial cells is done in tubes.
Partial plates:
Programs can be adapted to a different number of samples at any time, giving laboratories total flexibility to meet current and future demands.
Conclusion
Appendix: Performing the initial deck set-up
Check that the cable of the Teleshake (Position B) is not interfering with the movement of the ASSIST PLUS tower. Also make sure that the outlet of the vacuum manifold (Position C) is positioned towards the user, so that the tower of the pipetting robot can move freely along the X‑axis (Figure 1).
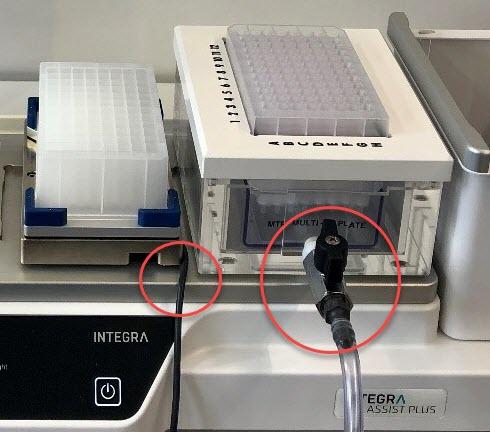
Place the vacuum manifold on the ASSIST PLUS deck next to the waste bin. After adjusting the position of the manifold for the first time, we recommend marking its position on the deck (see example in Figure 2). Thereafter, you simply have to align the vacuum manifold with the marks placed on the ASSIST PLUS.
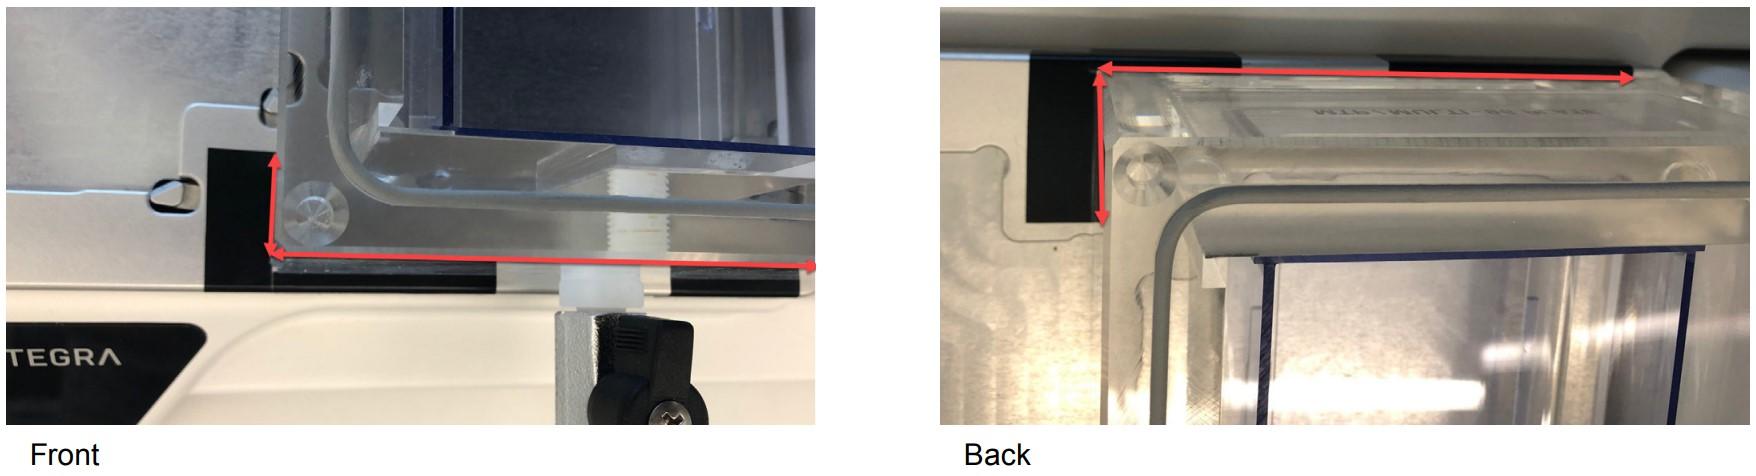
To check the position of the well plate on top of the vacuum manifold, manually attach tips to the pipette. Use the touch panel keys to move the pipetting arm of the ASSIST PLUS and control the tip position. First, select ‘ASSIST PLUS’ under the main menu of the pipette, then ‘VIALAB Programs’ and ‘MN Plasmid TG’. Go to ‘Height Adjust’, select ‘13 Transfer’ and then choose ‘Height 1/1’ under ‘Target’ using the left arrow. Confirm by pressing the ‘Start’ key on the ASSIST PLUS. The ASSIST PLUS moves to the chosen wells. Check the position of the vacuum manifold. The pipette tips should be in the middle of the wells. If necessary, manually adjust the position of the vacuum manifold on the deck. Press the back button on the pipette to exit the ‘Height Adjust’ menu, then discard the tips manually. Continue with the protocol set-up.
Ask our expert. Leave a comment!
Write us if you have any questions regarding the application note or one of our instruments.
Any questions? I'm happy to help!
Instruments and accessories
ASSIST PLUS, Pipetting Robot
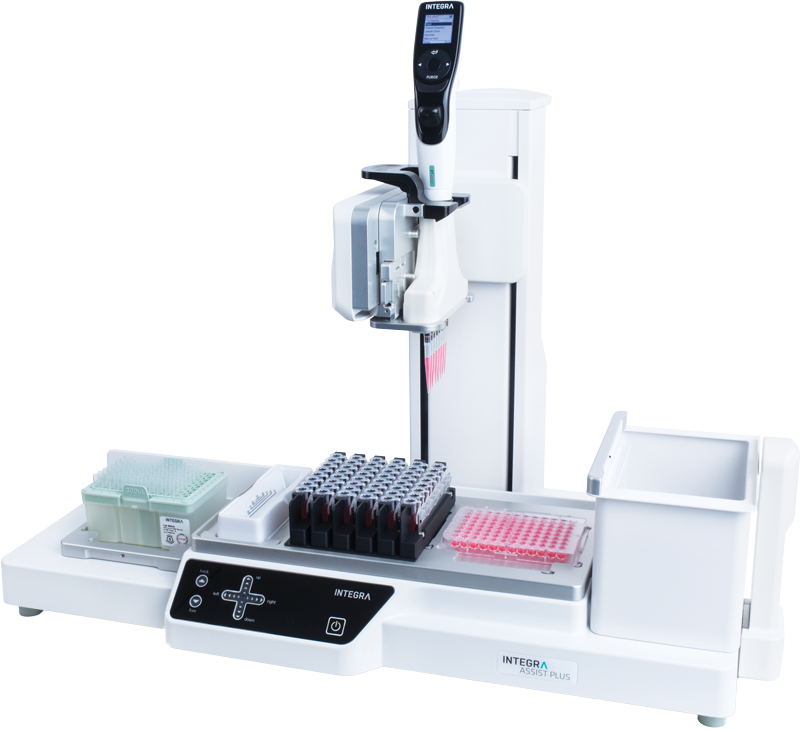
INTEGRA has developed the ASSIST PLUS pipetting robot to streamline routine pipetting tasks at an affordable price. Using INTEGRA electronic multichannel pipettes, the system:
- automates pipetting tasks,
- eliminates physical strain and
- ensures superior reproducibility and
- error free pipetting.
Part No. 4505
Customer’s voice
"This robot is awesome for setting up long and laborious lab assays with lots of repetitive steps. It has been extremely helpful in enabling us to collect lots of data in one go. There are now some assays that I simply could not do without it!"
Related products

Applications
Show all-
End-to-end Twist library preparation protocol for NGS workflow automation
-
A simple and streamlined workflow for membrane protein isolation
-
Streamlining single-cell sequencing with the Flex Apex workflow using automated liquid handling solutions
-
Optimizing DNA fragmentation and NGS library preparation with automated liquid handling
Stories
Show all-
 · Company News
Streamlining CRISPR workflows, from editing to analysis
-
 · Customer Testimonial
Enhancing the consistency of ag-tech R&D processes with the ASSIST PLUS pipetting robot
-
 · Product News
Magnetic beads represent a modern approach to gDNA isolation
-
 · Product News
Magnetic beads for NGS size selection and PCR purification