


-
Automation of the MACHEREY-NAGEL NucleoSpin® 96 RNA Extraction Kit on the ASSIST PLUS Pipetting Robot
High quality RNA obtained when by pairing the MACHEREY-NAGEL NucleoSpin 96 RNA Kit with the ASSIST PLUS pipetting robot
MACHEREY-NAGEL NucleoSpin® 96 nucleic acid extraction and purification kits are known to yield high quality and abundant nucleic acids. The 96 well silica membrane plate format used in the NucleoSpin 96 RNA kit is convenient for extracting RNA from cell cultures or tissues in high throughput laboratories, but the many pipetting steps required for manual processing of samples are tiring for users, and introduce the possibility of pipetting errors at each step. Performing the assay on the ASSIST PLUS pipetting robot eliminates this possibility, and reduces the strain of repetitive pipetting by providing semi-automated sample extraction. The processing of 96 samples with the ASSIST PLUS pipetting robot is possible in less than 1 hour.
-
Table of contents
MACHEREY-NAGEL NucleoSpin® 96 nucleic acid extraction and purification kits are known to yield high quality and abundant nucleic acids. The 96 well silica membrane plate format used in the NucleoSpin 96 RNA kit is convenient for extracting RNA from cell cultures or tissues in high throughput laboratories, but the many pipetting steps required for manual processing of samples are tiring for users, and introduce the possibility of pipetting errors at each step. Performing the assay on the ASSIST PLUS pipetting robot eliminates this possibility, and reduces the strain of repetitive pipetting by providing semi-automated sample extraction. The processing of 96 samples with the ASSIST PLUS pipetting robot is possible in less than 1 hour.
Key benefits
Overview: How to automate the MACHEREY-NAGEL NucleoSpin 96 RNA Kit
In this protocol, the pipetting steps of the MACHEREY-NAGEL NucleoSpin 96 RNA kit are automated on the ASSIST PLUS pipetting robot. With the NucleoSpin 96 RNA kit RNA can be isolated from cells or tissues (up to 2*106 cells or 30 mg tissue). All liquids are transferred automatically, with manual interventions only needed for turning the shaker and vacuum on and off, loading reagent reservoir 2, and preparing the elution plate.
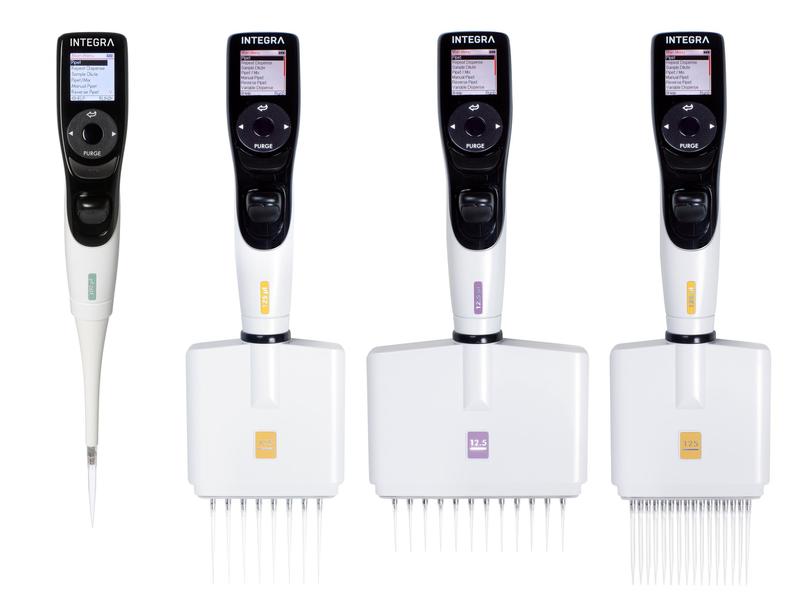
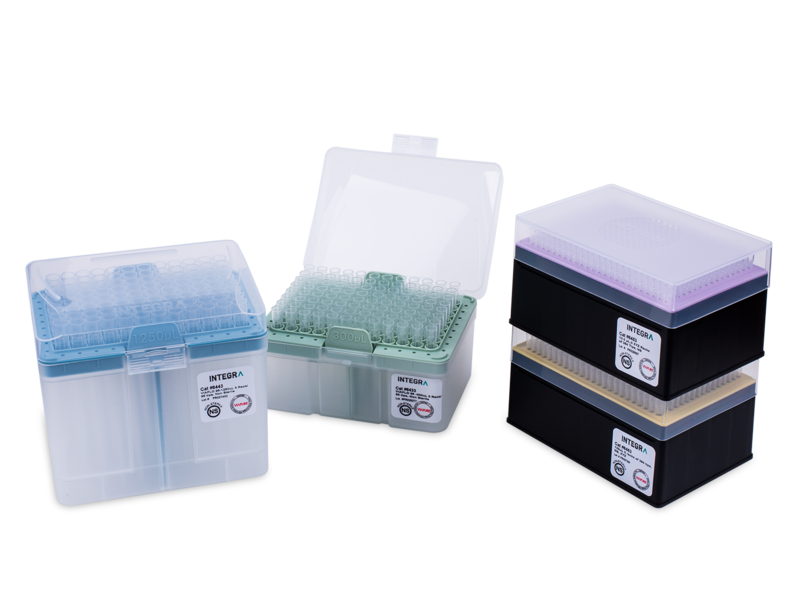
The ASSIST PLUS operates a 12 channel VIAFLO 1250 μl electronic pipette with 1250 μl Sterile, Filter GRIPTIPS®.
Before beginning, RNase-free rDNase is reconstituted (see MACHEREY-NAGEL protocol), rDNase reaction mixture is prepared, and ethanol (96-100 %) is added to the wash buffers RA3 and RA4.
Experimental set-up
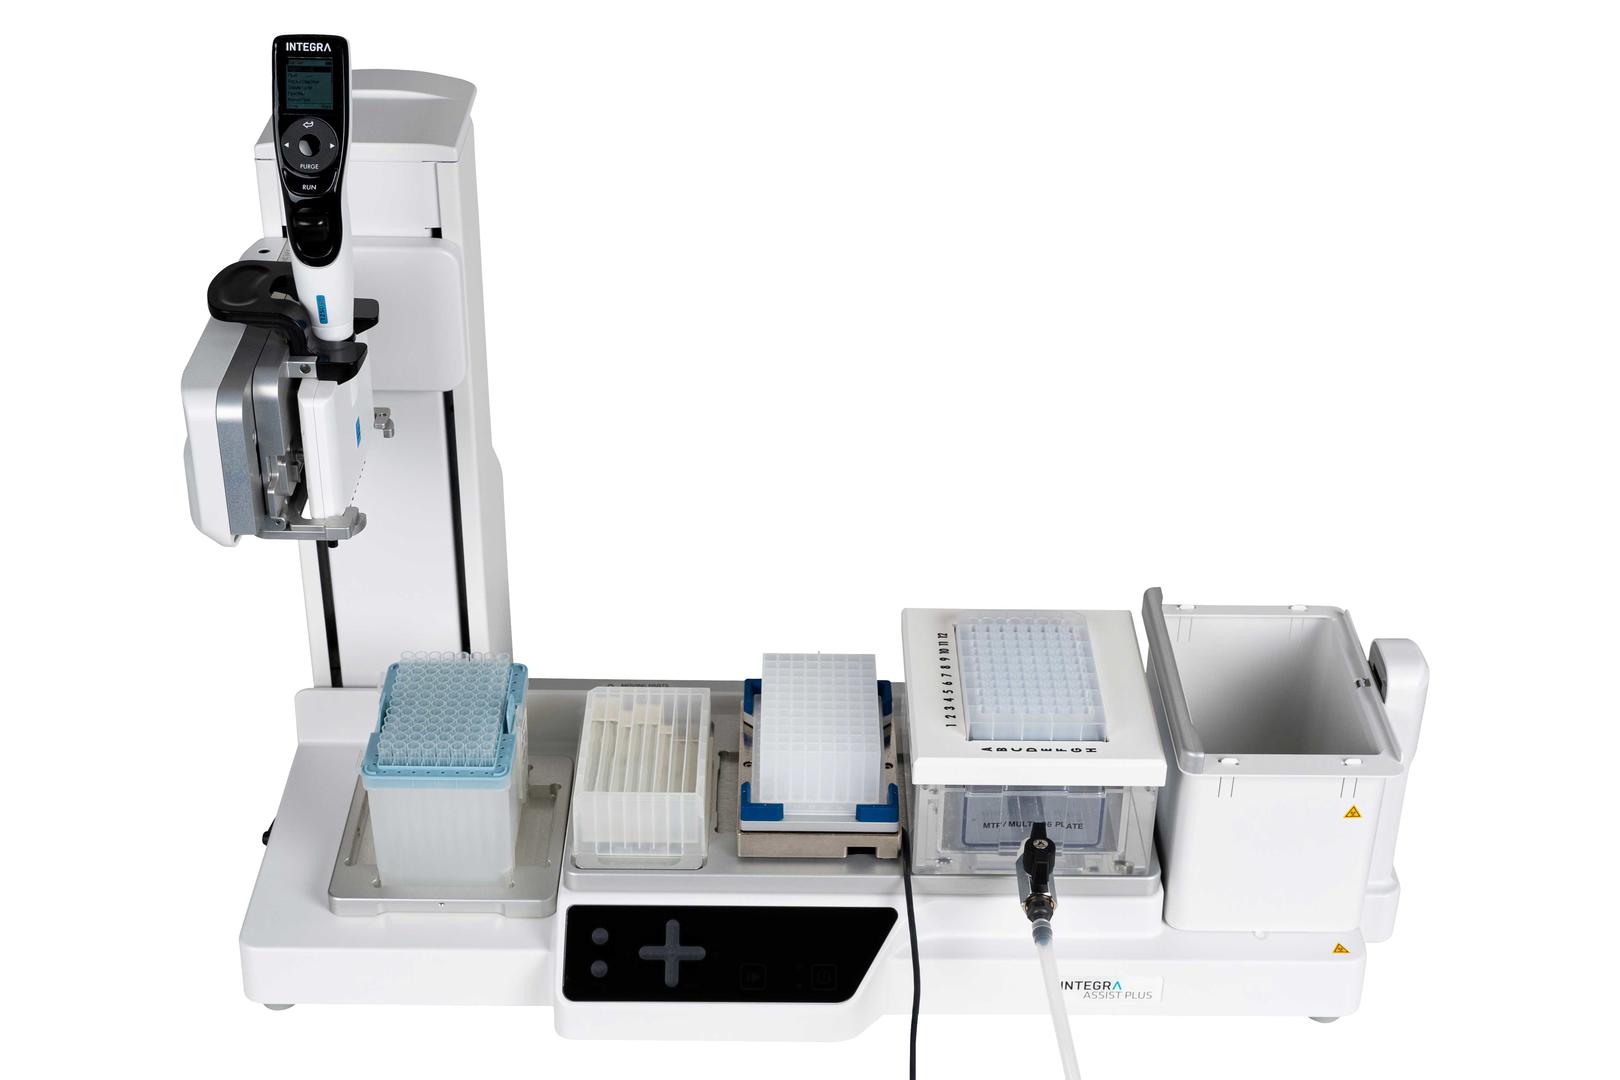
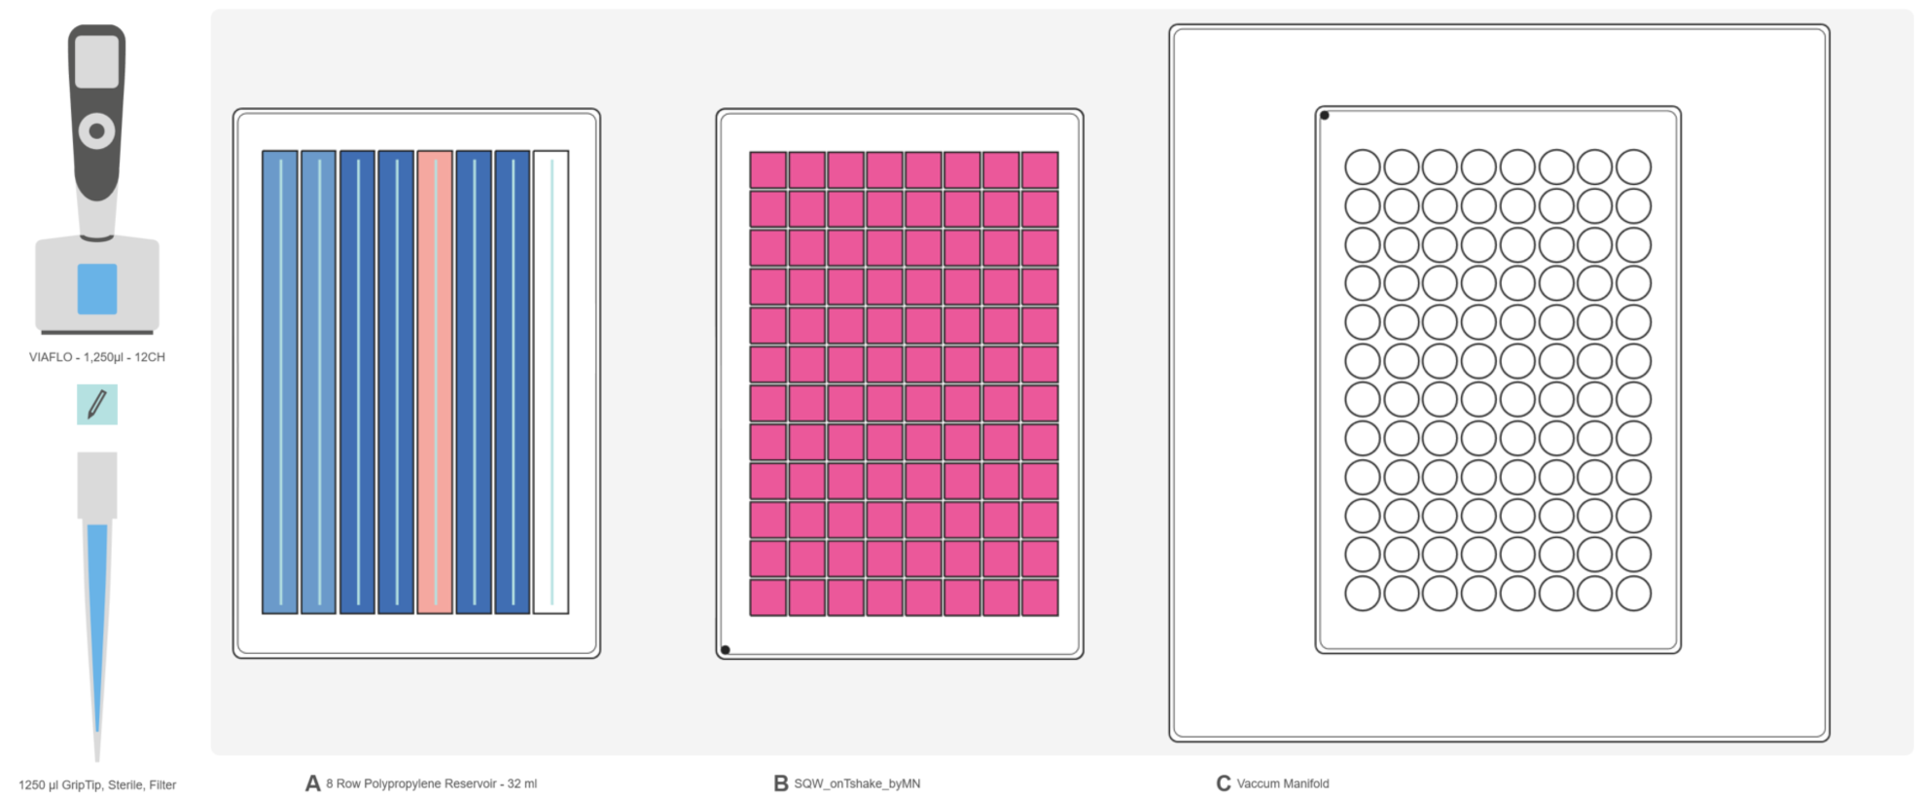
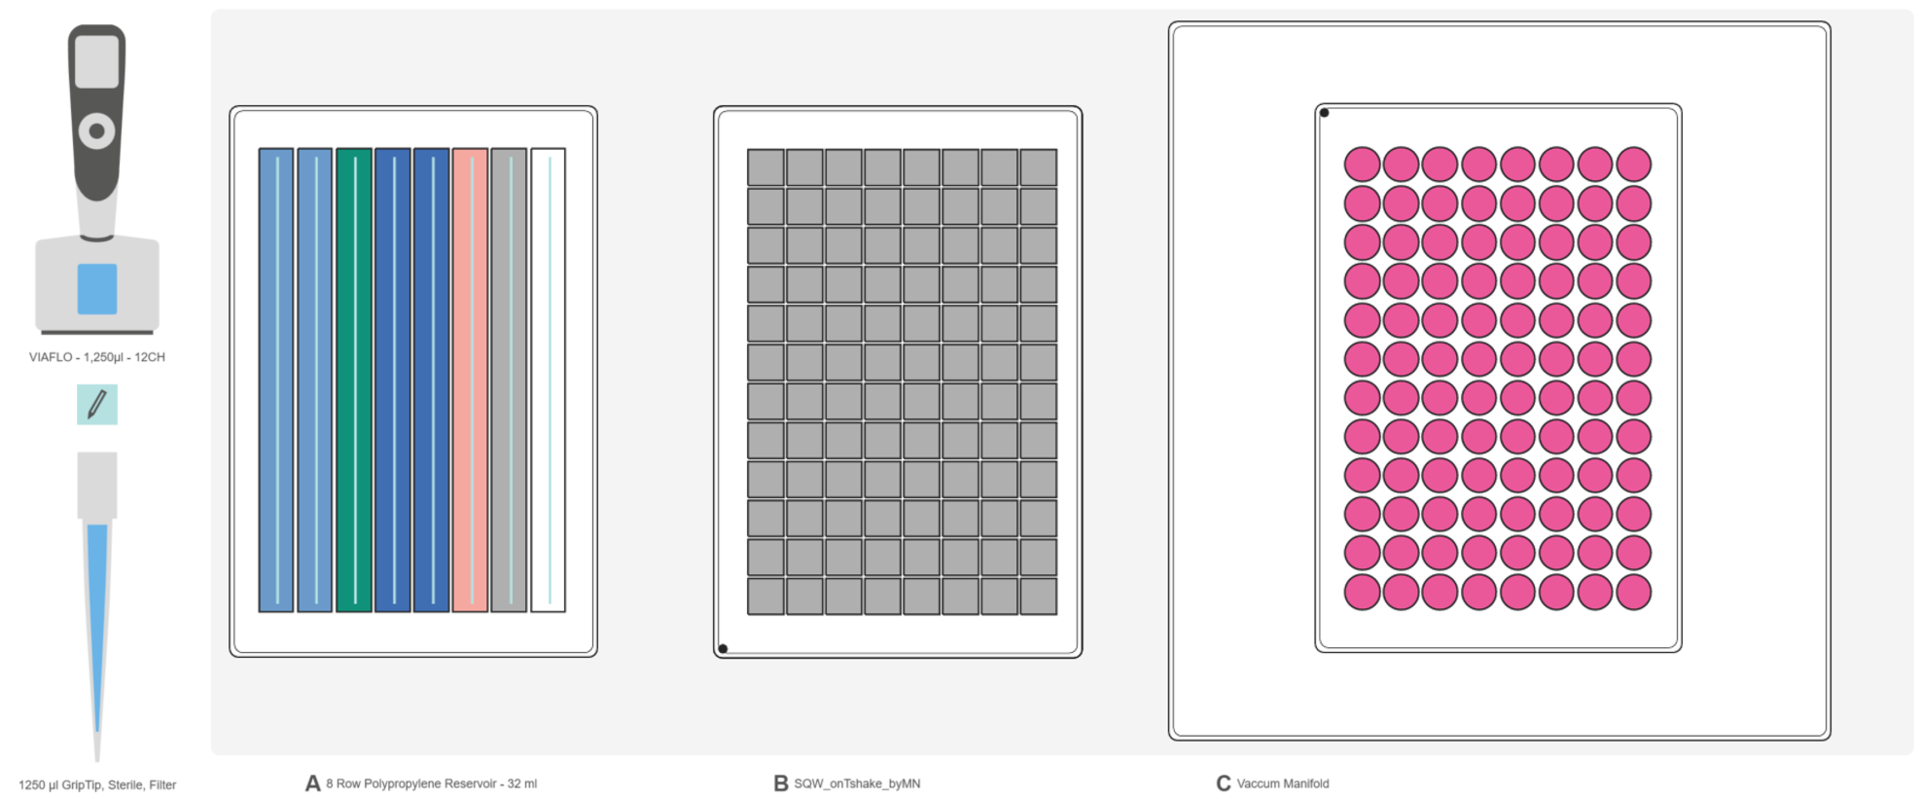
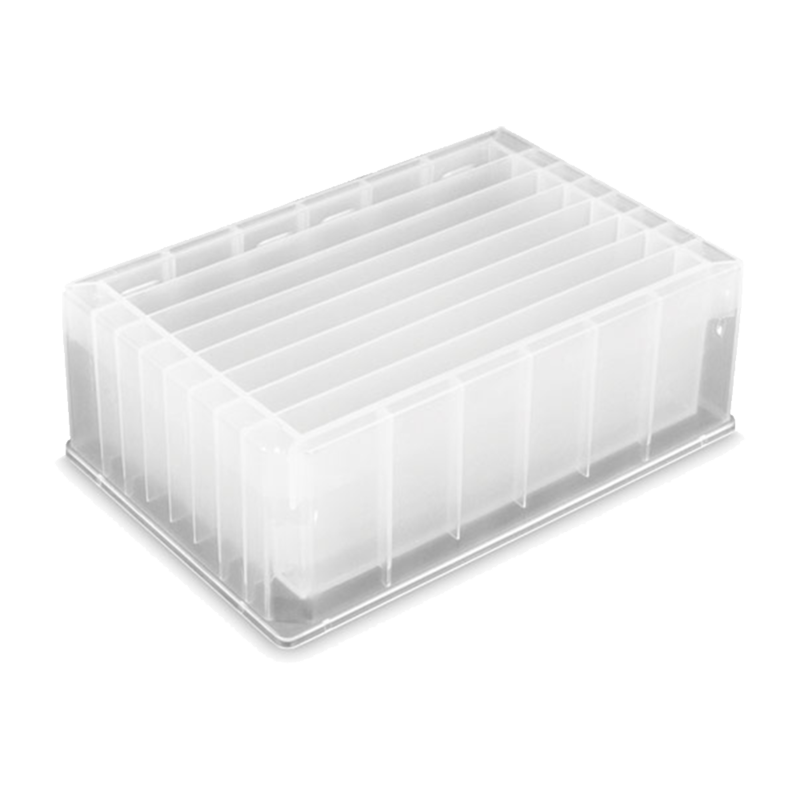
- Deck Position A: 8 row reagent reservoir holding kit buffers.
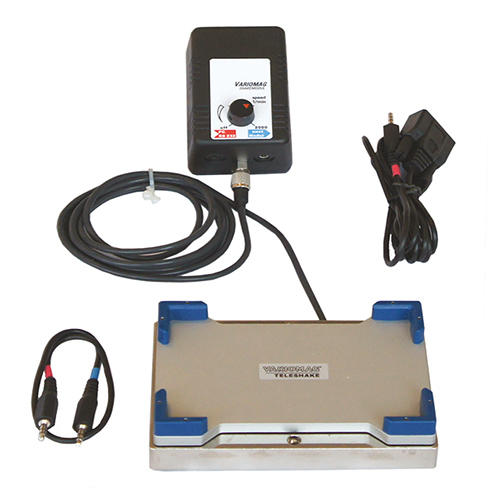
- Deck Position B: 96 well U-bottom, square, deep well plate placed on the INHECO Teleshake.
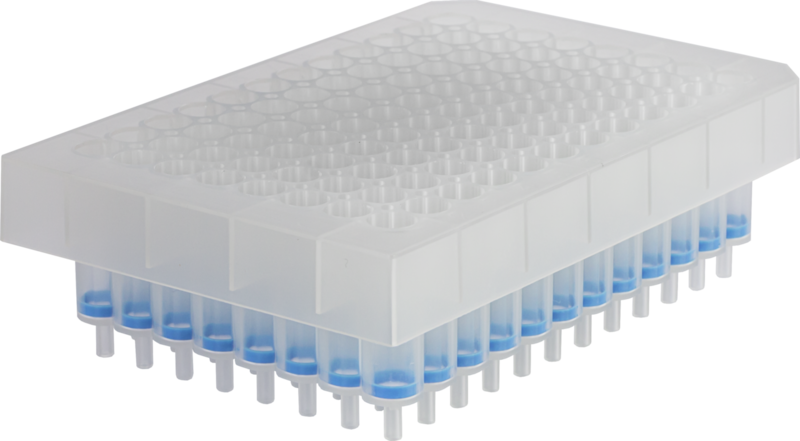
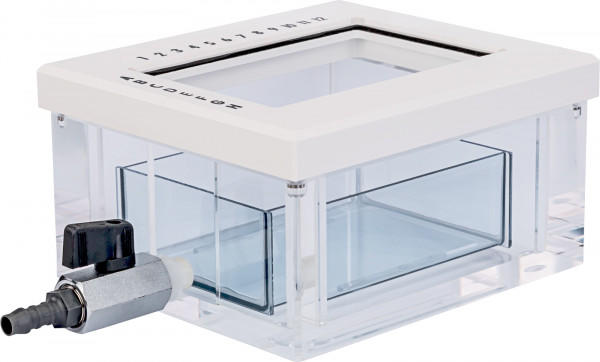
- Deck Position C: NucleoVac 96 Vacuum Manifold with RNA Binding Plate and waste capture plate.
IMPORTANT: Align the vacuum manifold before each run (see Appendix).
Downloads: App note and protocols for the NucleoSpin 96 RNA Extraction Kit with the ASSIST PLUS Pipetting Robot
Here you can download the complete protocols and reports used in this application and use them on your ASSIST PLUS. The protocol can be customized with the VIALAB software.
Step-by-step procedure
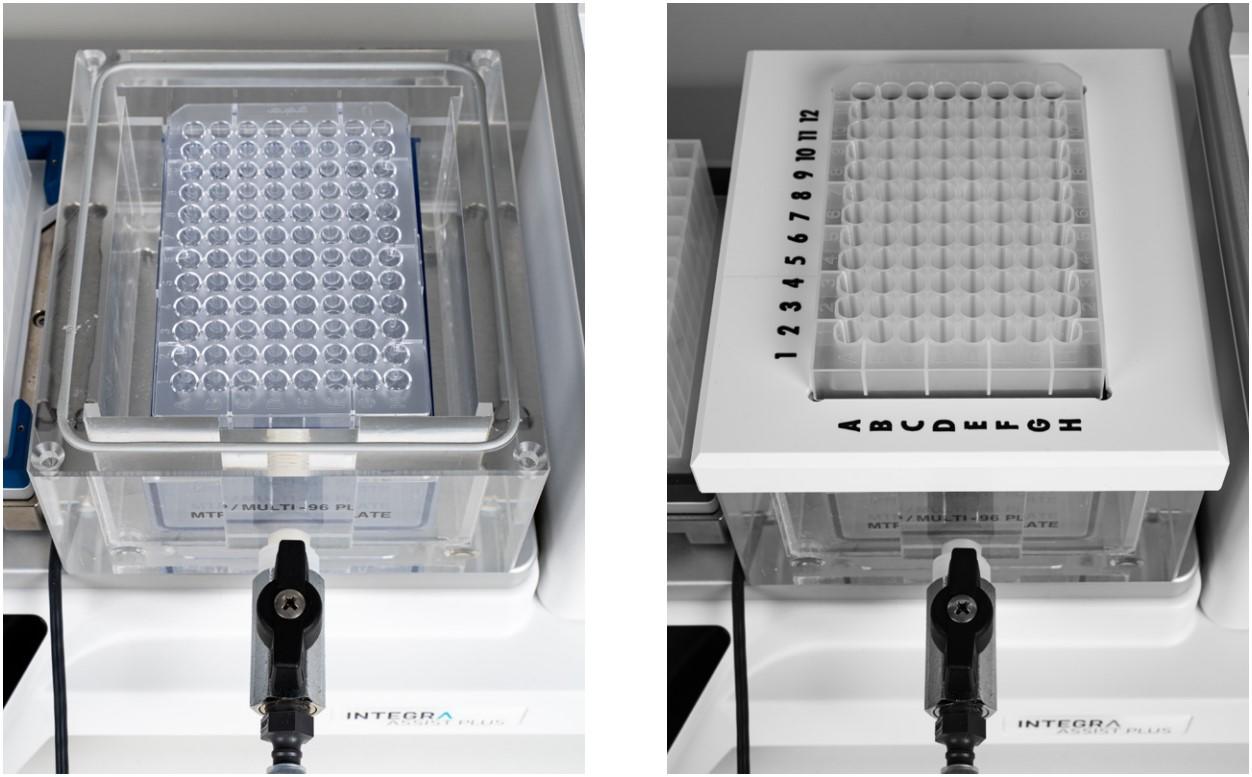
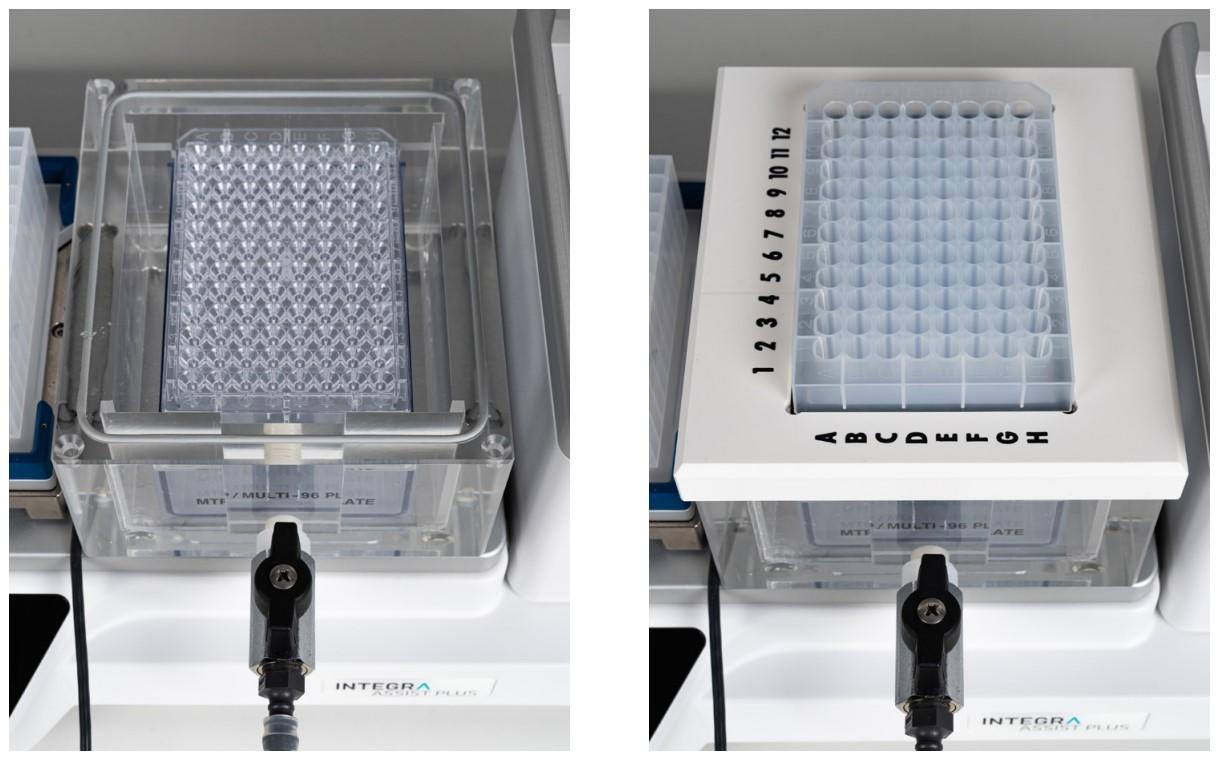
For the initial set-up, assemble the manifold as described in Figure 2, with the NucleoSpin 96 RNA Binding Filter Plate on top of the manifold and the Wash Plate in the manifold.
Overview of the steps:
- Reagent transfer
- Lysis of cells
- Binding
- Desalting the silica membrane
- Digestion of DNA
- Washing
- Drying
- Elution
1. Reagent transfer
Transfer the previously prepared reagents.
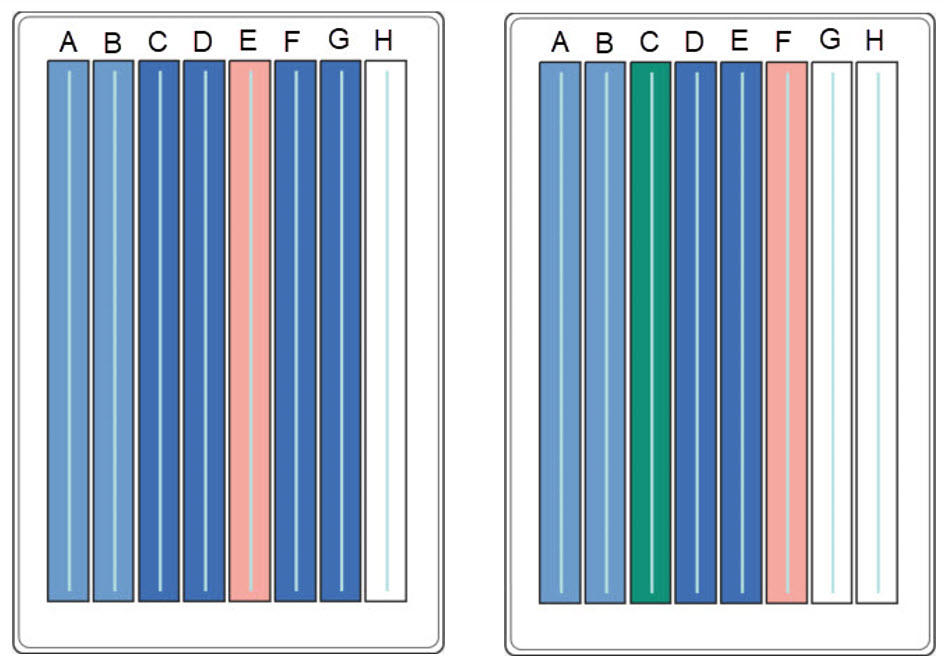
Transfer the prepared reagents into two INTEGRA 8 row reagent reservoirs according to Figure 3.
Reservoir 1
- Row A: 15 ml buffer RA1
- Row B: 15 ml buffer RA4
- Row C and D: 25 ml buffer RA3
- Row E: 10 ml rDNase
- Row F and G: 25 ml buffer RA2
Reservoir 2
- Row A: 15 ml buffer RA1
- Row B: 15 ml buffer RA4
- Row C and D: 25 ml buffer RA3
- Row E: 10 ml rDNase
- Row F and G: 25 ml buffer RA2
2. Lysis of cells
Lyse the cells by adding a solution containing chaotropic salt.
Place the 8 row reagent reservoir 1 with the buffers on Position A, the Teleshake with the samples on Position B, and the vacuum manifold on Position C (Figure 4). Select and run the 'MN RNA CELL' VIALAB program. The ASSIST PLUS starts the program by transferring 130 µl of lysis buffer onto the plate holding samples. Turn on the shaker when indicated by the pipette and resuspend the cells by shaking at 1000 rpm. After a 4 minute delay, the pipette notifies the user to stop the shaker.
Tip:
- An air gap is introduced at the end of every dispense step to eliminate droplet build-up after the liquid dispense. Non-contact dispensing – avoiding the use of tip touch – prevents the risk of cross contamination. This post-dispense step ensures the accuracy of each dispense when using Repeat Dispense mode.
3. Binding
Bind the RNA to the silica membrane.
After the cell lysis step, the ASSIST PLUS pipetting robot transfers 130 µl of buffer RA4 from row B of the reservoir to each well of the lysis plate.
IMPORTANT: Buffers RA1 and RA4 must be used in the same volume ratio.
The program automatically continues with the mixing step and the pipette transfers the crude lysate onto the NucleoSpin 96 RNA binding plate placed on the vacuum manifold. The pipette informs the user when to turn the vacuum pump on. Apply a vacuum of -0.2 bar and release it when all the lysate is bound to the silica membrane in the RNA binding plate, as indicated on the pipette.
Tip:
- The user is guided for each manual intervention by instructions appearing on the bright screen of INTEGRA’s VIAFLO electronic pipette, ensuring that the operator does not lose track of which program step is in progress. The user should press RUN to continue the program after each intervention.
4. Desalting the silica membrane
Desalt the silica membrane by adding the washing buffer.
The ASSIST PLUS pipetting robot transfers 500 µl of buffer RA3 from row C and D of the reservoir and instructs the user to switch on the vacuum pump. Apply a vacuum of -0.2 bar and release it after a 3 minute delay as indicated on the pipette.
5. Digestion of DNA
Avoid possible DNA contamination by directly applying rDNase onto the membrane.
The contaminating DNA that binds to the silica membrane needs to be removed. To achieve this, 95 µl of rDNase reaction mixture is transferred by ASSIST PLUS from row E of the reservoir directly above the silica membrane of each well. A 15 minute delay is preset in the program as an incubation period.
Tip:
- In this step, it is crucial to cover the silica membrane completely, so that the rDNase can come into contact with the entire silica membrane. This is achieved by optimizing the dispense speed and tip travel.
6. Washing
Wash the silica membrane in three steps.
The ASSIST PLUS pipetting robot adds 500 µl of buffer RA2 to each well (Figure 5). Apply a vacuum of -0.2 bar for 1 minute. In the meantime, the pipette instructs the user to exchange reservoir 1 for reservoir 2. After this, release the vacuum. The ASSIST PLUS transfers 800 µl of buffer RA3 to each well for a second wash step. Using the same parameters as before, apply the vacuum, release it, and allow the pipette to transfer 500 µl of buffer RA4 to each well for the third wash step. Apply the same vacuum as before for 1 minute, then release it.
7. Drying
Dry the RNA binding plate.
Following the final wash step with buffer RA4, remove the RNA binding plate from the vacuum manifold. Tap the plate on a clean paper towel to remove the residual ethanol-containing wash buffer at the bottom. Remove the wash plate and waste plate from the vacuum manifold. Set the vacuum to -0.6 bar. Insert the binding plate into the manifold lid, close the manifold and run the vacuum for 12 minutes in order to thoroughly dry the plate. Press RUN to activate the timer. An audible beep will occur at the end of the incubation period. Release the vacuum at this point.
8. Elution
Elute the RNA.
Remove the lid of the vacuum manifold and insert the U-bottom elution plate. Replace the lid of the manifold with the binding plate (Figure 6). Set the vacuum to -0.5 bar. Press RUN to activate the automated addition of elution buffer to the binding plate. Follow the prompt on the screen to incubate the plate for 3 minutes, followed by application of vacuum to release the RNA from the binding plate onto the elution plate.
After elution, discard the binding plate and take out the elution plate. The elution plate can either be directly used for downstream applications, or stored at -70 °C.
Tip:
- The elution buffer volume may be customized to meet the needs of individual users.
Results
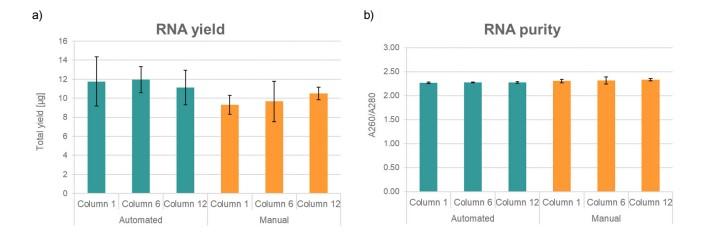
To evaluate the above-described protocol, RNA was extracted from the same samples using both the ASSIST PLUS pipetting robot and a handheld pipette (Figure 7). Overall, the RNA yield was found to be higher with the ASSIST PLUS than if processed manually. RNA purity with the ASSIST PLUS was comparable to the manual process but, the standard deviation was smaller.
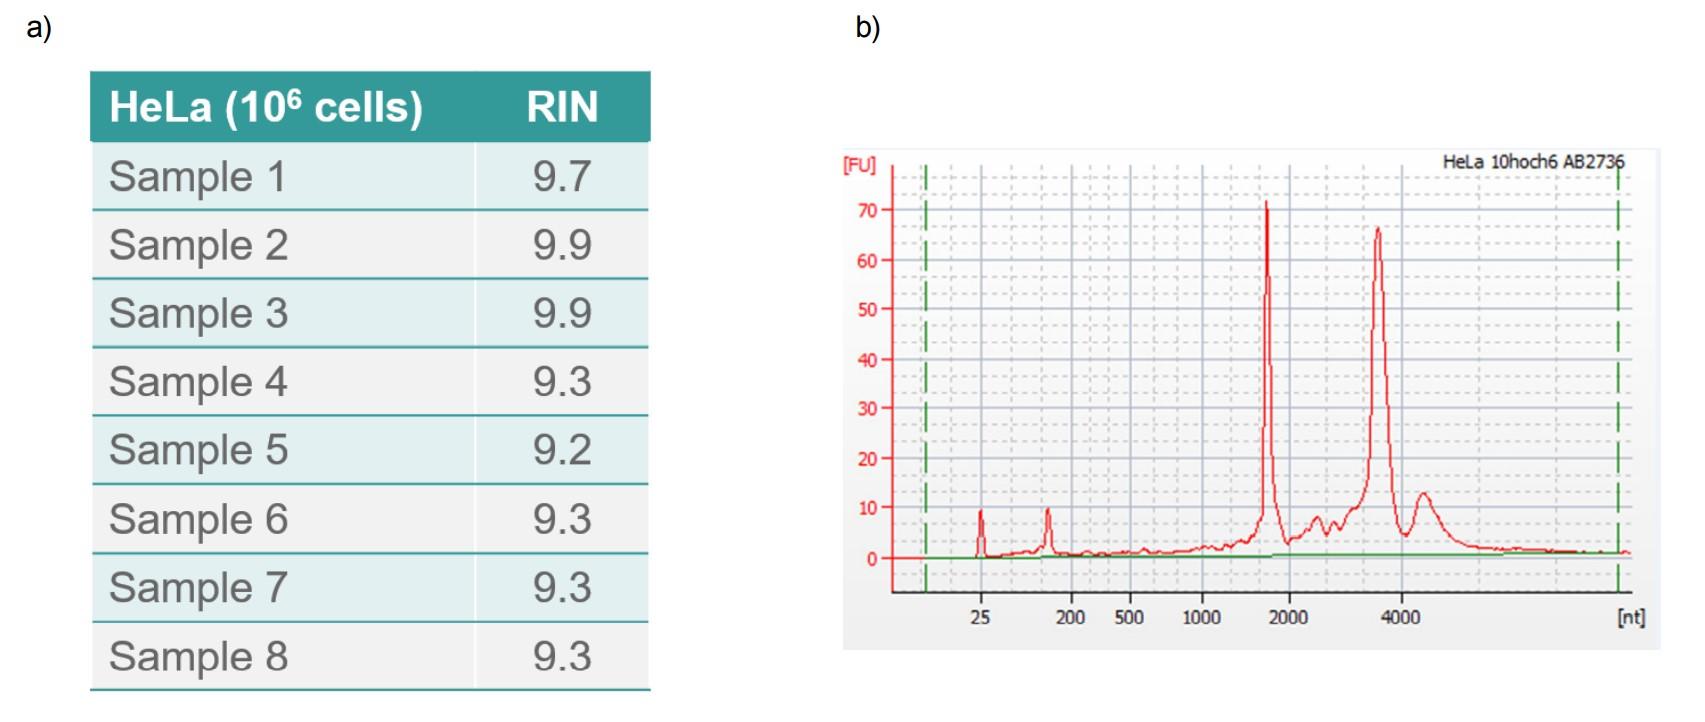
The high RIN scores of the eight HeLa cell replicates (Figure 8) indicate an excellent RNA integrity and high consistency.
Remark
For RNA isolation from the tissues, the validated VIALAB program (MN RNA TISSUE) and the report (MN RNA TISSUE Report) are also available for download.
Conclusion
Appendix: Performing the initial deck set-up
Check that the cable of the Teleshake (Position B) is not interfering with the movement of the ASSIST PLUS tower. Also, make sure that the outlet of the vacuum manifold (Position C) is positioned towards the user, so that the tower of the ASSIST PLUS can move freely along the X-axis (Figure 1).
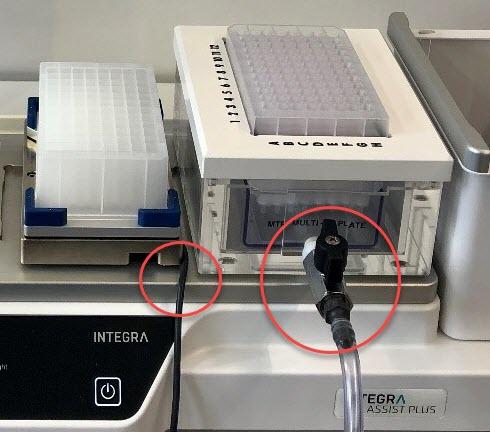
Place the vacuum manifold on the ASSIST PLUS deck next to the waste bin. After adjusting the position of the manifold the first time, its recommended to mark its position on the deck (see example in Figure 2). Thereafter, simply align the vacuum manifold with the marks placed on the ASSIST PLUS.
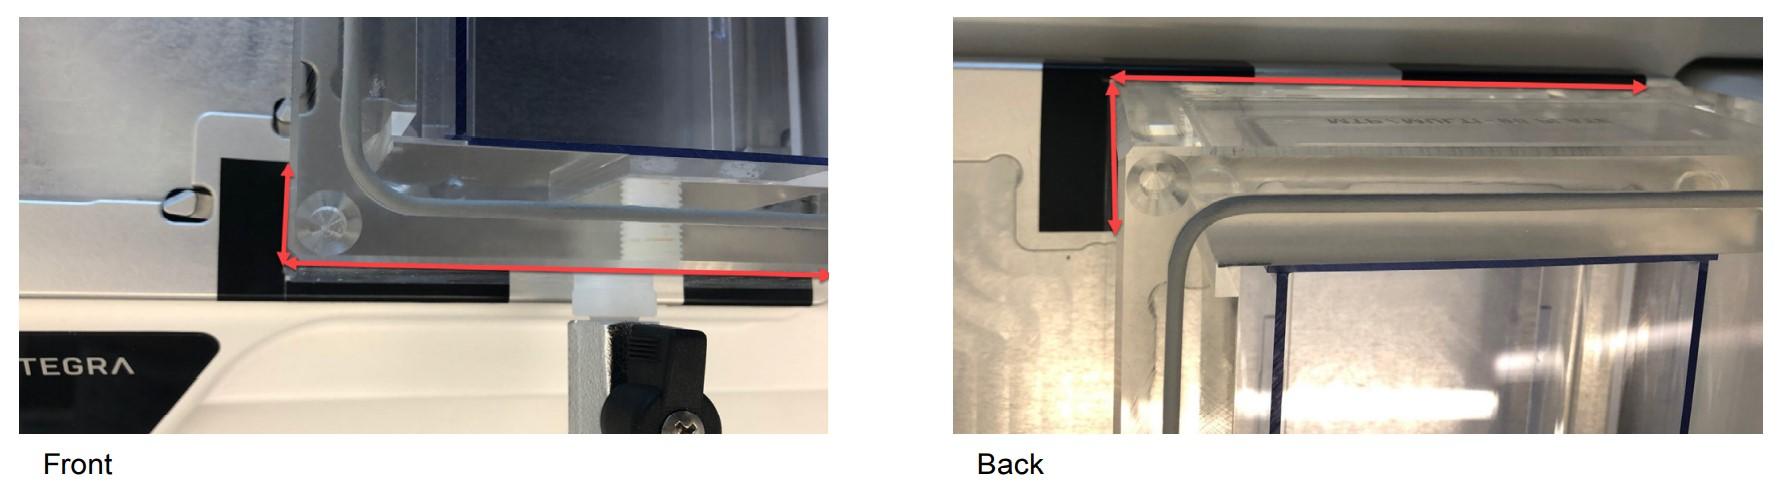
To check the position of the well plate on top of the vacuum manifold, attach the tips to the pipette manually. Use the touch panel keys to move the pipetting arm of the ASSIST PLUS and to control the tip position. First, select ‘ASSIST PLUS’ from the main menu of the pipette followed by ‘VIALAB Programs’ and ‘MN RNA CELL’. After this, go to ‘Height Adjust’, select ‘7 Transfer’ and then choose ‘Height 1/1’ under ‘Target’ using the left arrow. Confirm selection by pressing the start key on the ASSIST PLUS. The ASSIST PLUS then moves to the chosen wells. Check the position of the vacuum manifold. The pipette tips should always be in the middle of the wells. If necessary, manually adjust the position of the vacuum manifold on the deck. Press the ‘back’ button on the pipette to exit the ‘Height adjust’ menu and discard the tips manually. Continue with the protocol set-up.
Ask our expert. Leave a comment!
Write us if you have any questions regarding the application note or one of our instruments.
Any questions? I'm happy to help!
Instruments and accessories
ASSIST PLUS, Pipetting Robot
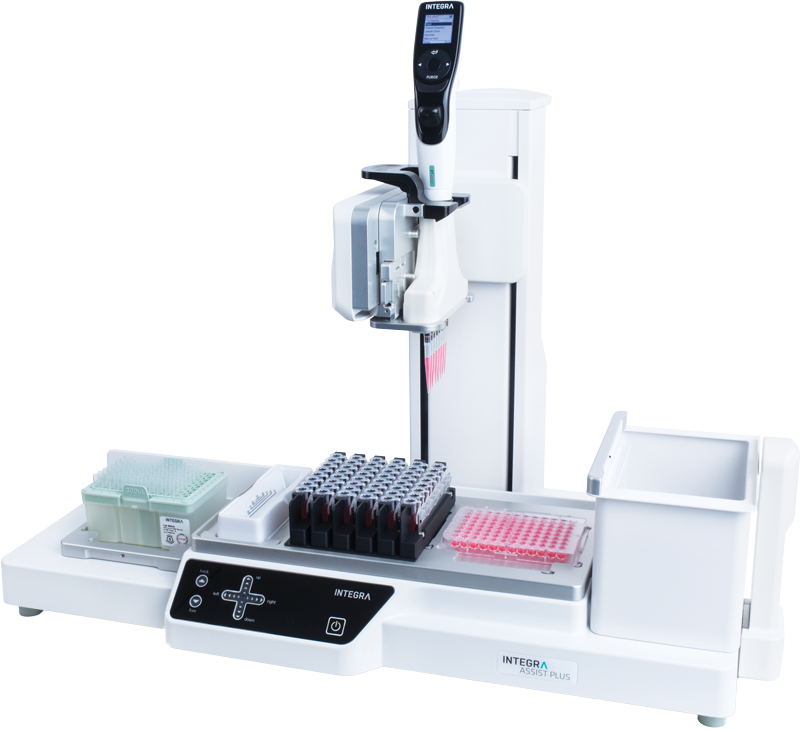
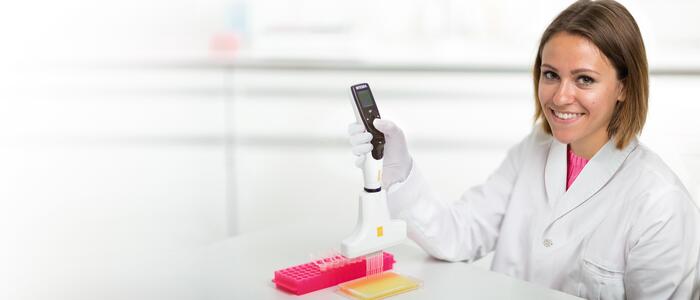
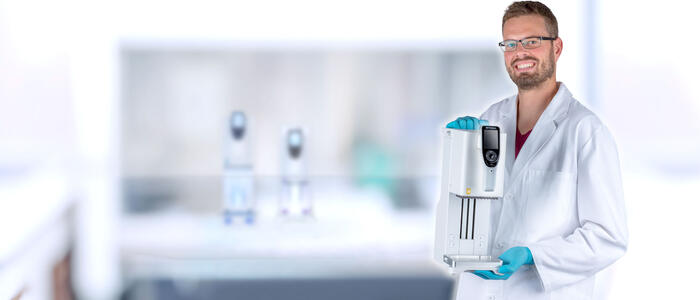
INTEGRA has developed the ASSIST PLUS pipetting robot to streamline routine pipetting tasks at an affordable price. Using INTEGRA electronic multichannel pipettes, the system:
- automates pipetting tasks,
- eliminates physical strain and
- ensures superior reproducibility and
- error free pipetting.
Part No. 4505
Download
Download App Note as PDF
DownloadAutomation of the MACHEREY-NAGEL NucleoSpin® 96 RNA Extraction Kit on the ASSIST PLUS Pipetting Robot
Customer’s voice
Assist Plus is a life saver
"This robot is life saver. We are no longer needed to do much manual pipet during the outbreak season. It is also safe and don't give us contamination from well to well. "
Related products
Applications
Show all-
End-to-end Twist library preparation protocol for NGS workflow automation
-
A simple and streamlined workflow for membrane protein isolation
-
Streamlining single-cell sequencing with the Flex Apex workflow using automated liquid handling solutions
-
Optimizing DNA fragmentation and NGS library preparation with automated liquid handling
Stories
Show all-
 · Company News
Streamlining CRISPR workflows, from editing to analysis
-
 · Customer Testimonial
Enhancing the consistency of ag-tech R&D processes with the ASSIST PLUS pipetting robot
-
 · Product News
Magnetic beads represent a modern approach to gDNA isolation
-
 · Product News
Magnetic beads for NGS size selection and PCR purification