


-
Streamlining single-cell sequencing with the Flex Apex workflow using automated liquid handling solutions
Using the ASSIST PLUS to eliminate manual pipetting in scRNA-seq library preparation for the Flex Apex
Single-cell RNA sequencing (scRNA-seq) has become an essential tool for understanding complex biological systems. The Flex Apex workflow from 10x Genomics offers a comprehensive, scalable solution to measure single-cell gene expression. Flex Apex uses probe-based gene expression profiling to maximize discovery power, providing the resolution needed to uncover rare cell states and drivers of disease across hundreds of samples. However, library preparation workflows can be time consuming when using manual pipetting, which is also prone to variability, highlighting the need for automated liquid handling solutions.
This application guide focuses on the implementation of automated liquid handling solutions using the ASSIST PLUS pipetting robot from INTEGRA Biosciences in the Flex Apex workflow. It includes VIALAB programs for optimization of all workflow steps – from sample preparation to sequencing-ready NGS libraries – for efficient lab automation, streamlined sample processing and reduced hands-on time.
-
Table of contents
Single-cell RNA sequencing (scRNA-seq) has become an essential tool for understanding complex biological systems. The Flex Apex workflow from 10x Genomics offers a comprehensive, scalable solution to measure single-cell gene expression. Flex Apex uses probe-based gene expression profiling to maximize discovery power, providing the resolution needed to uncover rare cell states and drivers of disease across hundreds of samples. However, library preparation workflows can be time consuming when using manual pipetting, which is also prone to variability, highlighting the need for automated liquid handling solutions.
This application guide focuses on the implementation of automated liquid handling solutions using the ASSIST PLUS pipetting robot from INTEGRA Biosciences in the Flex Apex workflow. It includes VIALAB programs for optimization of all workflow steps – from sample preparation to sequencing-ready NGS libraries – for efficient lab automation, streamlined sample processing and reduced hands-on time.
Key benefits
Overview: How to automate the Flex Apex workflow using the ASSIST PLUS pipetting robot
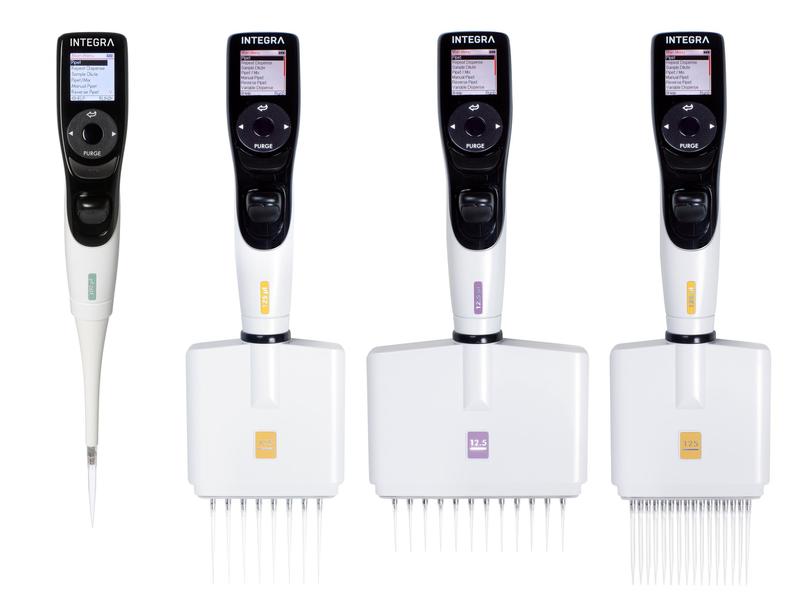
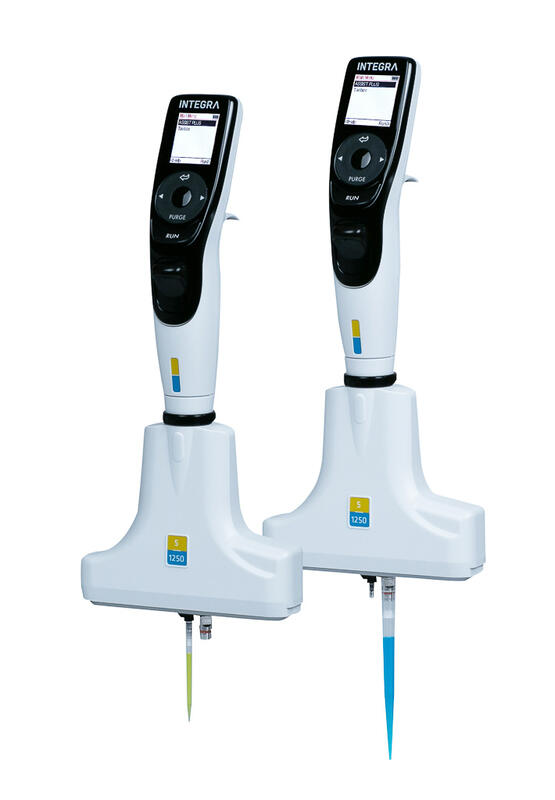
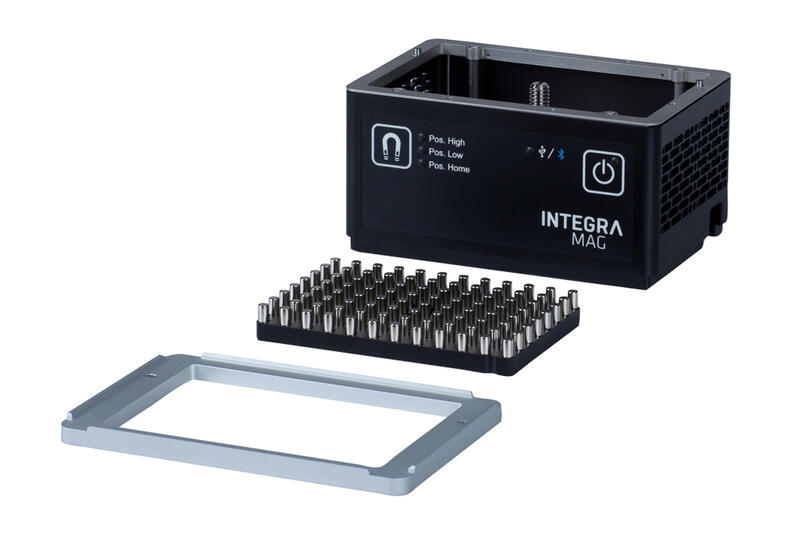
The ASSIST PLUS pipetting robot streamlines the Flex Apex workflow while improving throughput, precision and reliability. This application guide describes pre-programmed VIALAB programs and detailed instructions for each step in the workflow (Figure 1), allowing easy set-up of 96 samples. The modular, flexible ASSIST PLUS has the advantage that it can be used with a 300 µl, 12 channel VIAFLO electronic pipette for sample fixation, probe hybridization, barcoding, pooling and washing, and a 1,250 µl D-ONE pipetting module for normalization, pre-amplification PCR set-up, DNA clean-up and indexing PCR set-up (Figure 1). This flexibility in pipette selection enables users to combine a multichannel approach – for speed and precision – with a single channel option, for when a broad pipetting range is needed. Furthermore, magnetic bead clean-up steps can be automated with the MAG module, a magnetic separation device that uses vertical magnet array movements to enable automated magnetic bead handling, avoiding unnecessary manual interventions.

Downloads: App note and protocols for streamlining single-cell sequencing with the Flex Apex workflow using automated liquid handling solutions
Step-by-step procedure
Sample fixation and preparation
Preserve cellular RNA, and prepare samples for storage and downstream processing.
Sample preparation is dependent on the type of starting material, for example, single-cell or nuclei suspensions, tissues, FFPE samples or blood. For each type of sample preparation protocol, please refer to the manufacturer’s guidance for more information. This section shows how to automate the Plate-based Sample Preparation for GEM-X Flex v2 protocol for fresh cell/nuclei suspensions on the ASSIST PLUS.
Sample preparation consists of 4 steps:
- Sample fixation
- Quenching
- Sample storage (optional)
- Post-storage processing (optional)
Two different ASSIST PLUS deck set-ups are needed.


Sample fixation
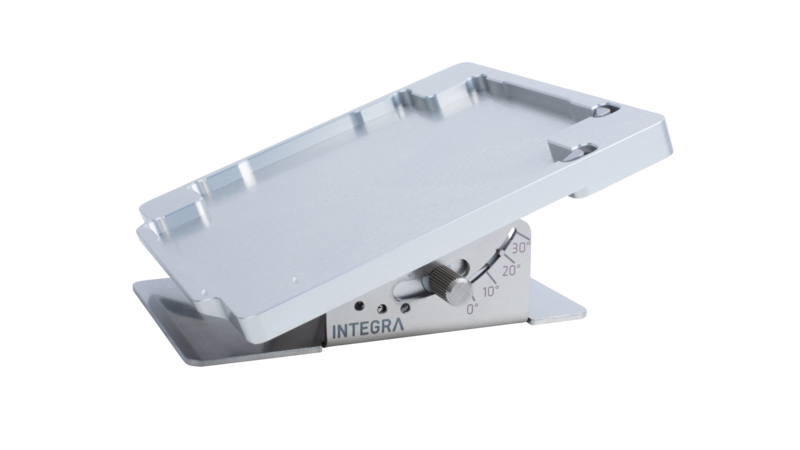
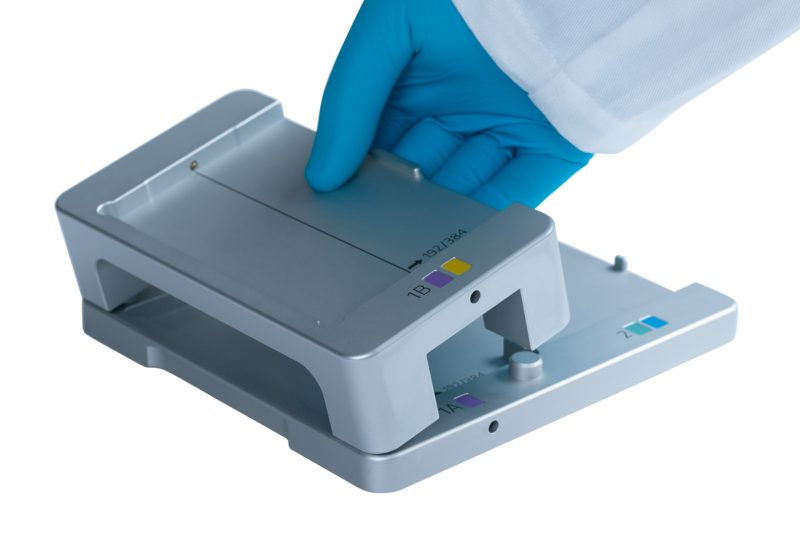
Following the set-up shown in Figure 2, fill reservoir A2 with 10.56 ml of room temperature fixation buffer B, centrifuge the sample plate at 300-400 rcf for 5 min (PBMCs/cell lines) at 4 °C and place it onto the slanted plate holder (20° tilt) in position B. Place an empty 100 ml reservoir in position C. Run program ‘0-1_Fixation_SPH’. After aspiration of the supernatant, remove the slanted plate holder and place the sample plate directly onto deck position B (Figure 3), then resuspend the samples in fixation buffer B. Seal the plate and incubate the samples at 20 °C for 1 h in a thermal cycler.
Quenching
After fixation, the reaction needs to be quenched. For this step, fill reservoir A1 with 21.12 ml of additive C and reservoir A2 with 22 ml of quenching buffer B at 4 °C, keeping the samples from the previous step in position B and the waste reservoir in position C (Figure 3). Keep samples on ice until ready to run program ‘0-2_Additive C_Quench_SPH’. In this program, additive C is added to the samples and mixed, then the plate needs to be sealed for centrifugation. After centrifugation at 850 rcf for 5 min at 4 °C, place the slanted plate holder (20° tilt) back on position B and place the centrifuged sample plate on it (Figure 2). Next, the ASSIST PLUS removes the supernatant and resuspends the samples in the chilled quenching buffer B.
Long-term storage (optional)
After quenching, the samples can either be stored for up to 12 months or used immediately for probe hybridization. Please refer to the manufacturer’s protocol Fixation of Cells & Nuclei for GEM-X Flex Gene Expression for more information about long-term storage.
For long-term storage, fill reservoir A1 with 3 ml of thawed, pre-warmed enhancer (10x Genomics, #2000482) and reservoir A2 with 6 ml of 50 % glycerol, then place the samples from the previous step directly onto position B without the slanted plate holder. position C is not required in this program; the waste reservoir from the previous step can be left in place or removed. (Figure 3). Run program ‘0-3_Storage’. This program adds enhancer and glycerol to the samples, with gentle mixing. After sealing the plate, the samples are now ready for storage at -80 °C.
Post-storage processing (optional)
Samples that have been stored frozen need to be thawed, processed and optionally normalized prior to use in the Flex Apex workflow. Please refer to the manufacturer’s protocol Fixation of Cells & Nuclei for GEM-X Flex Gene Expression for more information processing samples after long-term storage.
Fill reservoir A1 with 22 ml of quenching buffer B, place samples that have been thawed at room temperature and centrifuged onto position B and a 100 ml reservoir for waste collection onto position C (Figure 3). Keep samples on ice until ready to run program ‘0-4_Post Storage Processing SPH’. This program removes supernatant from the centrifuged samples and resuspends them in quenching buffer B, restoring the samples to a post-quenching, pre-storage state. It is recommended that normalized samples are used for hybridization, to ensure equal representation of each sample in the final pool. This can be achieved using the ASSIST PLUS set-up shown in Figure 3, exchanging the 12 channel VIAFLO pipette for a D-ONE pipetting module. Run the program ‘0-5_Residual Sample Normalization_SPH’, described in detail in the ASSIST PLUS Flex Apex user guide.
Sample normalization and probe hybridization
Tag the transcriptome using whole transcriptome probe pairs.
During hybridization, whole transcriptome probe pairs – each consisting of a left-hand side (LHS) and a right-hand side (RHS) targeting a specific gene – are added to the fixed and normalized samples. The probe pairs hybridize to their complementary target RNA during an overnight incubation.
This step consists of two stages:
- Normalization
- Probe hybridization
Normalization
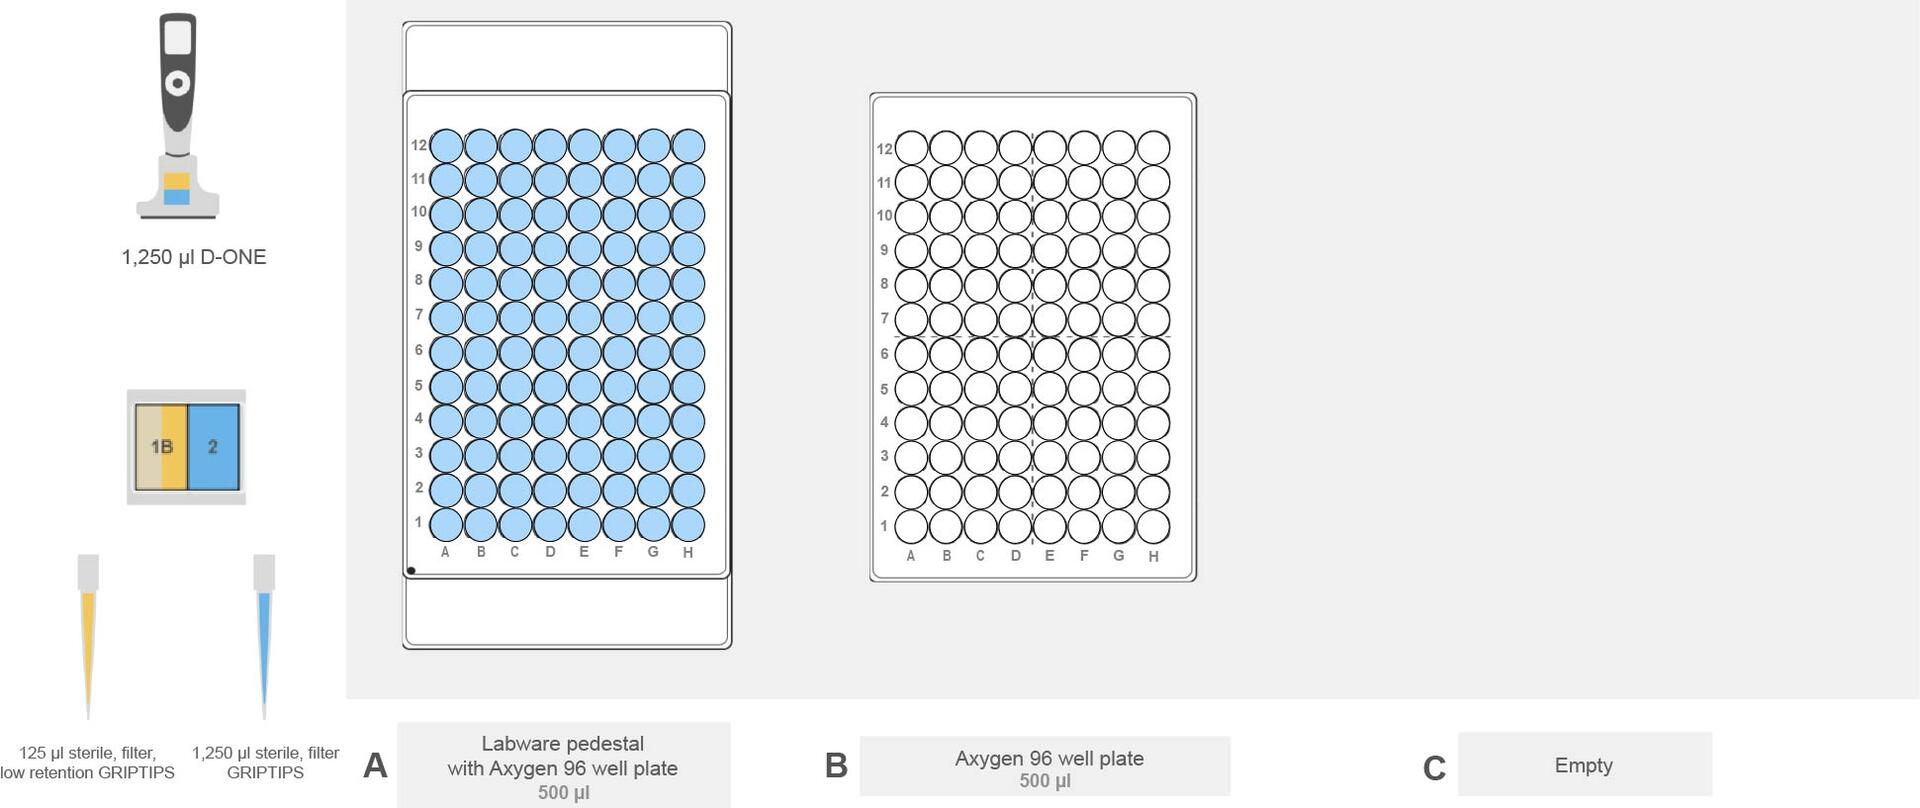
It is recommended that normalized samples are used for hybridization, to ensure equal representation of each sample in the final pool. Normalization can be performed at this stage using the ASSIST PLUS and the D-ONE pipetting module with the program ‘1-1_Normalization’ (Figure 4), described in detail in the ASSIST PLUS Flex Apex user guide, if it was not done during sample preparation.
Probe hybridization
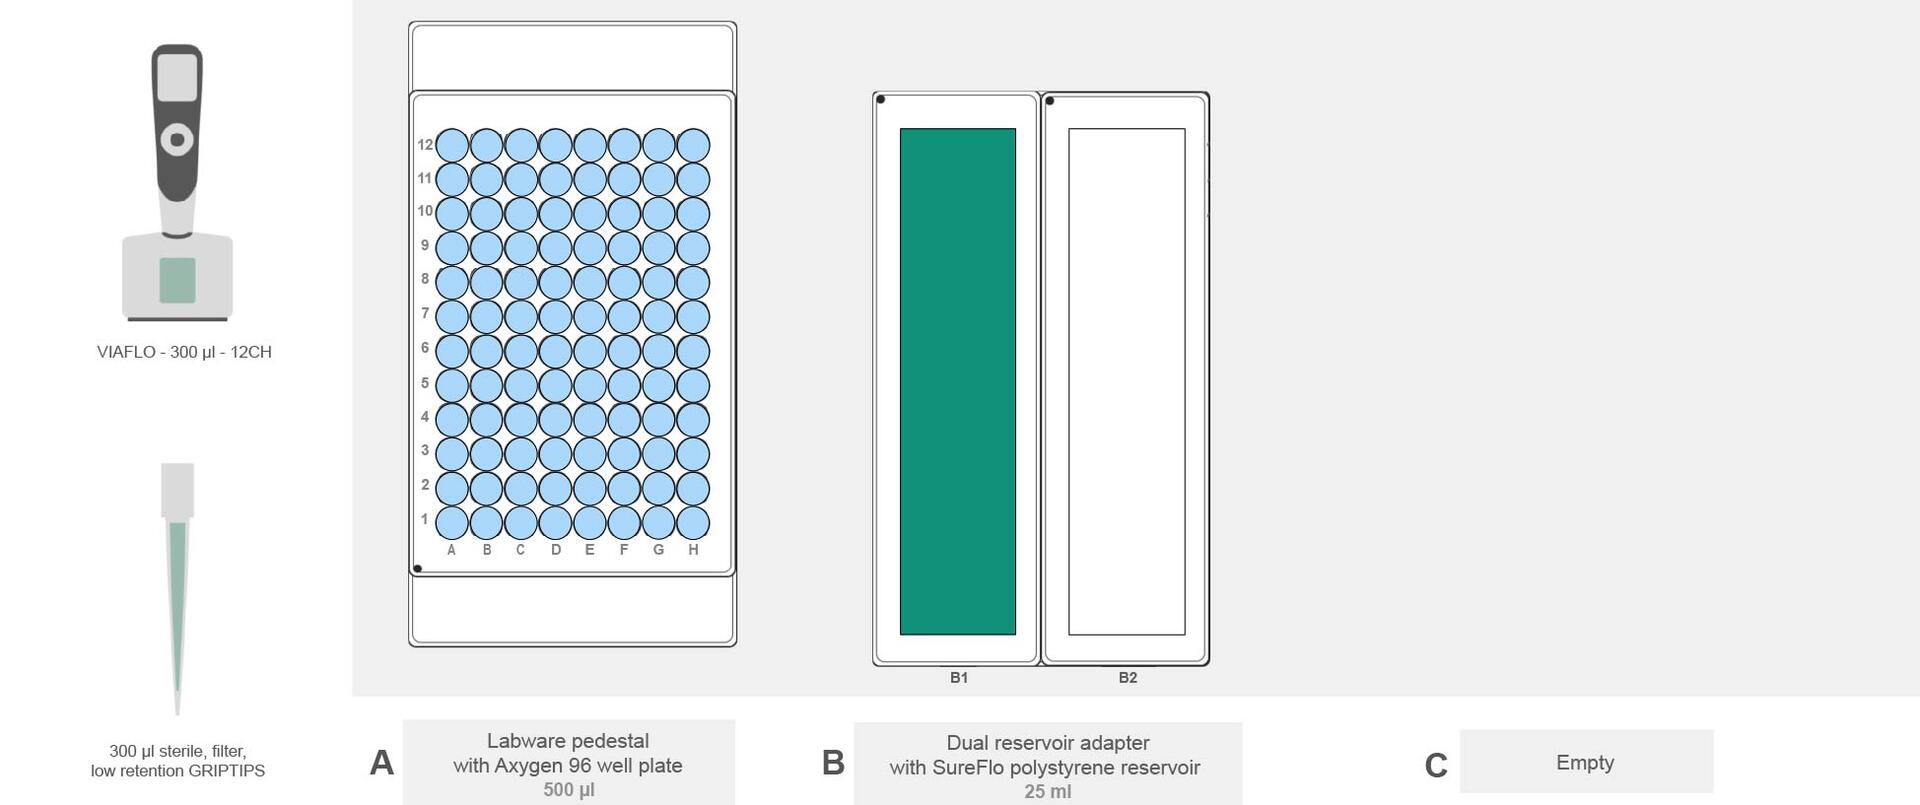
The normalized samples are centrifuged at 850 rcf for 5 min at 4 °C, ready to be used for probe hybridization. Exchange the D-ONE pipetting module with the 12 channel VIAFLO pipette. Fill reservoir B1 with 5.28 ml of manually prepared hybridization mix, pre-warmed to 42 °C, and place the sample plate on position A. Reservoir B2 will be used for waste collection (Figure 5). Run program ‘1-2_Probe Hybridization’ to remove supernatant from the samples and resuspend them in the hybridization mix. Seal the plate and incubate at 42 °C for 16-24 h.
Post-hybridization washing and barcoding
Wash samples after probe hybridization and hybridize barcode oligos.
A post-hybridization washing step is performed after overnight probe hybridization to remove excess unbound probes. This ensures that subsequently introduced barcoding oligos – comprising a partial capture sequence, a sample barcode and a partial constant sequence – hybridize specifically to probe-target complexes, enabling accurate sample multiplexing while minimizing off-target interactions.
This step consists of two stages:
- Post-hybridization washing
- Barcode oligo hybridization
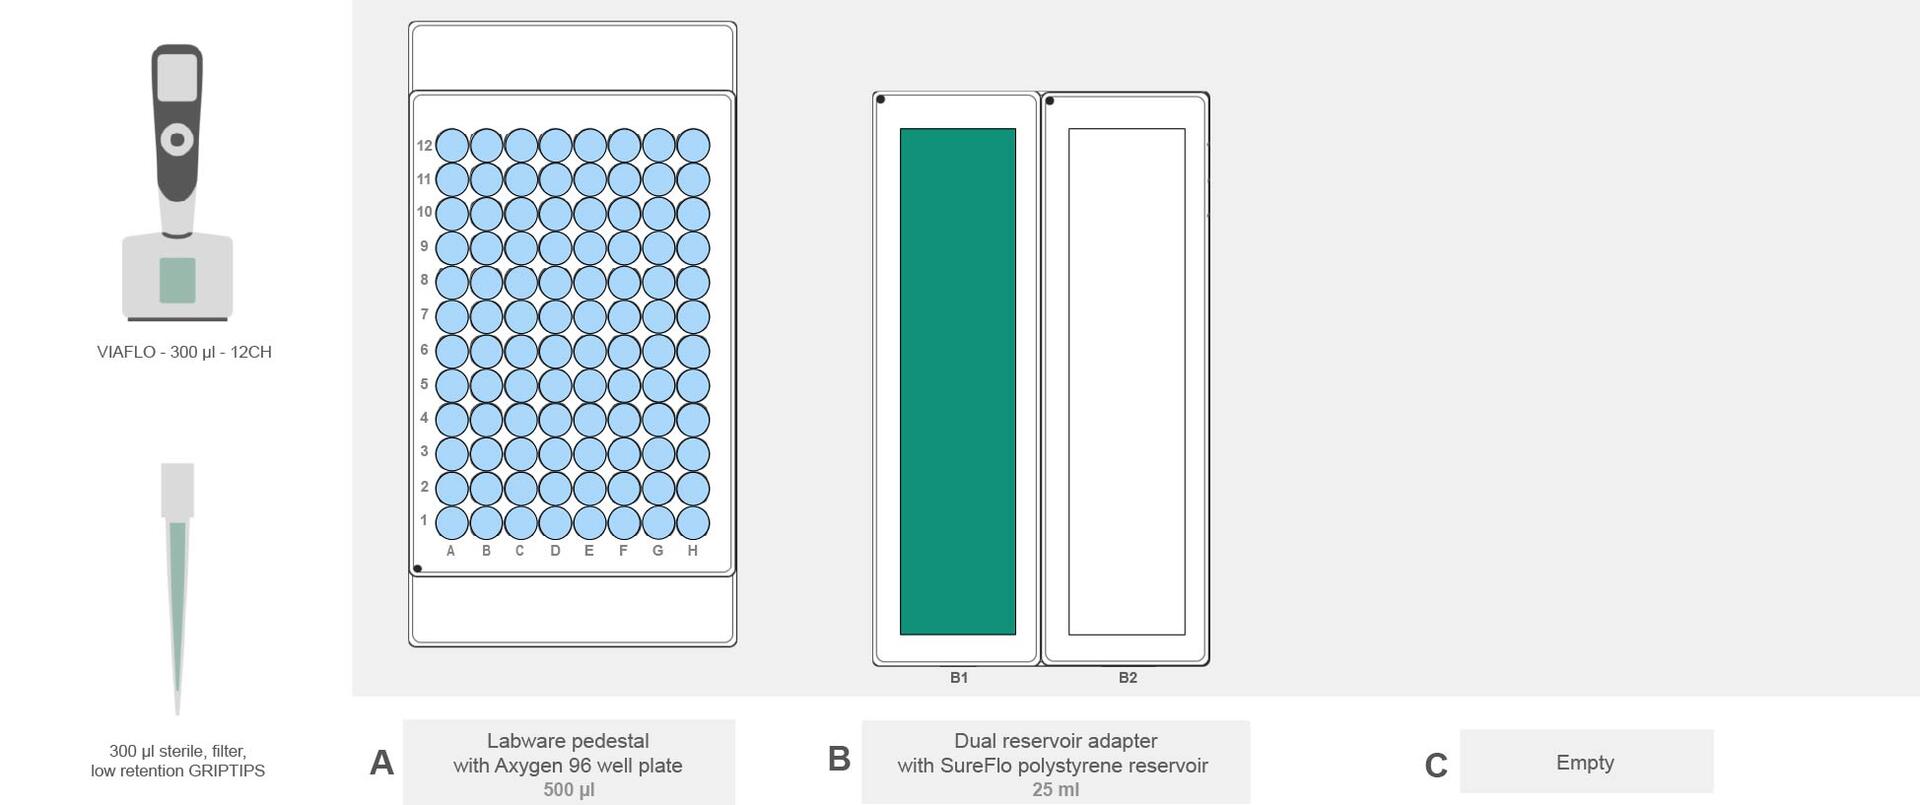
The ASSIST PLUS labware set-up for these stages is shown in Figure 6.
Post-hybridization washing
Place the sample plate in position A and fill reservoir B1 with 21 ml manually prepared post-hybridization wash buffer B at room temperature. Reservoir B2 will be used for waste collection (Figure 6). Run program ‘2-1_Post Hyb Wash’. This program adds the post-hybridization wash buffer B and mixes the samples. Seal the plate and centrifuge.
Barcode oligo hybridization
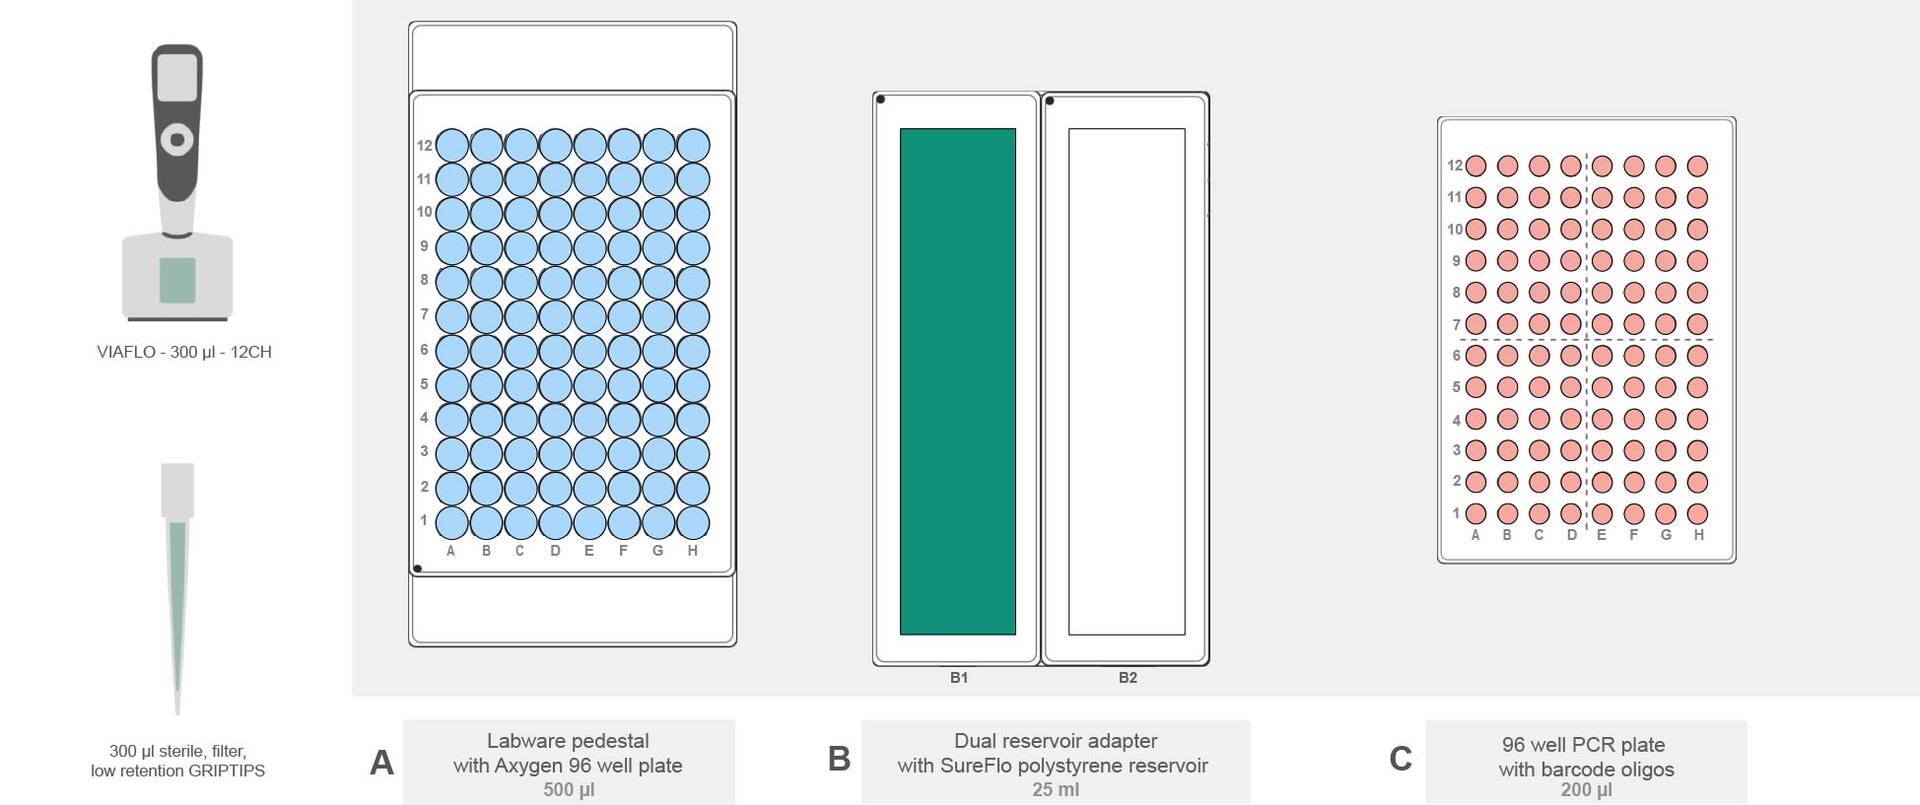
The barcode oligo hybridization mix is added after centrifugation of the samples. For this step, place the sample plate in position A, 4.25 ml of manually prepared oligo hybridization mix in reservoir B1 and a 96 well plate containing the barcode oligos in position C. Reservoir B2 is used for waste collection (Figure 7). Run program ‘2-2_Barcoding’ to remove the supernatant from the samples and resuspend them in oligo hybridization mix to transfer the barcode oligos to the samples. Seal the plate and incubate for 2 h at 42 °C.
Pooled washing
Wash and pool samples after barcode hybridization.
Samples hybridized with unique sample barcodes can be cleaned up following the Individual Wash workflow, where samples are washed individually and pooled once washing is complete. Alternatively, the samples can be pooled immediately after hybridization, and washed as a pool. The Pooled Wash workflow is combined into one program and described below.
The ASSIST PLUS labware set-up for this step is shown in Figure 8.
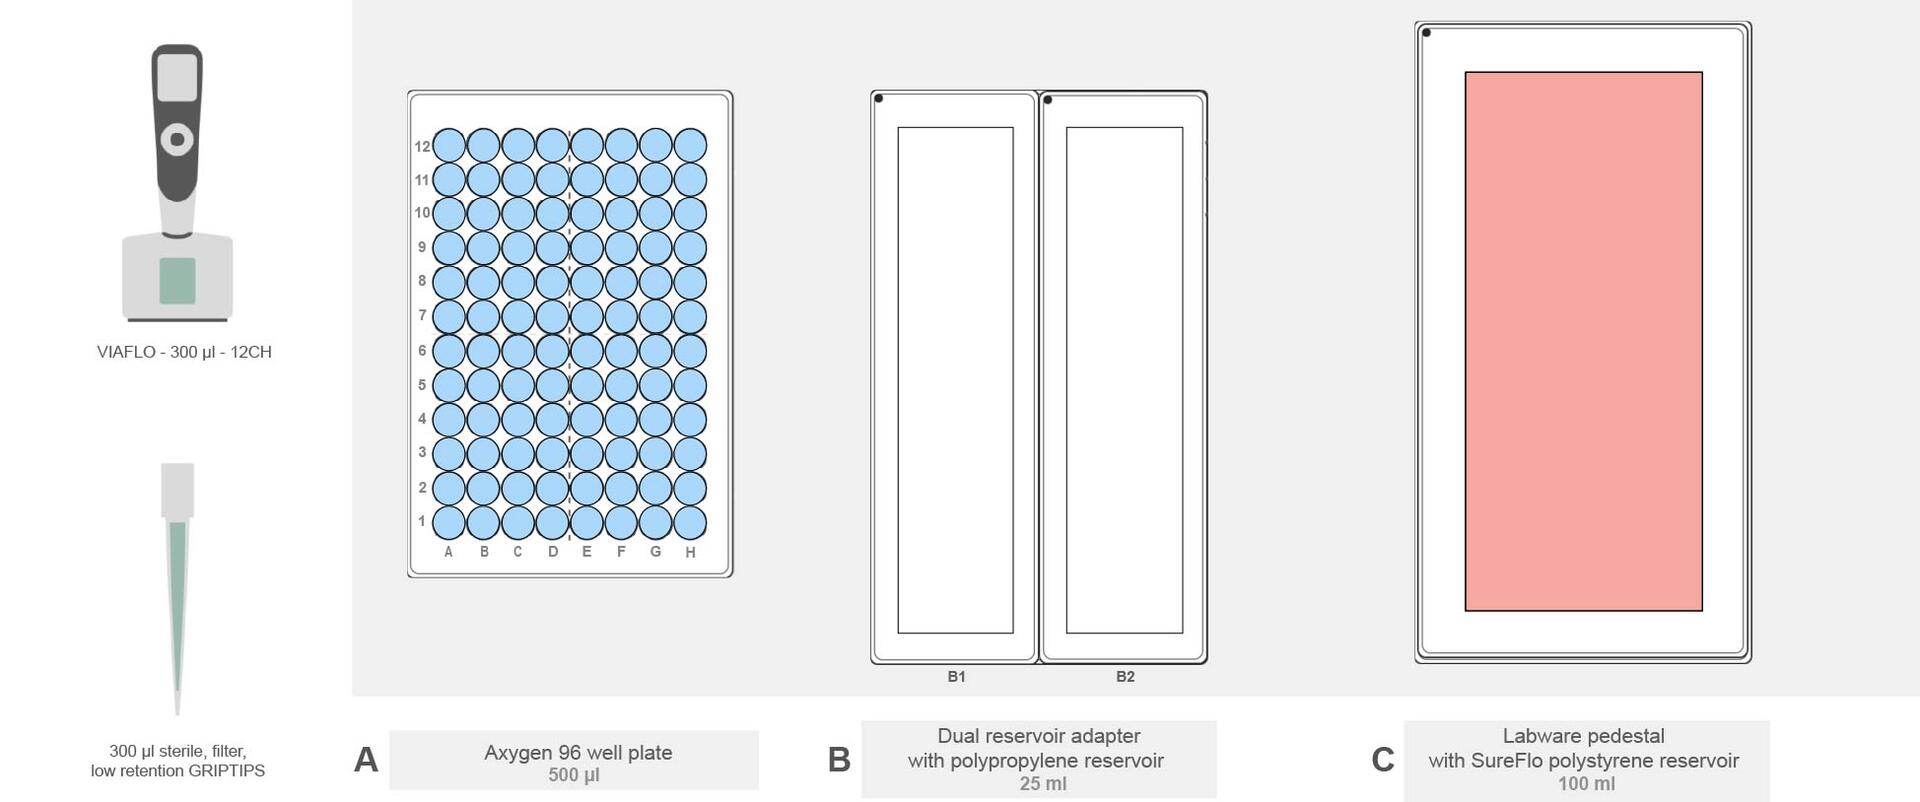
Place the sample plate in position A. Reservoir B2 will be used for collection of the pooled libraries. Fill reservoir C1 with 35 ml manually prepared post-hybridization wash buffer B at room temperature. Off deck, prepare a 50 ml centrifuge tube with 9.6 ml (100 µl per sample) post-hybridization wash buffer B (Figure 8). Run program ‘3-0_Pre-Wash Cooling’. This program pools samples and subsequently performs an additional wash of the sample wells to ensure complete collection of each sample. 150 µl of post-hybridization wash buffer B is added to each sample and pooled in reservoir B2. Manually transfer the samples to a 50 ml centrifuge tube after mixing. The sample plate is washed again with 200 µl of post-hybridization wash buffer B, pooled in reservoir B2, mixed and manually transferred to the pooled samples in the 50 ml centrifuge tube. The pooled samples are then centrifuged, and the supernatant is removed manually according to the manufacturer’s protocol, GEM-X Flex Apex v2 user guide, provided in the downloads.
Gel bead-in-emulsion (GEM) generation
Generate GEMs.
This step is performed off deck using a Chromium X/iX instrument (10x Genomics) according to the manufacturer’s protocol, GEM-X Flex Apex v2 user guide, provided in the downloads.
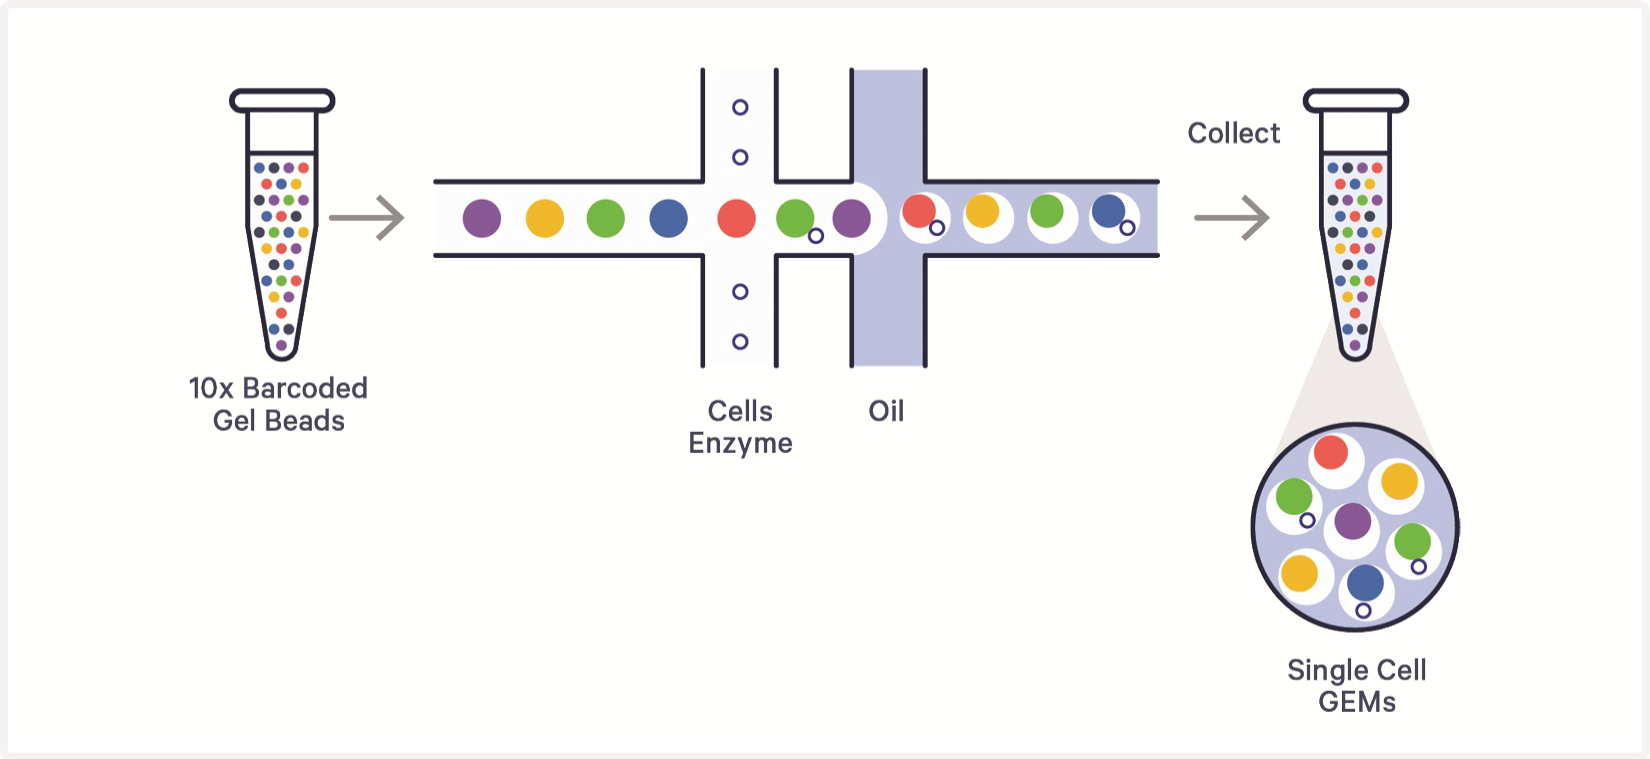
After pooling and washing, samples are diluted according to the protocol, and combined with barcoded gel beads, enzymes and oil on a GEM-X Chip. These components are partitioned into oil-emulsified droplets – ideally containing a single gel bead and a single cell or nucleus – within the Chromium X/iX (Figure 9). Following GEM generation, the gel beads are dissolved, cells are lysed and barcoded primers are released into the droplets. Subsequent enzymatic reactions, including ligation, hybridization, PCR and heat inactivation, result in a non-amplified library ready for downstream processing.
GEM recovery and pre-amplification PCR
Recover GEMs and prepare the libraries for pre-amplification PCR.
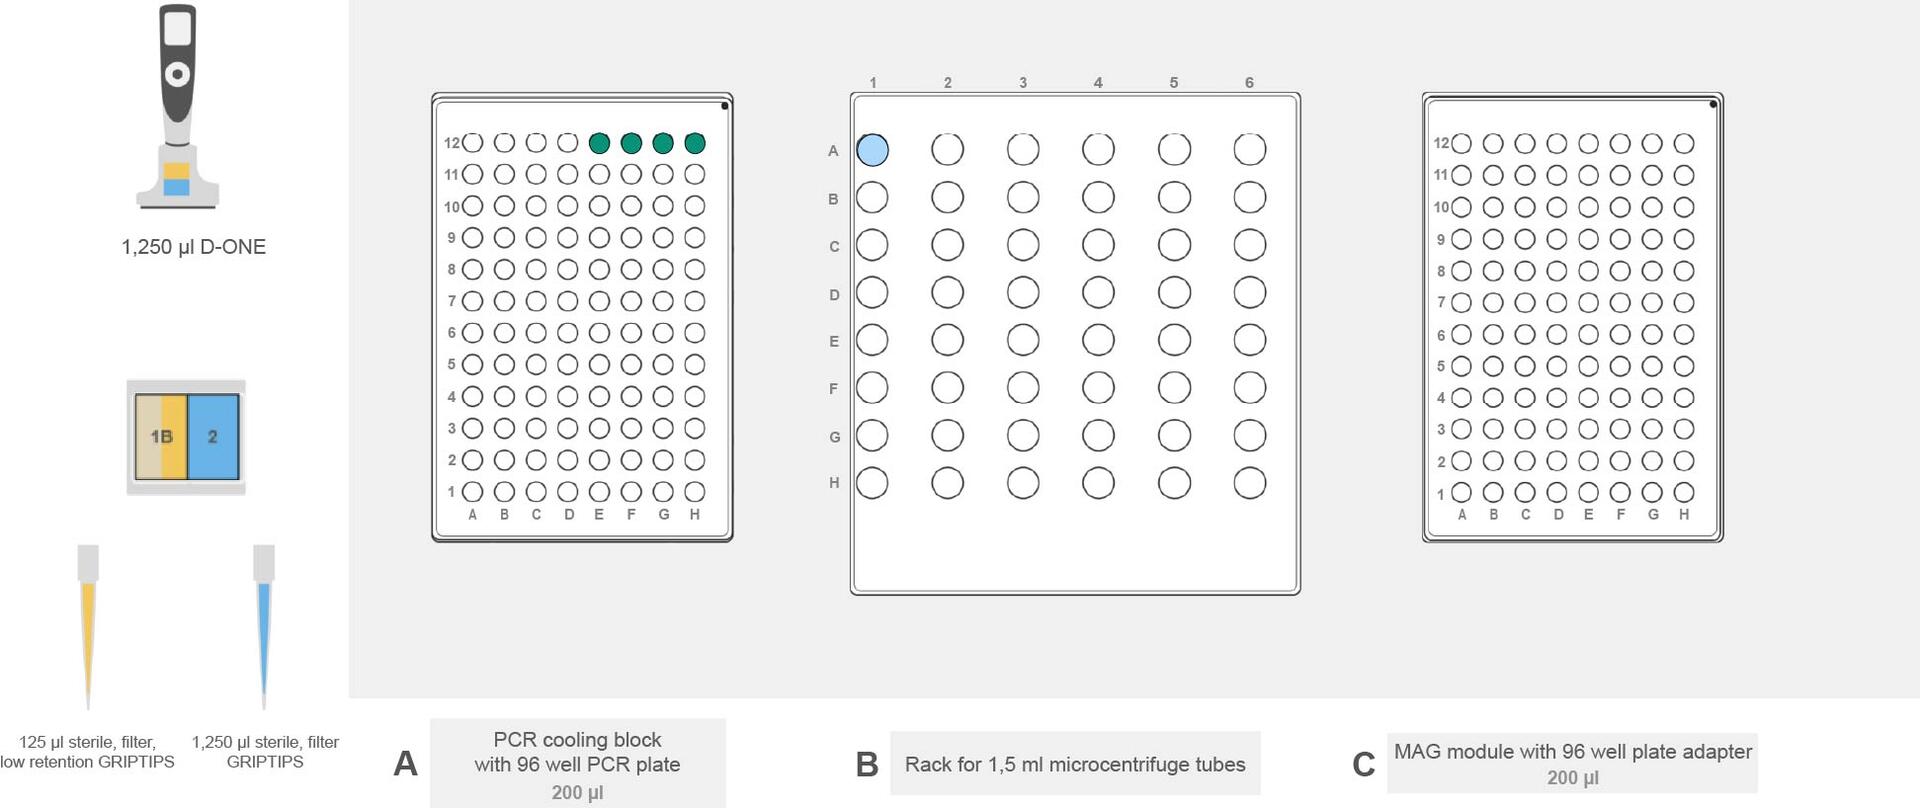
GEM recovery is performed manually according to the manufacturer’s protocol. After GEM recovery, the libraries are pre-amplified using PCR. Set up the ASSIST PLUS deck according to Figure 10. Add one strip of 8 PCR tubes in row 12 of the PCR cooling block on deck position A with samples (split pools) in wells E12-H12. Load the manually prepared pre-amplification mix into a 1.5 ml microcentrifuge tube in position A1 of the 1.5 ml tube rack on deck position B. Deck position C is not used in this step, but a MAG module with a 96 well PCR plate adapter can be placed in this position in preparation for the steps that follow (Figure 10). Run program ‘5-2_Pre-Amplification’ on the D-ONE pipetting module. This program distributes the pre-amplification mix to the samples. After the program is finished, close the tubes and mix the samples again by inverting the strip eight times followed by a quick centrifugation. Transfer the sample tubes to a thermal cycler and run the appropriate 8-cycle PCR program according to the manufacturer’s protocol, GEM-X Flex Apex v2 user guide, provided in the downloads.
DNA clean-up
Clean up your library after pre-amplification.
A magnetic bead-based clean-up is performed after pre-amplification PCR to remove excess primers, nucleotides, enzymes and other reaction components. This ensures efficient and specific downstream library preparation.
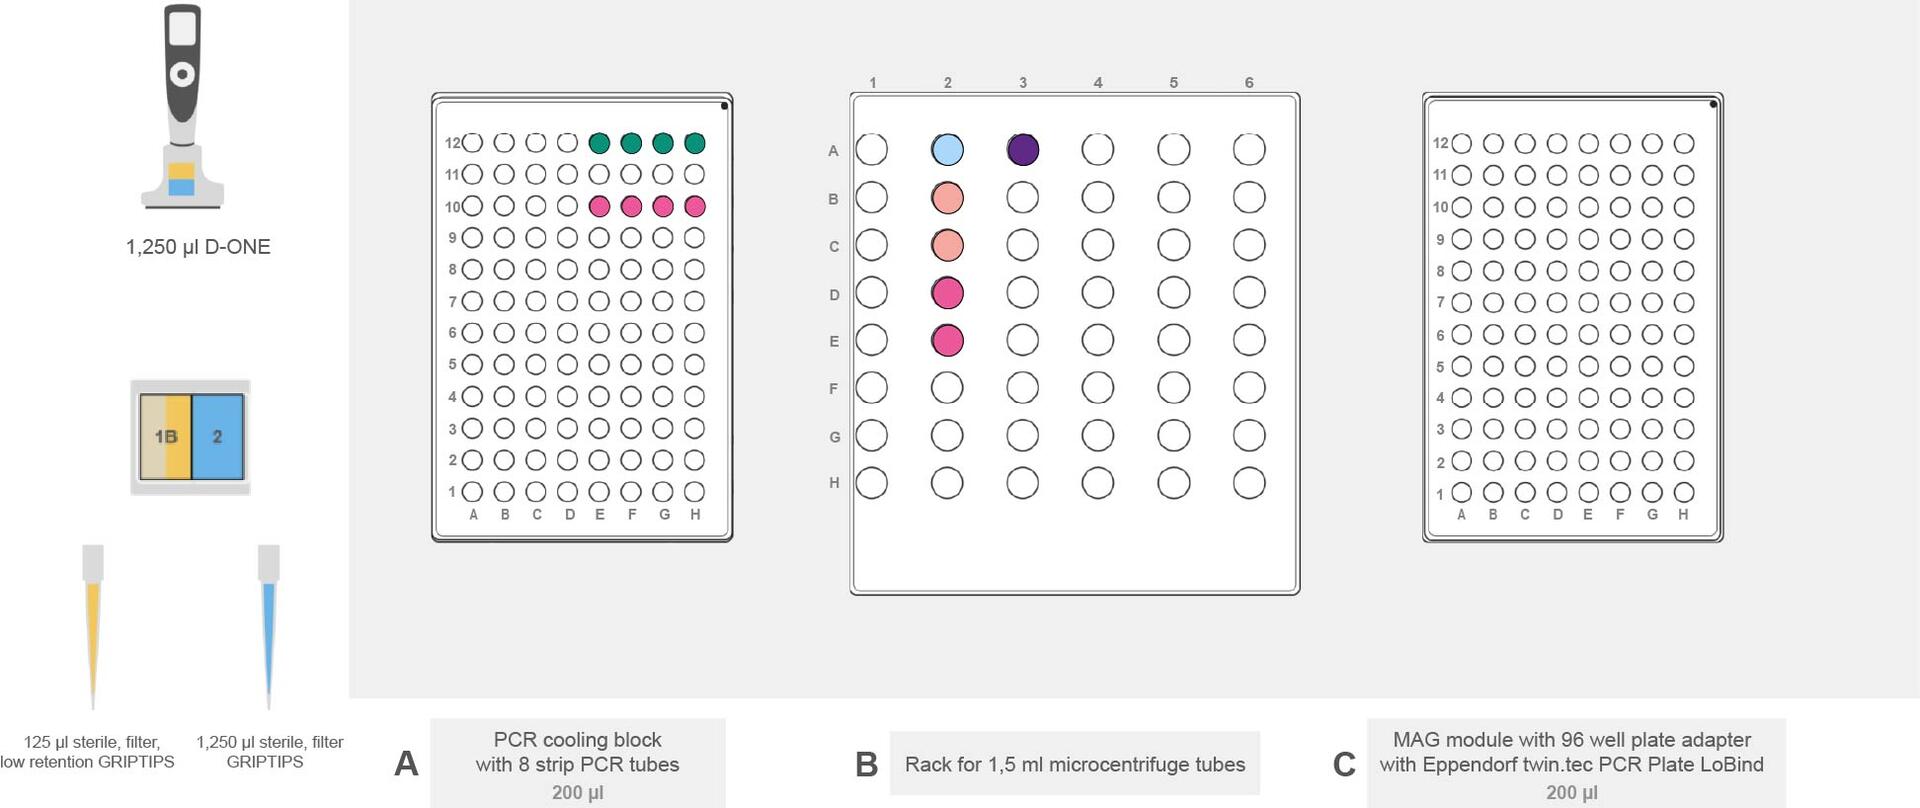
Centrifuge the sample PCR strip for 30 seconds in a microcentrifuge to separate the samples from the recovery agent. Manually transfer 70 µl into fresh tubes and place them in row 12 of the PCR cooling block on deck position A, with the samples in wells E12-H12. Place a fresh strip of PCR tubes in row 10, for post clean-up collection. On deck position B, place a 1.5 ml microcentrifuge tube with 560 µl of SPRIselect magnetic beads in position A2, ensuring that the magnetic beads are well homogenized by vortexing prior to transfer to the tube. Place two fresh 1.5 ml microcentrifuge tubes filled with 1 ml of 80 % ethanol in positions B2 and C2, and two empty tubes for waste collection in positions D2 and E2. Finally, manually prepare 600 µl elution buffer according to the manufacturer’s protocol, GEM-X Flex Apex v2 user guide, provided in the downloads, and place it in a 1.5 ml microcentrifuge tube in position A3. Place a fresh Eppendorf twin.tec® PCR Plate LoBind® on the MAG module with a 96 well PCR plate adapter in position C (Figure 11). Follow the instructions given in the ASSIST PLUS Flex Apex user guide to set up the DNA Clean-up Worklist.csv file, available in the downloads. Run program ‘5-3_DNA Cleanup’ on the D-ONE pipetting module. This program transfers the libraries to the plate on the MAG module, adds magnetic beads to the samples and washes them with 80 % ethanol, then elutes the libraries from the beads and transfers them to clean tubes in row 10 of deck position A.
Indexing PCR and final size selection
Prepare the libraries for indexing PCR and final size selection.
Indexing PCR introduces sequencing adapters and sample-specific indices to the library fragments, enabling downstream multiplexed sequencing. Subsequent magnetic bead-based size selection removes excess primers, adapter dimers, enzymes and nucleotides, while enriching for correctly constructed library molecules.
This step consists of two stages:
- Sample indexing PCR
- Library size selection
Sample indexing PCR
Place the sample PCR strip tubes in row 12 of the PCR cooling block on deck position A. Place a fresh strip of PCR tubes in row 10 of deck position A. These tubes will contain the final mix for indexing PCR. On deck position B, place a 1.5 ml microcentrifuge tube with manually prepared sample index PCR mix in position A2. Place the 96 well plate containing indexing primers on the MAG module in position C (Figure 12). Follow the instructions given in the ASSIST PLUS Flex Apex user guide to set up the Indexing PCR Worklist.csv file, available in the downloads. Run program ‘6-1_Sample Index PCR’ on the D-ONE pipetting module. This program distributes the sample indexing mix and the indexing primers to the fresh tubes provided in deck position A, row 10. Finally, a portion of the sample is added to the reaction. The remaining sample can be stored at -80 °C. The strip tubes containing the reactions are transferred to a thermal cycler and the appropriate PCR cycle program run.
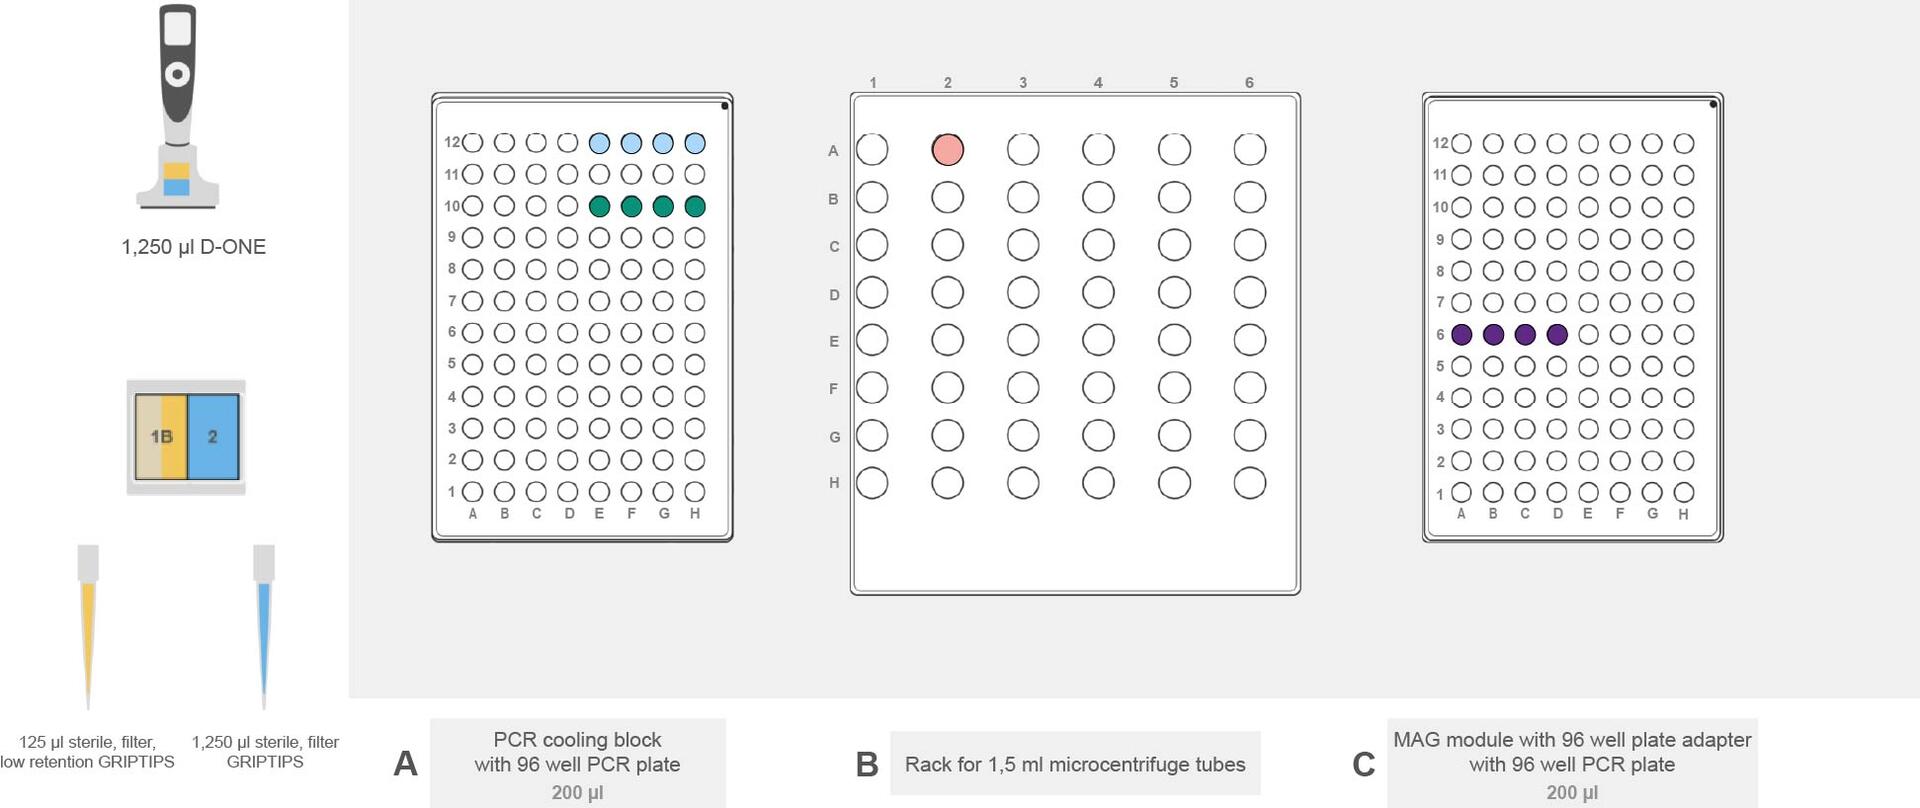
Library size selection
Place the indexed libraries in row 12 of the PCR cooling block on deck position A. Place a fresh strip of PCR tubes in row 10 on position A, for post size selection collection. On deck position B, place a 1.5 ml microcentrifuge tube with 450 µl of SPRIselect magnetic beads in position A2, 1 ml of 80 % ethanol in positions B2 and C2, empty tubes for waste collection in positions D2 and E2, and 450 µl of elution buffer in position A3. Place a fresh 96 well PCR plate on the MAG module with a 96 well PCR plate adapter in position C (Figure 13). Follow the instructions given in the ASSIST PLUS Flex Apex user guide to set up the Library Size Selection Worklist.csv file, available in the downloads. Run program ‘6-2_Library size selection’ on the D-ONE pipetting module. This program transfers the libraries onto the MAG module, adds magnetic beads to the samples and washes them with 80 % ethanol, then elutes the libraries from the beads and transfers them to clean tubes in row 10 on deck position A. Your libraries are now ready for sequencing.
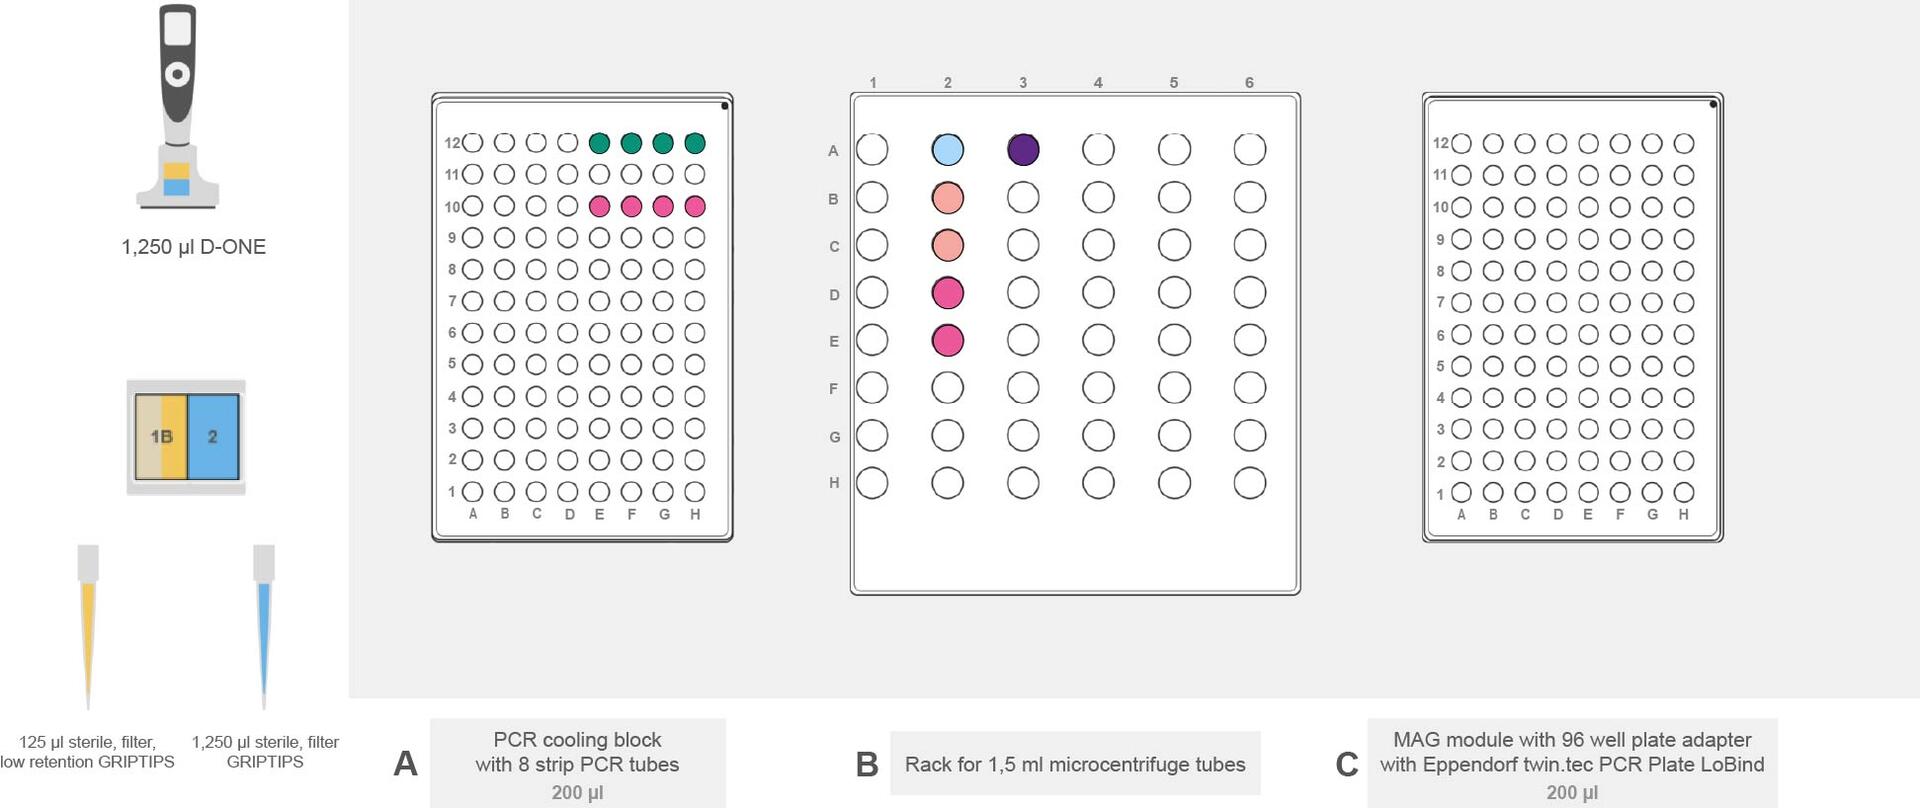
Remarks
- VIALAB software: The 96 sample Flex Apex workflow detailed above is supported by ready-to-use VIALAB programs that can be adapted to specific pipettes, labware and protocols. Template programs for 48 samples are also provided, enabling flexible adjustment of sample numbers.
- Program validation: All 96 sample programs have been user validated, except for ‘6-1_Sample Index PCR’ and ‘6-2_Library size selection’. These programs are intended as skeleton programs to provide a base for user optimization.
Conclusion
Ask our expert. Leave a comment!
Write us if you have any questions regarding the application note or one of our instruments.
N'hésitez pas à me contacter si vous avez des questions !
Used instruments and accessories
ASSIST PLUS, Pipetting Robot
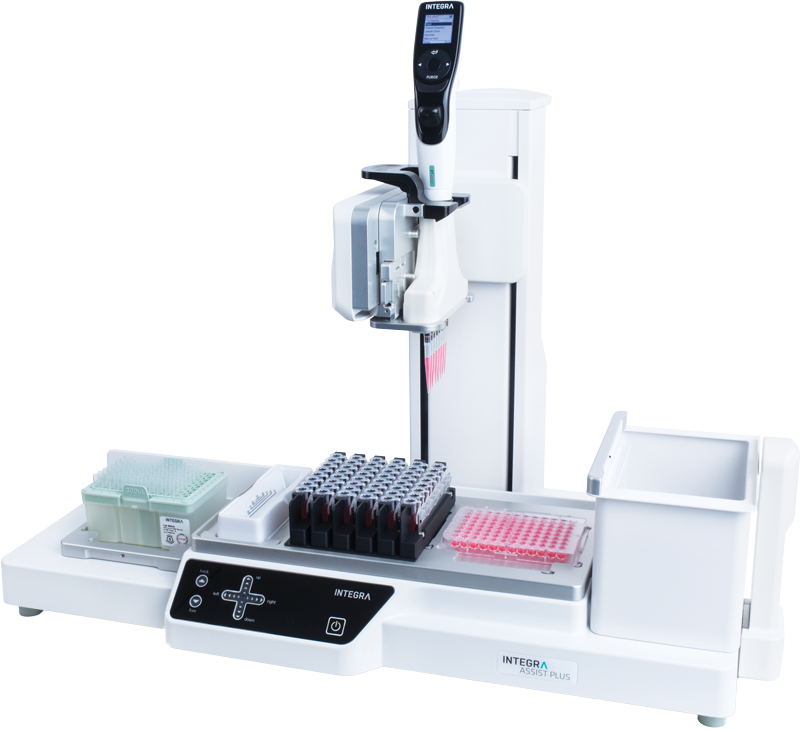
INTEGRA has developed the ASSIST PLUS pipetting robot to streamline routine pipetting tasks at an affordable price. Using INTEGRA electronic multichannel pipettes, the system:
- automates pipetting tasks,
- eliminates physical strain and
- ensures superior reproducibility and
- error free pipetting.
Part No. 4505
Downloads
Download App Note as PDF
TéléchargementStreamlining single-cell sequencing with the Flex Apex workflow using automated liquid handling solutions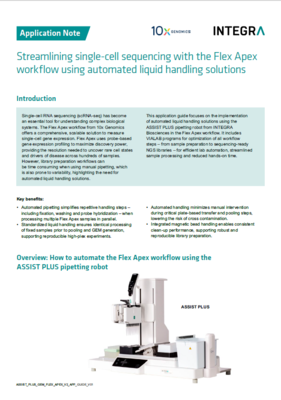
Customer’s voice
Manually spotting MALDI plates can be very time consuming and prone to error or contamination when done in large quantities. The Assist Plus cuts down the time from hours and possible errors to under 30 min without any risk of errors from manual pipetting. The Assist Plus is also super flexible which is important in my lab where I run many different types of protocols and need something affordable that is also highly flexible.
Related products
Applications
Montrer tout-
End-to-end Twist library preparation protocol for NGS workflow automation
-
Optimizing DNA fragmentation and NGS library preparation with automated liquid handling
-
A simple and streamlined workflow for membrane protein isolation
-
Automating media exchange and sample collection using Ronawk’s Bio-Blocks® In Similare technology and the ASSIST PLUS
Nos articles
Montrer tout-
 · Actualités Produits
Magnetic beads represent a modern approach to gDNA isolation
-
 · Actualités Produits
Magnetic beads for NGS size selection and PCR purification
-
 · Témoignage Client
Améliorer la cohérence des processus de R&D dans le domaine de l’agrotechnologie avec le robot de pipetage ASSIST PLUS
-
 · Témoignage Client
Générer les plus grands ensembles de données scRNA-seq au monde grâce au pipetage automatisé