How to use a biosafety cabinet
Written by Jan-Peter Baldin
28. April 2021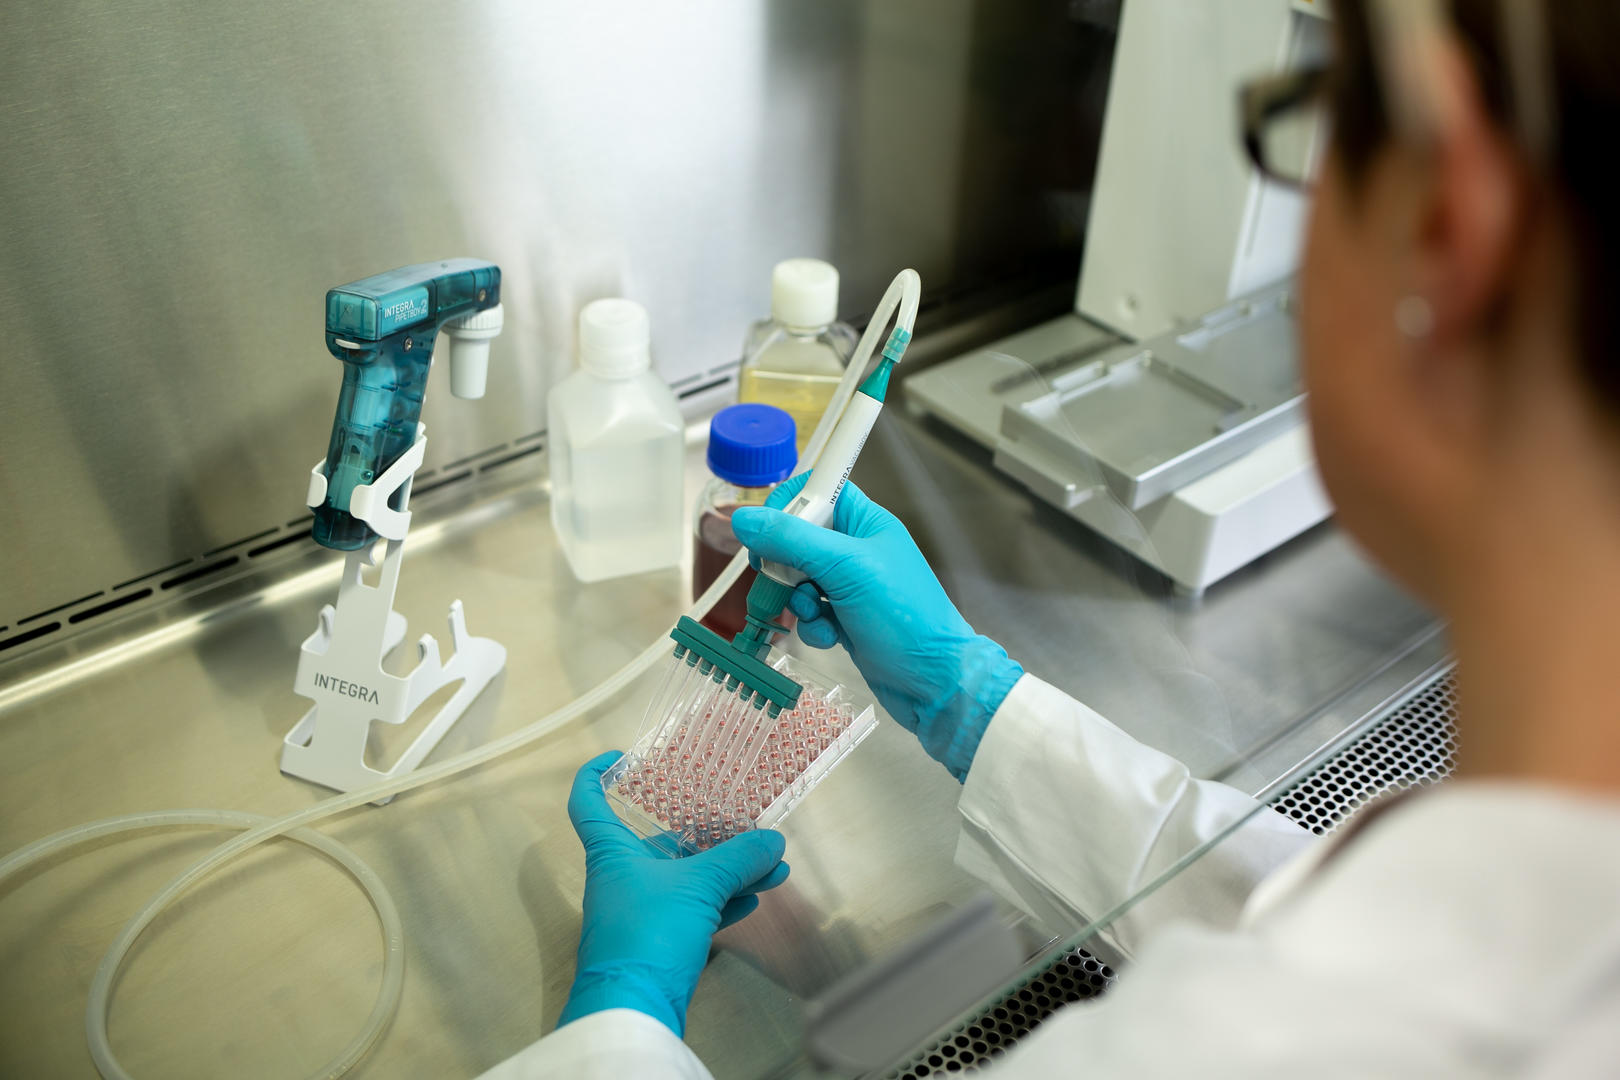
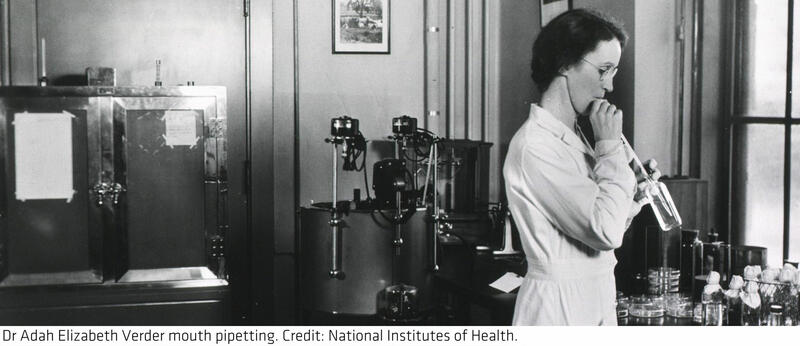
More than 2,000 years ago, Hippocrates noted that “there are many handicrafts and arts which cause those who exercise them certain pains and plagues”.1 He was probably thinking of miners rather than lab personnel, but recent statistics show that, even today, the risk of contracting certain infectious diseases is much higher in laboratories than elsewhere. Among lab technicians, for example, the incidence of brucellosis (a zoonotic infection caused by Brucella spp.) is about 8,000 times higher than in the general population (641 cases per 100,000, compared to 0.08 per 100,000).2 Various safety measures have been developed to protect lab staff, including the use of biosafety cabinets (BSCs). However, like most safety equipment, a BSC is only safe if it’s used correctly. Read the tips below to learn what to keep an eye on before, during and after your experiment to keep yourself and others safe.
Table of contents
1 What is a biosafety cabinet?
Biosafety cabinet (BSC)
Biosafety cabinets (or biological safety cabinets) are enclosed, ventilated workspaces under negative pressure, equipped with high efficiency particulate air (HEPA) filters. They are used in laboratories working with biologically hazardous materials to protect personnel, the environment and – depending on the type of biosafety cabinet – the products in the cabinet from aerosols and contamination.
2 Before your experiment
Good preparation is half the battle. Before you start an experiment, make sure you understand the working principle and limitations of your BSC, know how to decontaminate and set it up correctly, and wear appropriate personal protective equipment (PPE).
2.1 Understand how your BSC works
There are three different classes of BSCs:
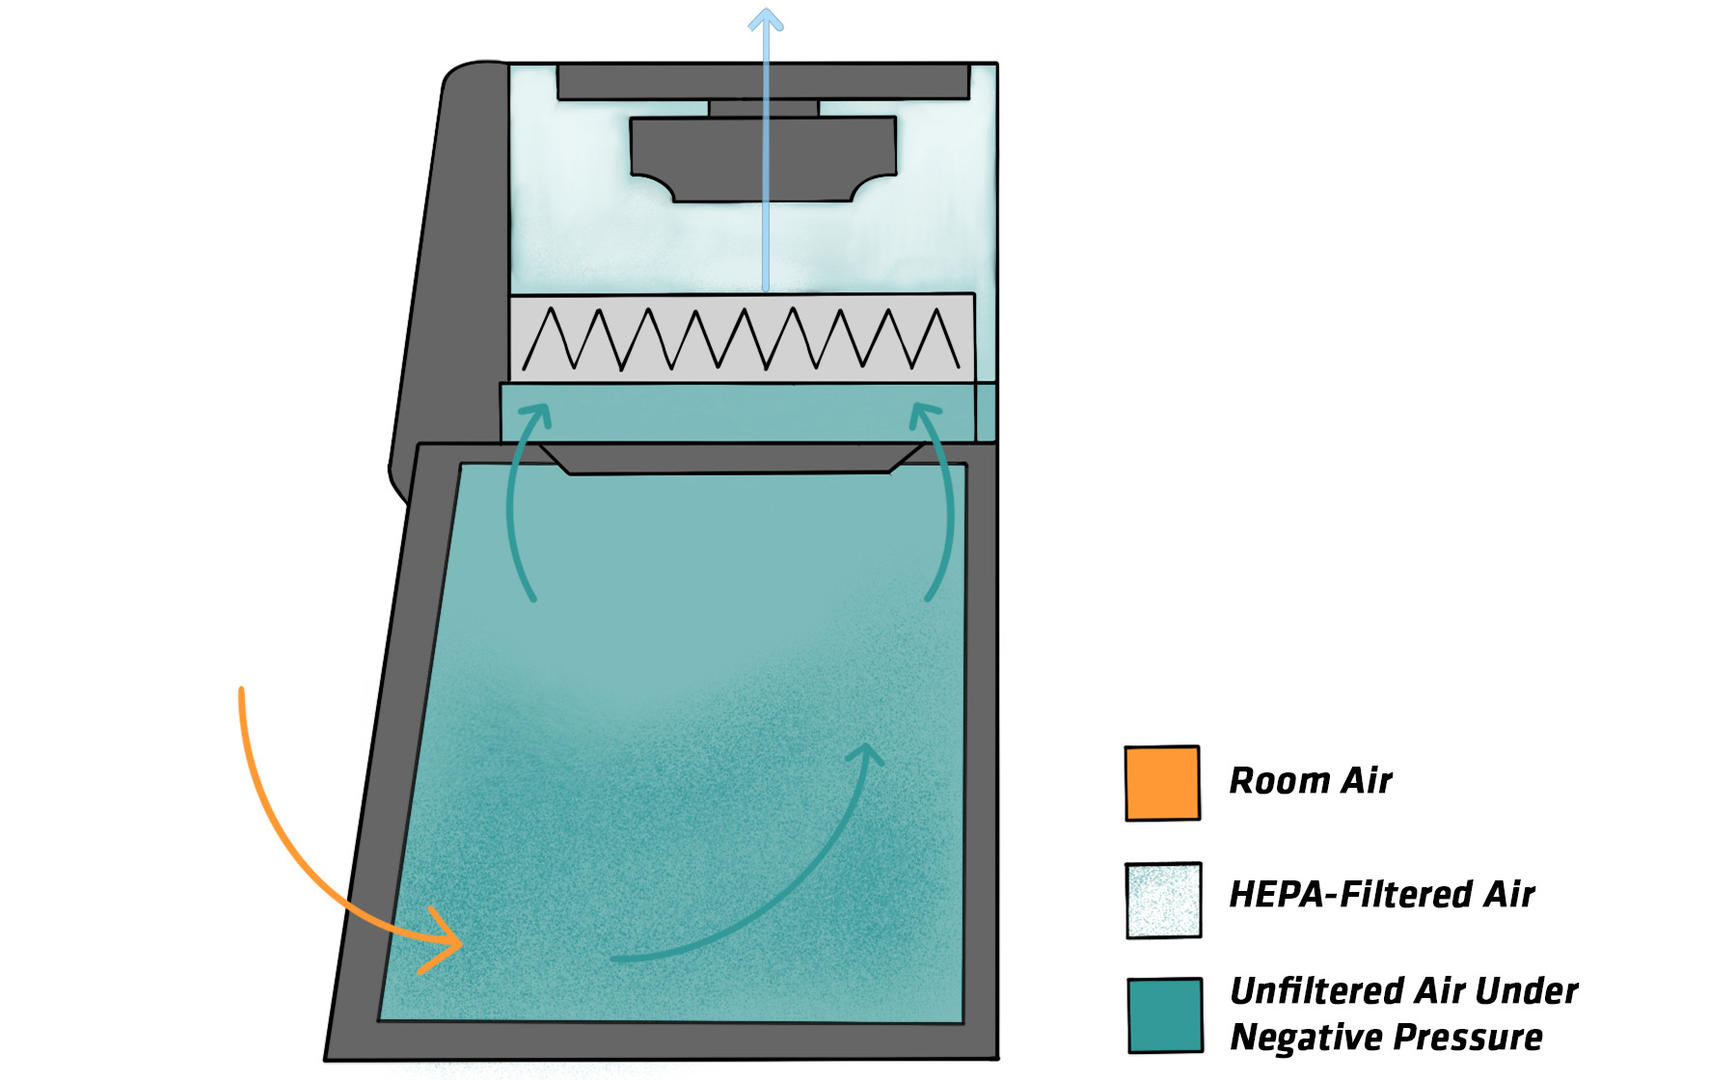
Class I BSCs feature a sash that can be opened, and generate an inward stream of air to prevent aerosols produced inside the BSC from floating out into the lab. Exhaust air is then passed through a HEPA and/or carbon filter before being discharged. This means that personnel and the environment are protected from contamination, but not samples in the BSC, as the inward air stream is unfiltered.
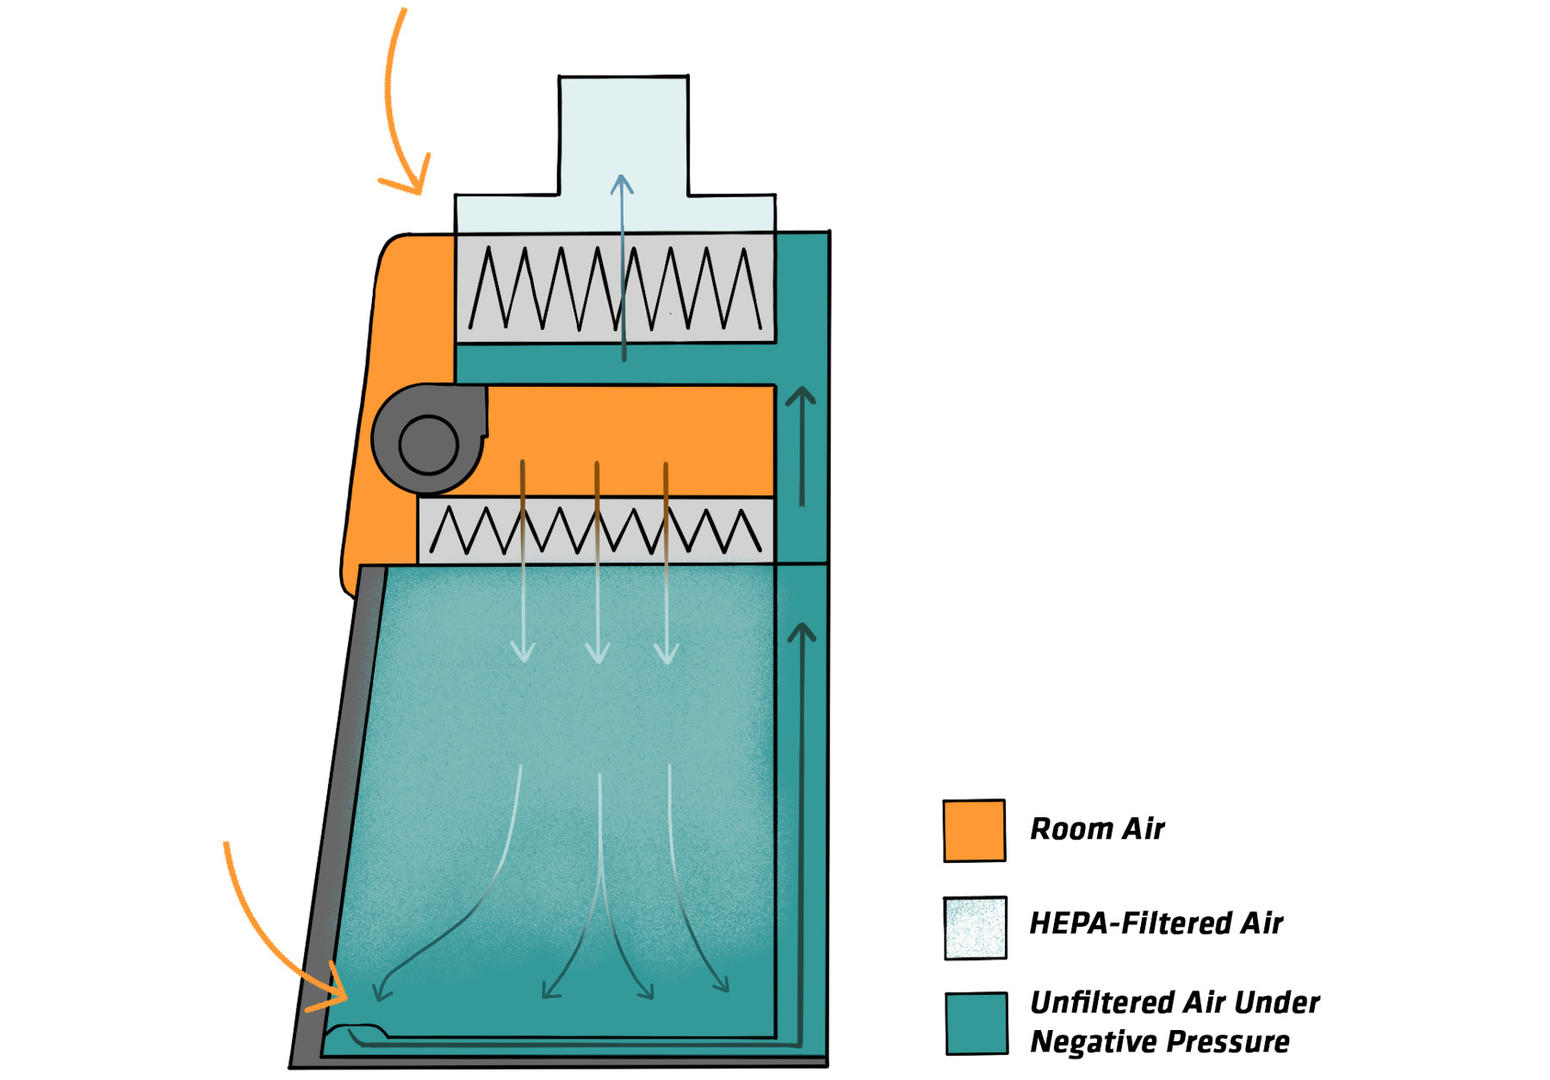
Class II BSCs have been developed to solve this issue. This type of cabinet provides two air streams, creating a barrier between the BSC and the lab. The first one flows from the lab into the front grille of the BSC, ensuring personnel protection. Unlike Class I cabinets, the inflow doesn't reach the work zone, and so can't contaminate the samples. The second air stream is a downward flow in the cabinet, generated by air that is drawn in and passed through a HEPA filter. It protects the samples in the BSC from contamination by permanently cleaning the cabinet interior from aerosols. Potentially contaminated air from both air streams is filtered and either recirculated back into the work zone or the lab, or ducted out of the building. Depending on whether they recirculate air, how much, and the design of the exhaust system, they are categorized as type A1, A2, B1 or B2. For more information on each type, see Table 1 below.
Note: The air streams of Class I and II BSCs can easily be disrupted. Therefore, you should place them away from doors and places where people are walking by. Open windows, air supply registers, fans and lab equipment creating air movement – such as centrifuges or vacuum pumps – can also generate currents that disrupt the air barrier, and shouldn't be located near BSCs.
Class III BSCs are gas tight, with a non-opening viewing window and glove ports allowing you to handle materials inside the cabinet. To transfer material into the cabinet, you need to use pass-through with interlocking doors installed at the side of the work zone. As with Class II cabinets, an air stream protects the samples from aerosols, and exhaust air is HEPA filtered (and sometimes also incinerated).
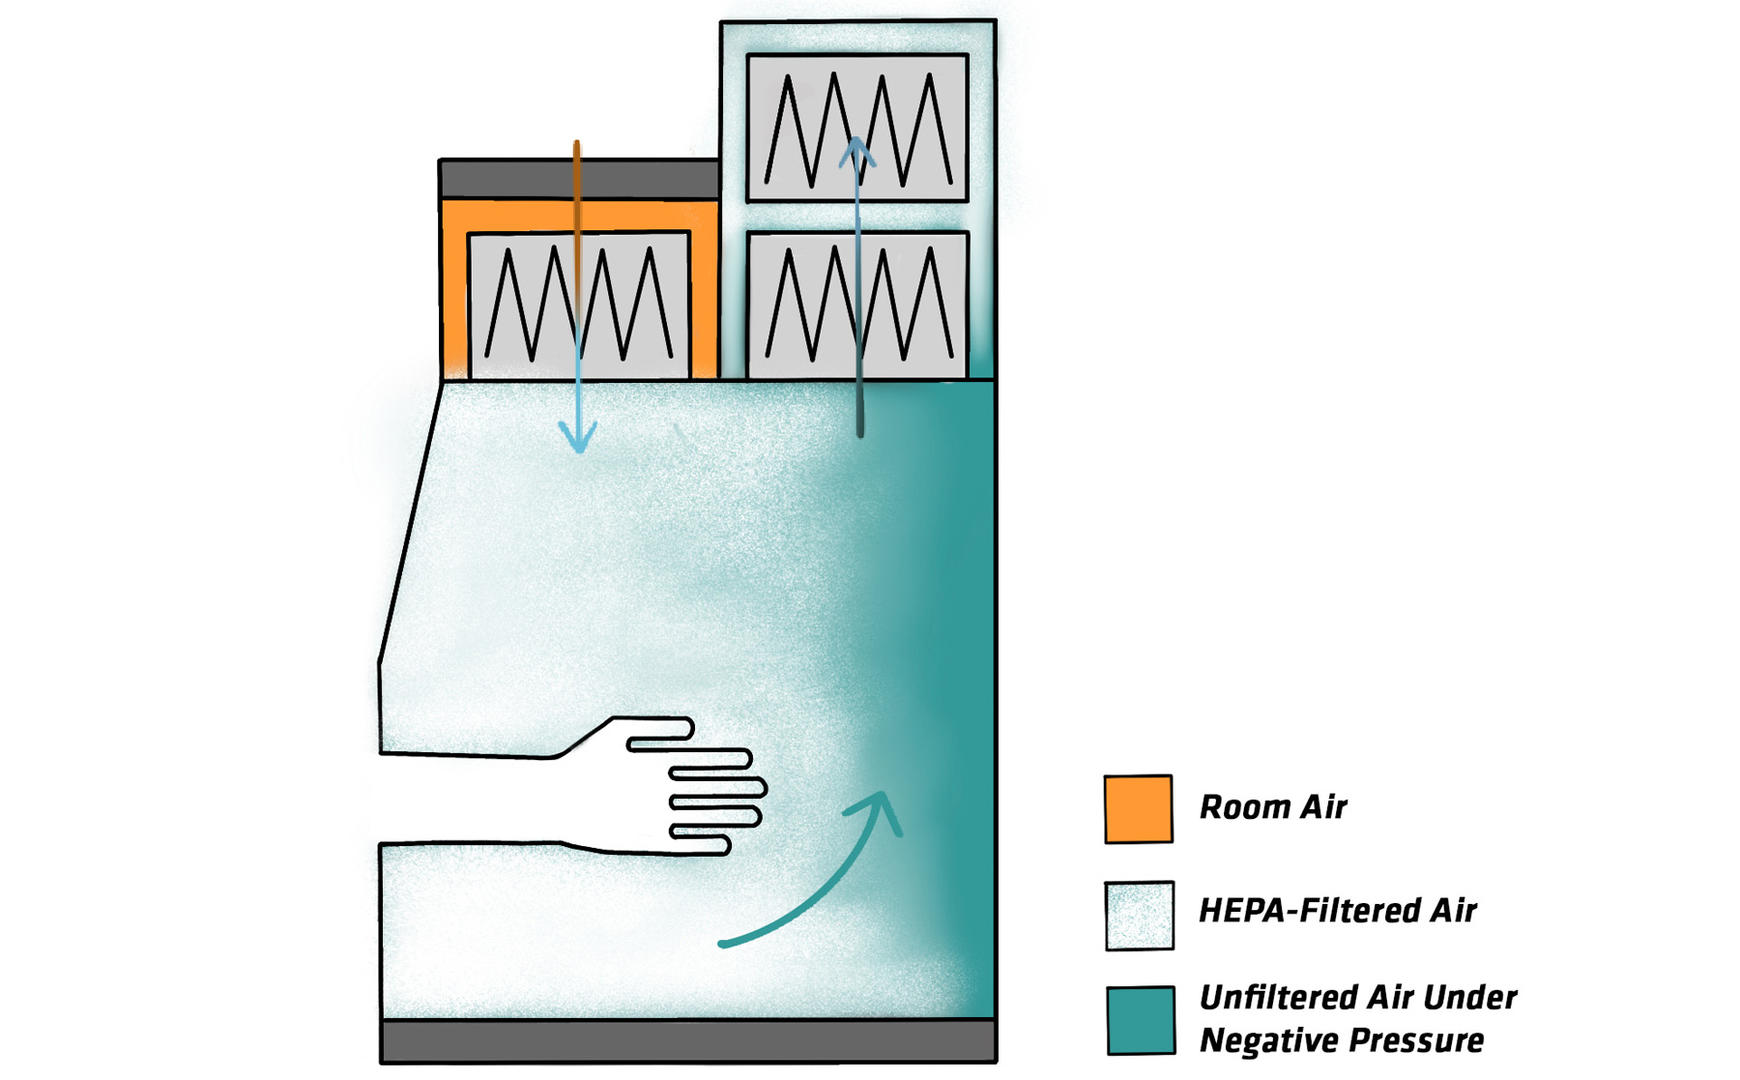
Another important aspect to understand is how the HEPA filter works. HEPA filters trap 99.97 % of particles of 0.3 µm in diameter, and 99.99 % of larger or smaller particles, which means that they are effective against all known infectious agents.3 However, since HEPA filters are particle filters, they don't remove vapors or gases. So, if you're working with radionuclides or volatile toxic chemicals, you need to make sure that your BSC doesn't discharge the exhaust air back into your lab, or recirculate it back into the work zone. The table below provides an overview of the exhaust systems of the different types of BSCs, and tells you how much air they recirculate:
| BSC Type | Airflow (%) | Exhaust system | |
|---|---|---|---|
| Recirculated | Exhausted | ||
| Class I | 0 | 100 | Hard duct |
| Class II A1 | 70 | 30 | Exhaust to room or connected to building exhaust |
| Class II A2 | 70 | 30 | Exhaust to room or connected to building exhaust |
| Class II B1 | 30 | 70 | Hard duct |
| Class II B2 | 0 | 100 | Hard duct |
| Class III | 0 | 100 | Hard duct |
Table 1: Airflow and exhaust system differences between Class I, II and III BSCs3
Also note that laminar flow hoods shouldn't be used as BSCs. Although they look similar, they don't protect you and your lab from contamination. They only protect your samples by directing HEPA filtered air over the work zone and out into your lab.
2.2 Wear personal protective equipment
Always put on appropriate PPE before beginning work in a BSC. When working with biosafety level (BSL) 1 or 2 agents, a front-buttoned lab coat is sufficient, but for BSL-3 and -4 agents, a solid front, back-closing lab gown is advised (if you're not working in a suit lab anyway). For BSL-3/4, you also need to wear gloves that are pulled over the wrists of the lab coat or gown, and it is recommended that you wear a mask and safety glasses. Some examples of BSL-1 to -4 agents are listed in the table below:
| Biosafety level | Agent |
|---|---|
| BSL-1 | Saccharomyces cerevisiae (yeast) or Lactobacillus spp. |
| BSL-2 | SARS-CoV-2, HIV, influenza |
| BSL-3 | Yellow fever virus, West Nile virus, M. tuberculosis |
| BSL-4 | Ebola virus, Marburg virus, Lassa virus |
Table 2: Examples of BSL-1 to -4 infectious agents
2.3 Purge the BSC
Many BSCs are designed to run 24/7. If yours can and has been switched off, you need to turn it on at least 5 minutes before starting work. This allows the cabinet blowers to remove contaminated air and particulates from the cabinet.
2.4 Disinfect the BSC
Decontaminate the work zone, inner walls and sash or viewing window by wiping them down with an appropriate disinfectant – such as a bleach solution or 70 % ethanol – every time you start an experiment. If you use a corrosive disinfectant, e.g. a bleach solution, a second wipe down with sterile water is needed.
2.5 UV lights aren't necessary
Do you usually switch on a UV light to decontaminate your biosafety cabinet before using it? This is something you should reconsider, because the risks of using UV lights often outweigh the benefits. UV light only destroys microorganisms it can reach. Since your BSC's surfaces aren't completely flat at the microscopic level, and always have some tiny particulates on them, a UV light doesn't offer reliable decontamination. Surface disinfection as described above is therefore necessary either way. In addition, the bulb loses effectiveness over time, which means that it needs to be checked and replaced regularly. If you still decide to use UV lights, you need to clean the bulb on a weekly basis to keep it from dust and dirt. Moreover, you need to make sure that nobody is in the lab when you switch the UV light on, or that your BSC features a closeable sash known to block UV light, as inadvertent skin or eye exposure can cause health problems.3,4,5
2.6 Set up the BSC for your experiment
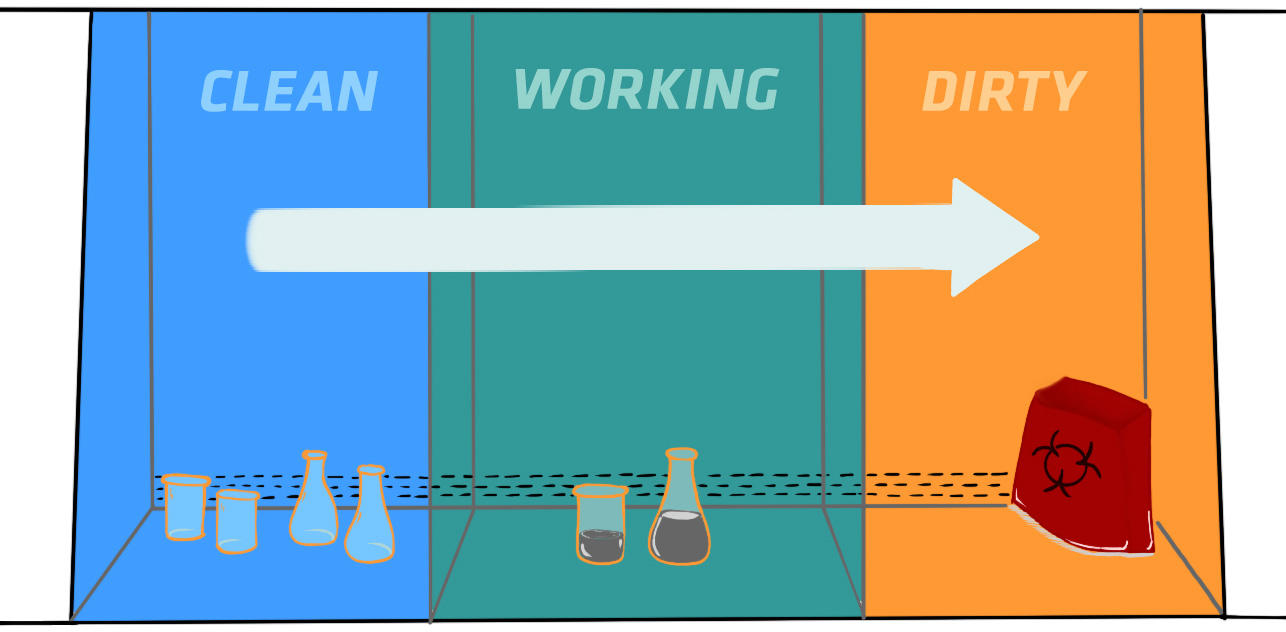
Before starting to work in a Class I or II BSC, you should assemble all the materials you need for your experiment, wipe every item with 70 % ethanol, and place it on the work zone. Arrange your materials in a logical order that allows you to work across the work zone, from clean to contaminated, and make sure that the grilles aren't blocked. Aerosol- or turbulence-generating instruments – such as centrifuges, vortex mixers or blenders – should be placed as far to the rear as possible, and clean items should be at least 150 mm away to avoid cross-contamination. To minimize the risk of splatters contaminating the work zone, you may want to work on disinfectant-soaked absorbent towels.
In Class III BSCs, the equipment and instruments needed for experiments are often installed within the cabinet. How additional materials need to be introduced depends on the design of your specific cabinet, such as dunk tanks, integral autoclaves, rapid transfer ports or other pass-through chambers.6
3 During your experiment
Always remember that you're not working at the bench. Pay special attention to your movements and when working with dishes, plates, tubes, bottles, Bunsen burners and aspiration systems.
3.1 Movements
As the air streams in BSCs can easily be destabilized, you need to move slowly. In Class I and II BSCs, you should minimize side-to-side movements to keep the air barrier intact. You should also reduce the number of times you move your hands and arms in and out of the cabinet. Every time you place them inside the BSC, you should wait for about 1 minute to allow the air streams to stabilize and remove surface contaminants. And before you move them out of the cabinet, make sure to surface decontaminate them. It is also important to work as far into the cabinet as ergonomically possible, and to never block the front grille of a Class II BSC by resting your arms on it.3,5,7
3.2 Working with dishes, plates, tubes and bottles
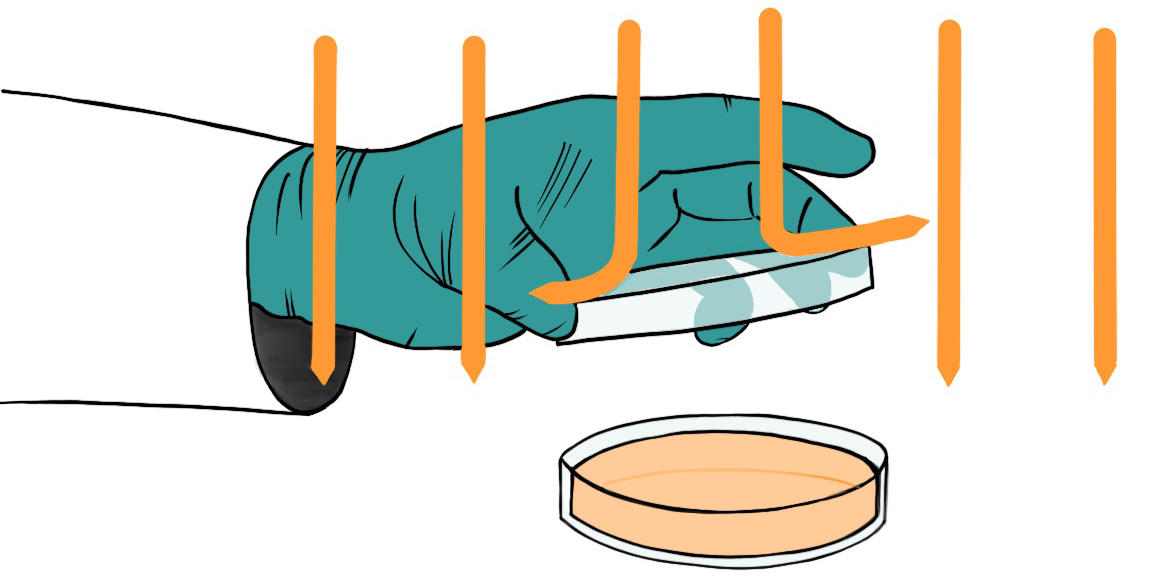
To reduce the formation of aerosols in Class II and III BSCs, always hold a lid or cover above your dishes and plates to protect them from the downward air stream. When working with tubes or bottles, you should always hold them in an inclined position, never vertically, and close them when not in use.
3.3 Using open flames
Avoid the use of open flames in a BSC. The Centers for Disease Control and Prevention states: “Open flames are not required in the near microbe-free environment of a biological safety cabinet. On an open bench, flaming the neck of a culture vessel will create an upward air current that prevents microorganisms from falling into the tube or flask. An open flame in a BSC, however, creates turbulence that disrupts the pattern of HEPA-filtered air being supplied to the work surface.”8 On top of increasing the risk of contamination by disrupting air flows, leaking Bunsen burners, tubes or valves could go unnoticed inside recirculating BSCs and lead to an explosion. If open flames are indispensable, you should use Bunsen burners that offer on demand ignition.
Another danger posed by open flames is serious burns. Since the space in BSCs is very limited, the risk of your gloves coming into contact with ethanol, then catching fire, is much higher than when working at the bench.
3.4 Collecting biohazardous materials
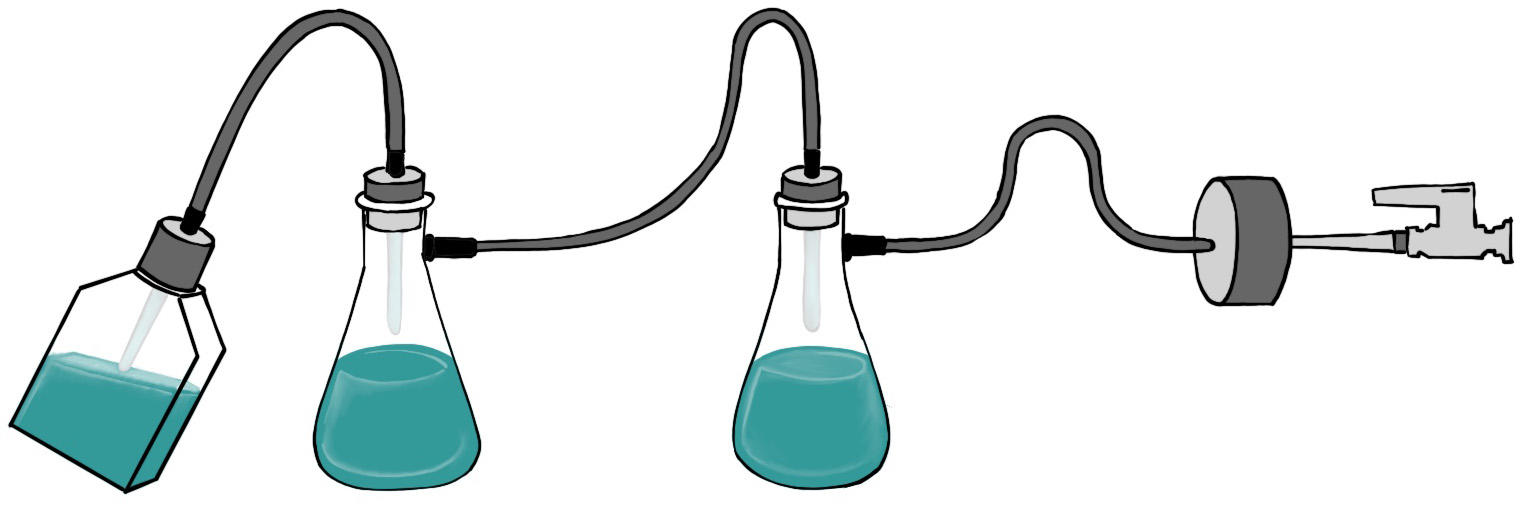
To aspirate and collect biological liquid waste, you can use either an in-house vacuum system or a standalone aspiration device. When using in-house developed vacuum systems, you need to make sure that your collection bottle is connected to an overflow bottle filled with a suitable disinfectant, and that your vacuum source is protected from aerosols by a HEPA filter. Independent aspiration systems are generally more compact, ready-to-use, and, most importantly, can’t contaminate your vacuum source. Some aspiration systems can even be placed outside of the BSC, with the air outlet connected to the HEPA filtration system of the cabinet.
4 After your experiment
Once you've safely completed your experiment, there are a few last steps that need to be performed to ensure that you don't contaminate your lab when clearing and decontaminating the BSC.
4.1 Clear and decontaminate the BSC
When you finish an experiment in a Class I or II BSC, the first thing you need to do is seal any biohazard bags used. You should then surface decontaminate all the items you used for your experiment and remove them from the cabinet. Never use your BSC to store materials or equipment as, for example, microorganisms could grow on residual culture media and contaminate future experiments. Once your BSC is empty, disinfect it by following the instructions in section 2.4, then close it. If you can't leave it running, let the blowers operate for at least 5 minutes before switching it off, to allow them to purge the air inside.
To clear and decontaminate a Class III BSC, you should follow your laboratory’s guidelines. In general, materials that need to be removed from the cabinet have to pass through a dunk tank, autoclave or other pass-through chamber, then the BSC is decontaminated or fumigated.6
5 Conclusions
As you can see, it's not rocket science to use a BSC correctly. Proper planning and careful implementation of your experiments following the rules above will help you to protect your samples from contamination, as well as yourself and your colleagues from infectious agents.
Did you like this article? Subscribe to our blog, and get the next one directly to your inbox!
Ask our expert. Leave a comment!
Write us if you have any questions regarding the blog article.